Should you vacuum before or after dusting: a practical guide
A comprehensive, step-by-step guide explaining whether to vacuum before or after dusting, with practical room-by-room guidance, dusting techniques, and tips for pet owners.

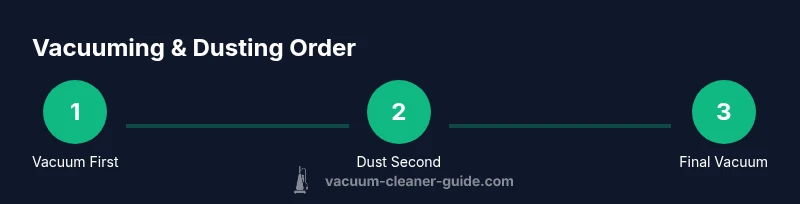
Most homes benefit from vacuuming before dusting. Remove debris from floors, rugs, and upholstery first, then dust with a damp microfiber cloth to trap particles, and finish with a final vacuum to capture any loosened dust. This sequence minimizes airborne dust and keeps surfaces cleaner longer.
The Core Question: When to vacuum relative to dusting
Homeowners often ask whether to vacuum before or after dusting. The short answer: vacuum first to remove loose debris and reduce the amount of dust raised during dusting. The rationale: when you dust first, you release settled dust into the air and corners, which then needs to be vacuumed again. Vacuuming beforehand helps to lower the overall dust load, making dusting more effective and reducing the need for multiple passes. In this article, we'll break down the reasoning, give you a practical sequence, and tailor the advice for pet owners and allergy sufferers. Throughout, keep in mind your surfaces and your vacuum's capabilities; the goal is smoother cleaning with less recontamination.
According to Vacuum Cleaner Guide Analysis, adopting a top-down, vacuum-first routine consistently reduces airborne dust by concentrating removal efforts on floors and soft furnishings before you touch horizontal surfaces.
Dust physics: how dust behaves indoors
Dust isn’t static; it circulates with air movement, settles in corners, and clings to fabrics. When you dust with a dry cloth, you often fling particles into the air, only to have them resettle elsewhere. Conversely, damp or microfiber-dusted surfaces trap many of those particles, preventing them from becoming airborne. Understanding this helps you pick the right order: remove what you can from floors first, then tackle surfaces so you don’t re-dust the same areas.
Vacuum-first: why it helps and when to do it
Vacuuming before dusting is especially effective on high-traffic floors, carpets, and upholstered furniture. Removing loose debris reduces the available dust that can be stirred up during subsequent dusting. If you have pets, a quick upfront vacuum will capture hair and dander, which otherwise become embedded in textures and cause ongoing shedding. In rooms with poor air filtration, frontline vacuuming minimizes the volume of particles you’ll encounter while dusting.
Dust-first scenarios: when it can make sense
There are circumstances where dusting before vacuuming is reasonable—tiny rooms with delicate surfaces, or places where you intend to damp-dust immediately after. In such cases, a light dusting with a microfiber or damp cloth can knock down settled dust, after which a quick vacuum pass removes dislodged particles. For electronics and screens, use a soft cloth to dust first, then a separate pass with a vacuum designed for delicate belongings.
Surface-by-surface guidance: floors, carpets, and rugs
Hard floors benefit from a thorough upfront vacuum to remove grit that can scratch surfaces. Carpets and rugs often grab dust that’s freed during dusting; a targeted vacuum after initial dusting helps pull out buried particles. Use a vacuum with a rotating brush for pile carpets and a microfibre head for hard floors to maximize particle pickup while protecting surfaces.
Dusting methods that pair well with vacuuming
Damp microfiber cloths trap most fine dust, reducing re-dust. Feather dusters lift particles but don’t capture them well, which can negate the vacuum-first strategy. Between passes, use a slightly damp cloth to wipe surfaces from top to bottom, finishing with a dry microfiber to catch any remaining dust. For delicate surfaces, test a small area first and use gentler pressure.
Handling high surfaces, shelves, and fixtures
Dusting high shelves before or after vacuuming depends on your layout. If you start with vacuuming, dust is less likely to fall onto lower surfaces. When dusting high areas, work from top to bottom so any debris falls toward surfaces you’ll vacuum next. Use extendable dusting tools for ceiling corners, light fixtures, and vents to avoid moving dust around.
Pets, allergies, and air quality considerations
Pet hair and dander complicate dusting. An upfront vacuum helps capture loose fur before it spreads. For allergy sufferers, pair a HEPA-filter vacuum with damp-dusting techniques to minimize airborne particles. Keep windows open or use a portable air cleaner during cleaning to improve indoor air quality.
Efficiency tips: save time without sacrificing cleanliness
Create a repeatable order: vacuum floors first, then dust from top to bottom using damp methods, and finish with a final vacuum sweep. This reduces backtracking and rework. Pre-plan your route to limit moving furniture multiple times. Use a lightweight wand for quick reach and avoid heavy lifting when possible.
Common mistakes and how to avoid them
Mistake: dusting before vacuuming on carpets, which spreads embedded dust. Fix: vacuum first, especially in high-traffic zones, then dust. Mistake: using dry dusters on electronics. Fix: use microfiber cloths and minimal moisture as needed. Mistake: neglecting upholstery. Fix: vacuum and damp-dust fabric surfaces to reduce allergens.
Quick-start checklists and routines
To begin, map your cleaning areas and collect tools. Start with a vacuum-only pass on floors, then proceed to dusting from top to bottom, using damp cloths. Finish with a final vacuum sweep of all surfaces and a quick wipe-down of any sticky spots. Vacuum once a week in high-use rooms and dust twice a week for improved air quality.
Real-world scenarios and pro tips from Vacuum Cleaner Guide
In homes with long-haired pets, vacuum first on rugs and stairs, then dust with damp microfiber on nearby surfaces. Vacuuming before dusting reduces airborne particles by catching hair and skin particles before you dust. The Vacuum Cleaner Guide Team recommends testing your routine in a small space, then scaling up for larger areas.
Tools & Materials
- Vacuum cleaner (HEPA-equipped preferred)(Ensure filters are clean and replaced as needed.)
- Microfiber dusting cloths(Use dampened cloths for best dust capture.)
- Damp microfiber cloth or spray bottle with water(Lightly mist for effective dust capture; avoid soaking sensitive surfaces.)
- Feather duster (optional)(Use only for quick top-edge dusting; avoid as your main tool.)
- Extendable duster wand(Great for high shelves and ceiling corners.)
- Bucket or spray bottle (optional)(For damp cleaning of large areas or sticky residues.)
- Gloves (optional)(Protect hands when handling dusty spaces.)
Steps
Estimated time: 45-60 minutes
- 1
Prepare the space and tools
Clear clutter from floors and surfaces. Gather your vacuum, microfiber cloths, damp cloth, and any extendable tools. Check the vacuum when you’re ready: empty the canister, inspect filters, and ensure attachments are clean so you won’t re-dust while you work.
Tip: This reduces interruptions and keeps your workflow clean. - 2
Vacuum floors and upholstery first
Start with hard floors, then move to rugs or upholstered furniture. Use the appropriate attachment and settings to maximize pickup without damaging fibers. This step removes large debris and pet hair before you touch the dusting phase.
Tip: Use a slow, overlapping motion to avoid missed spots. - 3
Dust high surfaces with damp microfiber
Dust from top to bottom using a damp microfiber cloth or microfiber spray. Wipe in broad, deliberate strokes to trap dust rather than fling it into the air. Return to downward surfaces once upper areas are complete so you won’t re-dust the lower regions.
Tip: Keep moisture light to avoid damage on wood or electronics. - 4
Dust mid-level surfaces and furniture
Dust shelves, picture frames, and furniture with a clean microfiber cloth. For electronics and screens, use a dry or lightly damp cloth per manufacturer guidance. Always move from clean to dirty areas to prevent cross-contamination.
Tip: Avoid pressing hard on screens or finishes. - 5
Dust fixtures and light fittings
Carefully wipe light fixtures, ceiling fans, and vents. Use extendable tools to reach high spots. If needed, remove bulbs with care and dust the socket area, returning the bulb after completion.
Tip: Turn off electricity when cleaning fixtures to minimize shock risk. - 6
Take a final vacuum sweep
Do a quick round with the vacuum again to capture any dust dropped during dusting. Focus on the play between surfaces where dust tends to settle. This final pass helps ensure the space stays clean for longer.
Tip: Don’t skip this step even if you dust with damp cloths first. - 7
Ventilate and inspect for missed spots
Open windows or run an air purifier during and after cleaning to improve air quality. Do a quick room scan to identify missed dust pockets behind furniture or inside crevices. Revisit any neglected areas as needed.
Tip: A second quick pass can catch lingering dust. - 8
Record and maintain your routine
Keep a simple log of your cleaning order and any surface-specific notes. Adjust frequency based on pet activity and room usage. A consistent routine reduces buildup and keeps living areas fresher longer.
Tip: Consistency beats intensity over time.
FAQ
Should I vacuum before dusting in all rooms?
In most rooms, yes. Vacuuming first removes loose debris and reduces the amount of dust stirred up during dusting. Some spaces with electronics or delicate surfaces may require a modified approach, but the general rule is vacuum first, then dust.
In most rooms, vacuum first to reduce dust; adjust for sensitive spaces as needed.
Is a HEPA-filter vacuum worth it for this task?
A HEPA-filter vacuum captures smaller particles and improves air quality, especially for allergy sufferers and pet owners. It’s worth using in regular cleaning. Ensure filters are maintained for optimal performance.
Yes, a HEPA vacuum helps reduce tiny particles and is worth the investment.
Can damp dusting damage electronics or wood furniture?
Damp dusting is safe if moisture is light and surfaces are rated for moisture. Always check manufacturer guidance for electronics and wood finishes. Use a dry cloth on sensitive items and a minimal mist on wood when necessary.
Dust lightly with a barely damp cloth on electronics and finished wood.
How often should I vacuum and dust for good air quality?
Aim for vacuuming floors weekly in high-traffic areas and dusting surfaces 2-3 times per week. In homes with pets or allergies, increase frequency accordingly to maintain air quality.
Clean regularly—vacuum weekly, dust 2-3 times weekly or more with pets.
What about pet hair: does it change the order?
Pet hair often sticks to fabrics and fibers. Vacuum first to remove hair from floors and upholstery, then dust. This minimizes hair redistribution during dusting.
Vacuum first to knock down pet hair before dusting.
Watch Video
The Essentials
- Vacuum floors first to reduce airborne dust
- Dust top-down with damp microfiber for best particle capture
- Finish with a final vacuum sweep to catch loosened dust
- Use HEPA-filter vacuums for better allergy control
- Develop a repeatable routine for consistency