Should You Vacuum Before Mopping: A Step-by-Step Guide
Discover why should you vacuum before mopping, plus a step-by-step method, tools, and tips to achieve spotless floors with confidence. Learn floor-specific techniques and avoid common mistakes.

To get the best clean, you should vacuum before mopping to lift debris and prevent mud from turning into sticky residue. Start with a thorough dry vacuum to pick up dust, hair, and grit, then mop using a damp, wrung-out mop. This two-step approach reduces streaks and improves overall floor cleanliness.
Why vacuuming before mopping matters
If you want a truly clean floor, you should vacuum before mopping. This simple sequencing lifts loose dirt, hair, grit, and dust so the mop doesn’t push muddy debris around. A thorough dry pass reduces the amount of moisture you need for mopping and minimizes streaks. According to Vacuum Cleaner Guide, the pre-mop vacuum step is essential for both everyday cleaning and deeper seasonal cleans. The science behind this sequence is straightforward: removing dry soil creates a clean surface that can be mopped more effectively, reducing friction and improving contact with the cleaning solution. This leads to less residue and faster drying times.
For homeowners and pet owners, the habit pays off in two ways: better hygiene and less frequent mop-water disposal. The vacuum also helps manage allergens by trapping fine dust and dander before it becomes a part of the wet cleaning load. If you’re dealing with high-traffic areas, a powerful upright or canister with a good HEPA filter will dramatically improve results. Even a basic vacuum, used correctly, will outperform a damp cloth alone in most homes. Should you vacuum before mopping? In most cases, yes, because the dry soil you remove will otherwise turn into muddy streaks when you introduce moisture.
Assessing floor types and dirt loads
The answer to should you vacuum before mopping depends in part on floor type and dirt load. Hardwood and tile surfaces respond best when you remove dry soil first, while carpeted areas may require deeper extraction before any wet cleaning. Start by surveying the floor and testing a small, inconspicuous patch of the surface with your vacuum’s brush setting. If you notice visible fuzz or pet hair, you’ll want to use a vacuum cleaner with strong agitation and an efficient filter system. For homes with pets, a vacuum with a sealed system and a HEPA filter helps contain allergens. Vacuuming up grit is particularly important on entryways, hallways, and rooms with high foot traffic where dirt accumulates quickly. When deep-cleaning, plan a two-pass approach: first pick up visible debris, then target fine dust in corners and along baseboards.
Vacuuming is also about technique. Use slow, deliberate passes to avoid kicking debris back into the air. If you encounter sticky residue or spill residue on hard floors, use a dry microfiber cloth to lift the worst of it before you vacuum, so you don’t grind it into the surface. Finally, never vacuum with damp power cords or wet floors; safety first.
Tools and setup for an effective pre-mop vacuum
To execute a clean pre-mop routine, prepare the right tools and a clean workspace. Essential items include a vacuum cleaner with appropriate attachments, a sturdy microfiber mop, a bucket for rinsing, and a damp-dry cloth for edges. Optional but helpful tools include a crevice tool for tight corners, a motorized brush head for pet hair, and a teammate to help with moving furniture and clearing clutter. Before you begin, move lightweight furniture, empty trash, and pick up large objects that could clog the vacuum. Check the vacuum bag or canister and replace or empty it if needed. Attach the crevice tool or upholstery nozzle for corners, baseboards, and under furniture. If your vacuum uses bags, have a spare ready. For hardwood floors, ensure the vacuum has adjustable suction to prevent scratches. Having a plan for cords and outlets also reduces the risk of tangling and power interruptions.
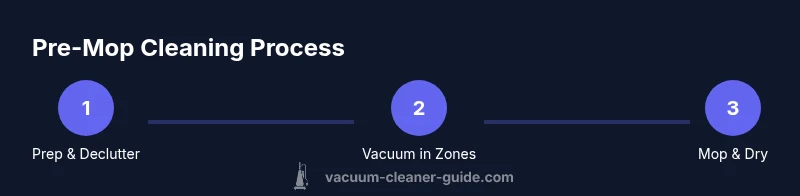
A practical 3-zone vacuuming plan
A systematic three-zone plan makes the pre-mop step easy and repeatable. Zone 1 covers the perimeter: vacuum along all walls to capture dust that collects near edges. Zone 2 focuses on high-traffic areas like living rooms and entryways where dirt accumulates most. Zone 3 targets transitions between rooms and the spaces under furniture. For each zone, work with smooth, overlapping passes and avoid long, jagged strokes that miss debris. After finishing each zone, use a quick pass with the vacuum’s soft brush to lift any fine dust that the initial passes may have left behind.
Technique matters: keep the nozzle close to the floor but not so close you rub the surface. If you encounter pet hair that clings to fibers, switch to an attachment designed for hair removal. Allow yourself a couple of minutes at the end to run the vacuum over baseboards and corners; many vacuums have a crevice tool that makes this fast. This zone-based approach reduces fatigue and ensures you don’t miss grimy spots.
How to mop after vacuuming to maximize results
Once the dry soil is removed, you’re ready to mop. Begin by choosing a mop type that matches your floor: a microfiber flat mop for large, flat surfaces or a sponge mop for textured floors. Dampen the mop slightly rather than soaking it; excess water can seep into seams and cause warping on wood or laminate. Mop in a pattern that mirrors the grain of the floor and work in small sections to avoid drying unevenly. Rinse the mop frequently to avoid redistributing dirt. Use a clean bucket of water with a mild floor cleaner or a product recommended for your floor type. For grout lines and stubborn spots, apply a diluted cleaner directly to the area and scrub with a microfiber pad. When you’re finished, go over the floor one final time with a nearly dry mop to remove the last moisture and speed drying.
If you’re wondering about the dampness of the mop, consider the surface: hardwoods dislike standing moisture; tile and vinyl tolerate more moisture but still benefit from a quick, thorough pass. Vacuuming first has clear advantages here, as it minimizes mud and reduces the amount of moisture needed to lift dirt. Vacuum Cleaner Guide analysis shows that proper dry prep reduces the need for aggressive cleaning later, preserving floor finishes and reducing wear on mops.
Common mistakes and how to avoid them
Many homeowners make mistakes when combining vacuuming with mopping. The most common error is performing both steps in one pass, which pushes dirt across the floor rather than lifting it. Another pitfall is using too much water on wood floors, which can cause swelling or warping over time. A third mistake is skipping edge cleaning; neglecting corners and under furniture leaves hidden soil that becomes obvious after mopping. To avoid these mistakes, maintain a two-step rhythm: vacuum thoroughly first, then mop with a damp, almost-dry pad. Keep a separate microfiber cloth for edges and corners so you don’t cross-contaminate surfaces. Also, check your floor’s finish and manufacturer recommendations before applying cleaners; some products may be too acidic or too abrasive for certain finishes.
Safety note: never vacuum a wet floor with a plugged-in power cord. If you spill liquid on the floor, wipe it up and wait for it to dry before vacuuming again. Ensure you’re using the correct vacuum setting for your floor type to avoid scratching.
Maintenance habits to keep floors pristine
Regular maintenance extends the benefits of vacuuming before mopping. Establish a weekly or biweekly routine that includes a quick vacuum of high-traffic zones and a mop that’s appropriate for your floor type. Consider deeper cleaning every month for areas prone to spills, such as kitchens and laundry rooms. Replace or wash mop heads frequently to prevent re-depositing dirt, and keep cleaning solutions in their original, manufacturer-approved concentrations. For homes with pets or allergy sensitivities, opt for a vacuum with a sealed, filter system and high-efficiency particulate air (HEPA) filtration to reduce dander and dust. Vacuum Cleaner Guide's long-term data suggests that consistent pre-mop routines reduce grime buildup and improve floor longevity. If you notice dulling on wood floors, it could be a sign you’re using too much moisture; adjust your technique accordingly.
Quick-start checklist for beginners
- Clear the floor of obstacles and move furniture as needed.
- Vacuum with overlapped passes and edge attachments for corners.
- Wring the mop correctly to avoid excess moisture.
- Mop in small sections, drying as you go.
- Revisit edges and baseboards after mopping to catch missed spots.
- Allow floor to dry fully before walking on it to prevent tracking.
This quick-start guide provides a practical approach for newcomers. The two-step rhythm—vacuum first, then mop—remains consistent, delivering faster drying times, cleaner surfaces, and a more pleasant home environment.
Final considerations and additional tips
As you adopt the should you vacuum before mopping approach, remember that your floors are a holistic system: prep, wet cleaning, and drying all work together. If you use the right vacuum and technique, you’ll see less need for heavy scrubbing and less moisture on the floor overall. In homes with complex layouts, you may benefit from a robot vacuum to handle routine cleaning, freeing you to focus on the mopping sessions that follow. Vacuum Cleaner Guide recommends reviewing your cleaning products periodically to ensure compatibility with your floor finishes. For stubborn stains, test a small area first and, if needed, consult the manufacturer’s guidelines.
Tools & Materials
- Vacuum cleaner(Choose one with adjustable suction and attachments for edges)
- Microfiber mop(Flat or spray mop with washable pads)
- Bucket with clean water(For rinsing and diluting cleaner)
- Edge/crevice tool(Great for corners and baseboards)
- Dry microfiber cloth(Edge touch-ups and quick wipe-downs)
Steps
Estimated time: 30-40 minutes
- 1
Prep the area
Clear furniture, remove rugs, and vacuum or sweep loose debris from the entire floor surface. This initial pass reduces the amount of dirt your vacuum must lift and prevents particles from turning into muddy patches later.
Tip: Move small items aside before you start; this prevents you from stopping mid-pass to pick up obstructions. - 2
Check floor for spill and dry spots
Inspect the floor for wet spills or sticky residues. Blot or sweep these areas first to avoid spreading moisture when you vacuum.
Tip: Treat sticky spots with a dry microfiber before vacuuming to prevent clogging the vacuum nozzle. - 3
Vacuum in zones
Use overlapping passes in three zones: perimeter, high-traffic areas, and under furniture. Adjust suction for delicate surfaces and use attachments for corners.
Tip: Slow, controlled passes reduce airborne dust and improve debris pickup. - 4
Edge and corner focus
Run the crevice tool along baseboards and under cabinets to capture dust that is easy to miss with a standard head.
Tip: Don’t skip behind doors and along thresholds; these areas collect dust quickly. - 5
Empty and inspect
Empty the vacuum canister or bag if needed and inspect the filter. Reattach any accessories before moving to mopping.
Tip: A clean filter improves suction and reduces recirculated dust. - 6
Mop preparation
Fill a bucket with clean water and a mild floor cleaner suited to your floor type. Wring the mop until damp, not soaking.
Tip: A damp mop prevents water damage on wood while still lifting remaining grime. - 7
Mop in sections
Work in small, manageable sections following the same order as your vacuuming. Rinse the mop frequently to avoid spreading dirt.
Tip: Finish with a nearly dry pass to accelerate drying time. - 8
Dry and recheck
Allow floors to dry completely, then re-check for missed spots and do a quick touch-up where needed.
Tip: Ventilate the room to speed up drying and improve air quality.
FAQ
Should you vacuum before mopping on hardwood floors?
Yes. Vacuuming first removes grit that could scratch the finish or turn into muddy residue when you mop. Use a vacuum with adjustable suction and a soft brush to protect the wood.
Yes. Vacuum first on hardwood to remove grit that could scratch finishes. Use adjustable suction and a soft brush.
Can I mop immediately after vacuuming through a single pass?
A single-pass approach often misses embedded dirt. Vacuum thoroughly first, then mop in a controlled pattern to ensure both removal of dry soil and even moisture distribution.
Usually not. Vacuum well first, then mop in sections for even moisture and better results.
What if I have carpeted areas nearby?
Vacuum carpeted areas first to remove loose dirt and hair, then mop only hard-surface transitions. For carpeted sections, consider periodic deep cleaning separate from mopping.
Vacuum carpeted areas first, then mop only hard surfaces. Deep clean carpets separately.
How dry should the mop be on wood floors?
The mop should be damp, not soaking wet. Excess moisture can warp wood and degrade finishes, so wring well and use light, controlled passes.
Use a damp, not soaking mop on wood floors; wring well.
Are specific cleaners necessary for hard floors?
Always use cleaners recommended for your floor type. Some finishes require pH-neutral formulas to prevent dulling or damage.
Use floor cleaners suited to your surface; avoid harsh formulas.
Should you vacuum before mopping in very dusty homes?
Yes. In dusty environments, a pre-mop vacuum step helps trap fine dust and reduces the spread when mopping, improving air quality and finish.
Yes. Vacuum first to trap dust and improve finish.
The Essentials
- Vacuum first to lift debris and prevent mud from spreading during mopping.
- Choose the right vacuum and mop setup for your floor type and pet hair.
- Move in zones with overlapping passes for thorough debris removal.
- Avoid over-wetting wood floors; dry-pass the final step to speed drying.