DIY Carpet Cleaner: Make Your Own Safe Solution at Home
Learn how to craft a safe, economical DIY carpet cleaner with everyday ingredients. Step-by-step recipes, safety tips, and stain strategies for pets and families.

Yes—you can make a safe, economical carpet cleaner at home using everyday ingredients like white vinegar, warm water, a mild dish soap, and baking soda. This DIY formula is pet-friendly when used correctly and tested on colorfast fibers. For tougher stains and different carpet types, a few simple recipes and precise testing steps will get you great results.
What You Can Make and Why DIY Works
If you're asking can you make carpet cleaner, the answer is yes—DIY formulas let you tailor a solution to your carpet type, odor issues, and household needs without harsh chemicals. By using common ingredients like distilled white vinegar, mild dish soap, warm water, and baking soda, you can deodorize, lift dirt, and refresh fibers. The Vacuum Cleaner Guide team notes that many homeowners prefer DIY cleaners for ongoing maintenance because they offer transparency and control over ingredients. Testing first and using colorfast patches prevents unwanted color bleeding. This approach is especially helpful for households with pets and small children, as you can avoid fragranced or synthetic cleaners. According to Vacuum Cleaner Guide, having control over ingredients helps ensure safety and effectiveness across different rooms and carpet colors.
Safety First: Testing and Fiber Care
DIY cleaners are generally safe for many carpet fibers when used correctly, but some fibers require special care. Always test on a hidden patch: apply a small amount, wait 10–15 minutes, and blot to check for colorfastness and texture change. If you notice any bleeding or damage, discontinue and switch to a milder solution or consult professional guidance. Vacuum Cleaner Guide analysis notes that pre-testing significantly reduces the risk of staining or fiber damage, especially on delicate materials like wool or shades with dye present. Keep pets and kids clear of treated areas until the carpet is fully dry, and ventilate the room well to speed evaporation. A clear label on your homemade cleaner helps everyone in the household follow the right steps without mixing incompatible products.
Simple DIY Carpet Cleaner Recipes (Basic)
Here are practical, easy-to-make formulas you can try using common kitchen staples. Start with the basic cleaner, then adapt for odors or stains. Recipe A emphasizes deodorizing and dirt lifting, while Recipe B adds a touch more cleaning power for heavy traffic areas. Always test on a small spot before applying widely, and keep essential safety practices in mind.
- Recipe A (Basic Cleaner): 1 cup distilled white vinegar + 2 cups warm water + 1–2 teaspoons mild dish soap. Mix in a spray bottle, lightly mist the area, and blot with a microfiber cloth after a brief dwell time. This recipe is gentle on most synthetic carpets and tends to leave a fresh scent without harsh chemicals.
- Recipe B (Deodorizing Boost): Sprinkle a light layer of baking soda on the area, wait 10–15 minutes, then vacuum up. Follow with Recipe A if deeper cleaning is needed. Baking soda helps neutralize odors and works well in conjunction with the vinegar solution, though avoid saturating the carpet with moisture. For stubborn odors, repeat the process on a small test area first.
Stain-Specific Formulas for Tough Spots
Not all stains respond the same way, so having a few focused formulas makes sense. For common beverages like coffee or red wine, a stronger two-step approach can help lift pigment and residues. Start with a vinegar-water-soap mix, then re-spray with a slightly stronger solution if needed, and blot gently instead of rubbing to prevent fiber damage. Hydrogen peroxide can be effective for some colorfast whites and light fabrics, but it should never be used on dyed or non-colorfast carpets without a colorfast test first. Always test a hidden patch before treating a visible area. The emphasis is on using the least aggressive approach first and only advancing to stronger agents if the fiber is proven colorfast.
How to Use DIY Cleaners with a Carpet Cleaning Machine
If you own an extractor or carpet cleaning machine, you can adapt these recipes for pre-spray or post-cleaning rinses. Do not overload the machine with soapy mixtures; use a light, well-diluted solution and follow your machine’s guidelines. Pre-spraying helps loosen soil, while the machine’s suction removes most of the moisture. After extraction, consider a final pass with plain water to rinse residues and speed drying. Always test the machine on a small area with the chosen solution to confirm compatibility with your carpet type and padding.
Carpet Type Considerations: Wool vs Synthetic
Different fibers react differently to moisture and cleaners. Most synthetic carpets tolerate vinegar-based cleaners well, but wool and silk blends can be sensitive to acidic solutions. If you have a delicate carpet, dilute the solution further and shorten dwell times. Always perform a patch test on an inconspicuous area, and consult carpet manufacturer recommendations if you have high-value or specialty fibers. The Verdict from Vacuum Cleaner Guide emphasizes tailoring your approach to fiber type to protect color and texture while achieving soil lift.
Maintenance, Storage, and Shelf Life
Store DIY cleaners in clearly labeled spray bottles away from direct sunlight to protect volatile ingredients. Shake before use to ensure the ingredients blend evenly, as some liquids may separate over time. Avoid mixing cleaners in the same bottle; keep each formula in its own bottle to prevent unintended chemical reactions. For odor control, label the mix with the date and intended carpet area. Regularly check stored bottles for changes in scent, color, or clarity, and discard any solution that appears suspicious or has changed characteristics.
Common Mistakes and How to Avoid Them
Avoid these frequent errors: using too much soap, which leaves residue and attracts more dirt; saturating the carpet with moisture and delaying drying; testing on visible areas instead of inconspicuous patches; using harsh chemicals that can damage fibers or void warranties. To prevent residue, rinse lightly with plain water after cleaning and extract as much moisture as the machine allows. Keep a simple log of what you used on which area to track effectiveness and prevent cross-contamination between rooms.
DIY Cleaner vs Store-Bought: Costs, Convenience, and Results
DIY carpet cleaners offer cost savings per use and allow you to customize formulas for your household needs, especially with pets or sensitive individuals. Store-bought cleaners provide convenience and consistent results, with tested blends designed to protect various carpet fibers. The best choice depends on your priorities: cost-conscious maintenance, control over ingredients, or guaranteed, tested performance. In many cases, a blended approach—DIY pre-treatment combined with professional cleaning at intervals—delivers the best balance of safety, efficacy, and convenience.
Tools & Materials
- White vinegar (distilled)(Use plain distilled vinegar; avoid scented varieties.)
- Warm water(Avoid boiling hot water; warm is safer for most fibers.)
- Mild dish soap(A small amount is enough; avoid harsh, heavy-duty soaps.)
- Baking soda(Deodorizes and helps lift dirt when used properly.)
- Spray bottle(Clear spray bottle works best for even application.)
- Measuring cups/spoons(Accurate measurements help consistency.)
- Colorfast test patch cloth(Test on an inconspicuous area first.)
- Soft-bristle brush(Gentle agitation prevents fiber damage.)
- Microfiber towels(Blot liquids and lift soils without snagging fibers.)
- Carpet cleaning machine (optional)(Use diluted cleaners and follow machine manual.)
- Ventilated storage bottles(Label and store away from sunlight.)
- Hydrogen peroxide 3% (optional)(Only on colorfast, white or very light carpets; test first.)
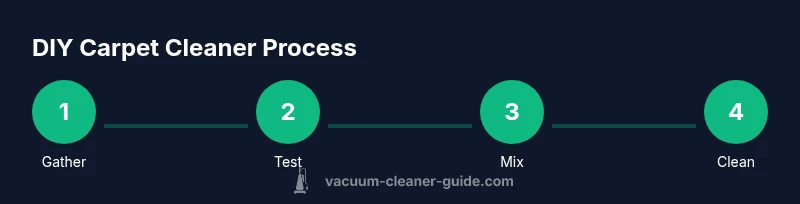
Steps
Estimated time: 60-120 minutes total (drying can extend total time)
- 1
Gather ingredients and tools
Collect your vinegar, warm water, dish soap, baking soda, and all tools in a well-ventilated workspace. This ensures you have everything on hand and reduces trips to the kitchen mid-cleaning.
Tip: Label each bottle to avoid mixing formulas later. - 2
Test colorfastness on a hidden patch
Dampen a small cloth with your cleaner and press onto an unseen area. Wait 10–15 minutes, blot gently, and check for color transfer or fiber damage before treating visible areas.
Tip: If there’s any color transfer, dilute the solution further or skip that formula. - 3
Mix basic cleaner
In a spray bottle, combine 1 cup distilled white vinegar, 2 cups warm water, and 1–2 teaspoons mild dish soap. Gently mix; avoid creating a lot of foam.
Tip: Shake gently before each use to keep ingredients well mixed. - 4
Pre-treat stains (optional)
Dust a light layer of baking soda on tough stains and let sit for 10–15 minutes to deodorize, then brush lightly to lift soils before cleaning.
Tip: Avoid applying baking soda to large wet areas that you haven’t treated yet to prevent clumping. - 5
Apply cleaner to carpet
Lightly mist the solution onto the stained or soiled area from about 6–8 inches away. Do not saturate the carpet; moisture should lift soils without oversaturation.
Tip: Work in small sections to maintain control and effective soil lift. - 6
Agitate and lift dirt
Gently agitate with a soft-bristle brush, moving in circular motions to loosen dirt. Allow a brief dwell time for the solution to break down soils.
Tip: Avoid scrubbing aggressively which can fray fibers. - 7
Rinse and remove moisture
Use clean water or the carpet cleaner’s rinse mode to extract moisture and lift remaining residue. Repeat if necessary until the area looks clean and does not leave a soapy feel.
Tip: Ventilate the room and use fans to speed drying. - 8
Dry completely and vacuum
Allow full drying time (60–120 minutes or more depending on room conditions). Once dry, run a vacuum over the area to restore nap and remove any remaining particles.
Tip: Avoid stepping on the area until completely dry to prevent re-soiling.
FAQ
Can I use vinegar on all carpet types?
Vinegar-based cleaners work well on many synthetic carpets, but some fibers like wool or silk blends can be sensitive to acidity. Always test first and dilute more for delicate fibers.
Vinegar can work on many carpets, but test first on a hidden patch, especially on wool or silk blends.
Is hydrogen peroxide safe on colorfast carpets?
Hydrogen peroxide can help with stubborn stains on colorfast whites or very light carpets but should never be used on dyed or non-colorfast fibers without a patch test. Use only a small amount and test first.
Hydrogen peroxide can help on colorfast whites, but test first and avoid dyed fibers.
Will DIY cleaners leave residue?
If you rinse or extract well and avoid excess soap, residues are minimal. For extra assurance, perform a plain water rinse and extract again.
Rinse well to minimize residue, and consider a second extraction if you notice soapiness.
Can I use essential oils in DIY carpet cleaners?
A drop or two of a mild essential oil can add fragrance, but avoid overpowering scents and test for any sensitivity or residue on fibers.
Essential oils can be added sparingly, but test for sensitivity and residue first.
How long does it take for the carpet to dry after using a DIY cleaner?
Drying time depends on room temperature, humidity, and carpet thickness. Plan for 60–120 minutes or longer in damp conditions, and ensure adequate ventilation.
Most carpets dry in an hour or two with good airflow; in humid rooms it may take longer.
Can I use DIY cleaner in a carpet cleaning machine?
Yes, but dilute formulas and follow your machine’s guidelines. Avoid concentrating cleaners in the reservoir and test compatibility with a small area first.
Yes, but dilute and test compatibility with your machine and carpet.
Watch Video
The Essentials
- Test colorfastness before cleaning.
- Use minimal moisture to prevent over-wetting.
- Label bottles and keep cleaners separate.
- Ventilate and allow full drying before foot traffic.