DIY Vacuum Cleaner Robot: A Complete How-To Guide
A practical, beginner-friendly guide to building a diy vacuum cleaner robot with a step-by-step build, safety tips, and troubleshooting for homeowners and pet owners.

Build a functional diy vacuum cleaner robot by combining a simple chassis, two drive motors, a vacuum nozzle, basic sensors, and a microcontroller. This guide walks you through the materials, safe wiring practices, and a practical step-by-step build to create an autonomous cleaner that navigates, cleans, and returns to a base for charging. Expect hands-on learning and a customizable end result.
What is a DIY vacuum cleaner robot?
A diy vacuum cleaner robot is a home-built machine that combines mobility, suction, and autonomy to clean floors with minimal human input. By using a simple chassis, motor drive, microcontroller, and a basic vacuum system, you can create a compact bot that navigates rooms, avoids obstacles, and returns to a charging area. This project is popular among homeowners and hobbyists who want a hands-on understanding of robotics and sustainability, as it repurposes affordable components rather than buying a premium commercial model. The learning curve is manageable with patience, a few essential tools, and a willingness to troubleshoot. Throughout this guide, Vacuum Cleaner Guide will keep the focus on safe, practical, and repeatable steps that align with typical household cleaning needs, while leaving room for personalization and upgrades, and showcasing how a diy vacuum cleaner robot can adapt to different floor types and layouts.
Why build a DIY vacuum robot?
There are several reasons homeowners choose a do-it-yourself path. First, cost and customization: DIY robots can be tailored to fit odd room shapes, carpet heights, and preferred navigation styles better than off-the-shelf bots. Second, learning and skills: assembling a robot teaches core electronics, programming, and problem-solving. Third, convenience and maintenance: a DIY unit invites you to swap out components, adjust suction, or add sensors as your home evolves. Finally, safety and privacy: by building your own unit, you know exactly what components are in use and how they are powered, which is reassuring for pet-friendly households. In short, a DIY vacuum cleaner robot can be a satisfying project that yields long-term cleaning benefits and a deeper understanding of automation, rather than simply buying a plug-and-forget device. Vacuum Cleaner Guide’s analysis emphasizes practical, safe approaches that encourage experimentation while prioritizing reliability.
Core components and design choices
A successful DIY vacuum robot relies on a balance between mechanical design, control electronics, and cleaning performance. Key choices include the chassis type (a compact canister or a rectangular base), driveline (two wheels plus a caster or a tracked system), and the vacuum subsystem (lightweight nozzle plus a simple dust container). For sensing and navigation, most builders start with basic bumper or infrared sensors and a simple line-following approach, then may upgrade to sonic sensors or optical encoders as they gain confidence. The control system can be as simple as an Arduino-based microcontroller with motor drivers, or as advanced as a Raspberry Pi with Python-based navigation. Power strategy matters too: a small Li-ion pack with protection circuits is common, paired with efficient motors to maximize run-time. Finally, aim for modularity—use plug-in connectors, detachable housings, and clearly labeled wiring to simplify future upgrades. Vacuum Cleaner Guide recommendations highlight starting with a modular, upgrade-friendly design to accommodate improvements like enhanced sensors or better suction.
Safety and maintenance considerations
Safety should be your top priority. Work in a well-ventilated area, unplug power while assembling, and insulate sharp edges. Use proper battery handling techniques and avoid short circuits by securing battery terminals and using appropriate fuses. Keep sensors and wiring away from the vacuum intake to prevent entanglement. In maintenance mode, inspect connections regularly, clean filters, and replace worn gears or wheels before they fail in mid-clean. For pets and children, build a sturdy guard around moving parts and avoid exposed wiring. Finally, document your build with simple schematics so future you can troubleshoot and upgrade safely.
Designing for performance and upgrades
A DIY robot that cleans effectively starts with measurable goals: suction power, run-time, and navigation reliability. If you start with a small footprint, you can optimize airflow by selecting a compact motor and nozzle that fit your chassis. Consider modular sensors and a pluggable microcontroller so you can iterate without rebuilding. Document your changes with revision notes and maintain a parts list to track what works. For pet owners, sturdy brush bars and easy-to-clean dust bins reduce hair tangles and maintenance downtime. Finally, consider future upgrades such as mapping capabilities or more precise localization; plan for these by selecting compatible drivers and using standardized connectors.
Troubleshooting and common pitfalls
The most frequent issues include motors stalling under load, weak suction, and sensors giving false readings near carpets. Start by verifying power and wire integrity, then test motor driver PWM signals with a multimeter. If navigation seems erratic, recalibrate sensors and adjust thresholds; ensure the chassis moves smoothly on your floor type. Clogging is common with DIY vacuums—clean the nozzle and replace filters regularly. Finally, avoid overcomplicating early builds; a reliable, simple design is more beneficial than a feature-heavy but unreliable prototype.
Tools & Materials
- Chassis/base robot frame(Flat, sturdy base with mounting points for motors (off-the-shelf chassis works))
- DC motors with wheels(Two motors with compatible gear ratio, or a ready-made drivetrain)
- Motor driver/controller (e.g., L298N)(Provides PWM control for speed and direction)
- Microcontroller (Arduino Uno or compatible)(For simple control logic and sensor interface)
- Vacuum motor or integrated nozzle(Lightweight, small-diameter motor and suction setup)
- Dust bin/container(Simple collection chamber with a filter)
- Sensors (IR or bumper, optional sonar)(For obstacle avoidance and basic navigation)
- Battery pack (Li-ion or NiMH) with protection(Capable of delivering current to motors for 30-60 minutes)
- Battery charger(Compatible with chosen battery chemistry)
- Wires, jumpers, soldering gear(Secure connections and reliable power delivery)
- Screws, nuts, standoffs(Mounting hardware and chassis assembly)
- Soldering iron and basic tools(Useful for solid, durable connections)
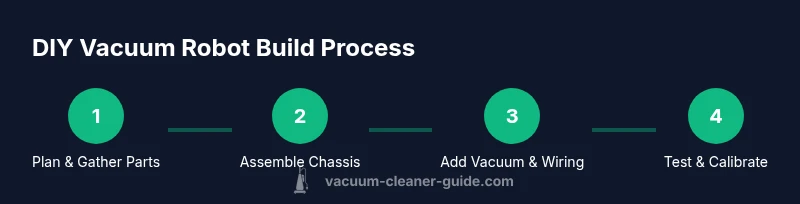
Steps
Estimated time: 3-5 hours
- 1
Plan and scope
Define where the robot will operate, desired run-time, and cleaning goals. Create a simple bill of materials and a rough wiring diagram to guide procurement.
Tip: Write down constraints before ordering parts to avoid scope creep. - 2
Assemble the chassis and drivetrain
Attach motors to the chassis, mount wheels, and verify wheel alignment. Ensure the drivetrain can rotate freely without binding.
Tip: Use thread-locking compound on all motor mounting screws to prevent vibration loosening. - 3
Mount the vacuum module
Position the vacuum nozzle at the front or under the chassis so airflow is not blocked. Secure dust container and ensure easy access for cleaning.
Tip: Keep the nozzle width compatible with the chassis width to reduce snagging on furniture. - 4
Install the power system
Mount the battery and connect power rails with proper polarity and a switch. Include a basic fuse or protection circuit.
Tip: Avoid placing battery terminals near metal edges; insulate exposed metal to prevent shorts. - 5
Wire electronics and motor drivers
Connect motor drivers to the microcontroller, route PWM and direction pins, and test individual motors before full assembly.
Tip: Label every connector and keep cables tidy to ease future revisions. - 6
Add sensors and navigation basics
Install bumper/IR sensors at the front corners. Calibrate thresholds to avoid false positives on different floor types.
Tip: Test sensors against a wall to confirm reliable detection distance. - 7
Program basic behaviors
Upload simple routines to move forward, avoid obstacles, and stop at boundaries. Start with a straight-line test and gradually introduce turns.
Tip: Keep initial code simple; use serial prints to debug sensor readings. - 8
Test drive and iterate
Run the bot on a clean, flat surface. Observe performance, adjust speed, and refine obstacle avoidance as needed.
Tip: Test on both carpet and hard floor to ensure consistent suction and mobility. - 9
Safety and enclosure finalization
Secure loose wires, add small guards around moving parts, and verify all components stay cool during operation.
Tip: Never operate without a protective enclosure over exposed electronics. - 10
Documentation and maintenance planning
Document wiring diagrams, component part numbers, and revision notes. Plan routine checks and potential upgrades.
Tip: Create a simple BOM and updating log to track changes.
FAQ
What is a DIY vacuum cleaner robot?
A DIY vacuum cleaner robot is a self-built device that autonomously cleans floors. It combines a chassis, motors, sensors, a power source, and a basic vacuum system. This is a hands-on project that teaches practical robotics concepts.
A DIY vacuum cleaner robot is a self-built autonomous cleaning device using common components. It’s a great learning project for robotics.
Do I need programming experience to build one?
Some basic programming is helpful to control movement and sensor logic. Blocks-based or Arduino-style tutorials make it accessible for beginners. You can start with simple line-following or obstacle-avoidance routines.
Some coding helps, but you can begin with simple routines using block-based tools or Arduino sketches.
What components are essential for a basic build?
You’ll need a chassis, two drive motors, a microcontroller, a basic vacuum setup, sensors for navigation, and a power source. Additional items like motor drivers and a dust container help reliability and performance.
Key parts include a frame, motors, controller, battery, and a simple vacuum.
How long does a DIY project typically take?
Project duration varies with skill and refinements. Plan for several hours to assemble, test, and iterate. A focused weekend session is common for a smooth build.
Most projects take several hours, often a weekend, depending on complexity.
Is a DIY vacuum robot safe around kids and pets?
Yes, with proper safety measures. Use guards around moving parts, secure wiring, and never leave exposed electronics unattended during initial tests.
Yes, with thorough safety precautions and supervision during initial tests.
Watch Video
The Essentials
- Plan clearly before cutting and wiring.
- Choose modular parts for upgrades.
- Test in stages to catch issues early.
- Prioritize safety with proper insulation.