How to Make Vacuum Cleaner Step by Step: A DIY Guide
Learn how to make a vacuum cleaner step by step with a safe, practical DIY approach. This guide covers tools, materials, step-by-step assembly, testing, and maintenance for homeowners and pet owners.

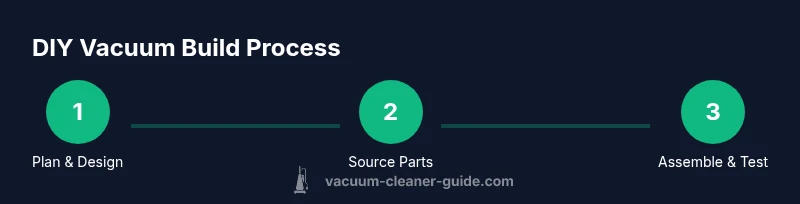
This guide shows how to make a vacuum cleaner step by step, focusing on safety, basic components, and a practical, approachable build that works for everyday home use. You’ll follow a clear sequence from planning to testing, with essential tools and safety notes to keep you on track.
What you’ll build and why a DIY vacuum matters
If you’re wondering how to make vacuum cleaner step by step, you’re about to explore a practical, safe, and approachable DIY project. The goal is not to replace a commercial unit with a fancy gadget, but to create a simple, serviceable device that can handle light cleaning tasks, small spills, and pet hair in a pinch. This section sets the tone: a DIY vacuum is a learning project, not a replacement for heavy-duty commercial equipment. You’ll learn about airflow, filtration, and enclosure design while grounding the process in real-world usage—carpeted living rooms, hard floors, and spaces with curious pets. The core idea is to deliver a functional, low-cost solution that emphasizes safety, basic electrical awareness, and modular components that you can upgrade later. By following the steps, you’ll gain a clean understanding of how suction, filtration, and containment work together in a compact system.
Safety prerequisites and planning
Before you start any build, it’s essential to plan for safety and feasibility. Identify a workspace with good ventilation and enough room for testing. Decide on a target power source and ensure the components you select are rated for safe operation. Create a simple checklist: understand the voltage, confirm the enclosure is non-conductive or properly insulated, and ensure all fasteners are secure to avoid vibration or disassembly during use. A clear plan reduces the risk of electrical hazards and mechanical failures. This is also the moment to set expectations: DIY builds may not match factory performance but can deliver reliable, safe operation for light-duty tasks in a home with pets and kids.
Core design choices: power, suction, and filtration
Choosing the right balance of motor power, suction path, and filtration determines how well your DIY vacuum will perform. Lower power with a compact motor reduces heat and energy use, while higher power increases suction but demands careful airflow management. Filtration protects indoor air quality; consider a simple filter stage plus a dust container or bag. Filtration efficiency and replacement costs matter: a basic pleated filter paired with a washable dust cup can achieve decent performance without breaking the bank. Plan an airtight design around seals, gaskets, and careful routing of hoses to minimize leaks and losses. This section helps you align your goals with practical constraints so your build is both effective and safe.
Parts and materials overview
A successful DIY vacuum starts with a clear bill of materials and an organized approach. Core parts include a basic motor or blower unit with a compatible impeller, a dust collection container or bag, a filtration stage (such as a pleated or HEPA-style filter), an airflow path (intake, ducting, exhaust), a housing or chassis, a power switch with fusible protection, wiring components, and basic fasteners. You’ll also need a nozzle or cleaning head and flexible hoses for reach. Nonessential but helpful extras include vibration dampening mounts, edge seals, and labeling for maintenance. Planning a modular layout—separate intake, filtration, and exhaust sections—makes future upgrades easier and safer.
Housing and airflow path design
Airflow path quality is central to suction efficiency. Start with a robust housing that can tolerate a fan or motor, then design an intake that minimizes debris bypass. A simple, straight path from intake to dust container reduces turbulence and improves dust capture. Incorporate a filtration stage before exhaust to protect air quality. Ensure there are no pinch points or sharp bends that could stall airflow. Quick testing with safe materials helps you confirm that air moves smoothly, there are no obvious leaks, and the dust container is easy to empty.
Electrical safety and wiring basics
Electrical safety is non-negotiable in any DIY power project. Use components rated for the intended voltage, and implement a proper switch and fuse protection. Keep all wiring insulated and secured away from moving parts, with strain relief where cables enter the housing. Avoid exposed conductors and ensure the motor is securely mounted to reduce vibration and heat buildup. If you’re new to wiring, consult a basic electronics guide or work with a qualified person. The objective is to create a simple, safe, and conservatively rated electrical circuit.
Assembly considerations and pre-assembly checks
Before you assemble, lay out every part and check for compatibility. Dry-fit components to confirm fit and alignment, then disassemble for final assembly. Use gaskets to seal joints and prevent air leaks. Tighten fasteners to the recommended torque to avoid loosening during operation. Maintain a clear labeling system for parts and wiring so future maintenance is straightforward. A careful pre-assembly check minimizes the risk of rework and scattered components.
Testing, troubleshooting, and adjustments
Testing is where theory meets reality. Power up the unit in a controlled environment and observe for unusual noises, smoke, or overheating. Check suction at the nozzle and verify airflow reaches the dust container. If performance lags, inspect seals and joints for leaks, verify the filtration is correctly installed, and ensure there’s no obstruction in the ducting. Document any adjustments for future reference. Safety remains the priority: never operate with exposed wiring or components that overheat.
Maintenance, upgrades, and long-term care
A DIY vacuum benefits from a proactive maintenance plan. Regularly rinse or replace filters, clean the dust container, and inspect seals for wear. Periodically check motor bearings and mounting hardware for looseness. Upgrades can include improved filtration, quieter fans, or modular attachments for different cleaning tasks. By keeping records of parts and performance, you’ll extend the life of your device and retain its reliability for light household use.
Tools & Materials
- Motor or blower unit(Choose a safely rated unit appropriate for DIY projects; ensure compatibility with your housing and wiring.)
- Impeller/fan wheel(Matches motor shaft diameter; ensure balanced mounting.)
- Dust container or bag(Non-breakable container with secure lid and easy emptying.)
- Filtration system(Pleated or HEPA-style filter; ensure proper airflow and replaceable media.)
- Housing enclosure(Non-conductive or well-insulated metal; ensure smooth interior surfaces.)
- Suction nozzle and hoses(Flexible hoses with secure connectors; include a basic cleaning head.)
- Power switch and fuse(Integrated switch with overcurrent protection; use a fuse compatible with the motor rating.)
- Wiring and electrical components(Use appropriate gauge wire; include strain relief and proper insulation.)
- Fasteners and adhesives(Corrosion-resistant screws, nuts, and non-conductive sealants as needed.)
- Safety equipment(Gloves, safety glasses, and a dust mask during assembly.)
Steps
Estimated time: 3-6 hours
- 1
Define specs and plan layout
Decide target suction, anticipated use, and safety constraints. Sketch the airflow path from intake to dust container, noting where filters will sit and how the housing will support the motor. This planning reduces rework and helps you select compatible parts.
Tip: Write down the voltage, motor power range, and filter type before ordering components. - 2
Prepare the housing and openings
Mark and cut openings for the intake, exhaust, and filter housing. Deburr edges and smooth interior surfaces to prevent snagging debris. Install any mounting plates or vibration dampeners before the motor goes in.
Tip: Use protective gloves and a proper saw or rotary tool for clean cuts. - 3
Mount the motor and attach the impeller
Secure the motor in the chassis with appropriate fasteners. Attach the impeller to the motor shaft, ensuring concentric alignment. Recheck clearance between the impeller and housing.
Tip: Spin by hand to verify there is no rubbing before applying power. - 4
Install filtration and dust containment
Place the dust container and seal the inlet/outlet around filters. Ensure a tight seal to minimize leaks and maximize suction. Attach the filter element so air passes through it before reaching the exhaust.
Tip: Test seal with a light press; any movement indicates a weak seal needs improvement. - 5
Wire the switch and power supply
Connect the motor to the switch and fuse, routing wires securely away from moving parts. Insulate exposed conductors and secure with strain relief. Double-check polarity and safe routing.
Tip: Keep a simple wiring diagram handy and verify power off before wiring. - 6
Assemble the airflow path and seals
Reassemble all components, verify airtight joints, and route ducts to minimize bends. Install gaskets at junctions and test for airflow without leaks.
Tip: A straight path improves suction more than a complex route with many elbows. - 7
Attach nozzle, hose, and attachments
Connect the cleaning head and hose to the intake. Ensure secure fittings and that the hose does not kinks easily. Consider a basic attachment set for different surfaces.
Tip: Clamp loose connections to prevent detachment during use. - 8
Initial safety test and performance check
Power up briefly in a controlled area to observe for unusual noise or overheating. Check suction by placing a small tissue at the nozzle and watching for noticeable airflow. Stop if anything smells hot or unusual.
Tip: Do a quick no-load test first to ensure all components are stable. - 9
Final adjustments and documentation
Record materials used, settings, and any fit issues. Label parts for future maintenance and create a simple maintenance schedule. Store schematics in a safe place for later upgrades.
Tip: Keep a spare filter and sealant for quick future replacements.
FAQ
Is it safe to build a vacuum cleaner at home?
With proper planning and caution, a DIY vacuum can be safe for light-duty use. Prioritize electrical safety, secure mounting, and proper insulation. Never operate with exposed wiring or unsecured parts.
Yes, if you follow safe electrical practices and secure all parts. Always unplug before working on wiring.
Will a DIY vacuum match the performance of a store-bought unit?
A DIY unit can perform adequately for light cleaning tasks, especially on hard floors and low-pile carpets. It may not match commercial-grade suction or filtration for heavy-duty use.
It can handle light tasks, but commercial units usually offer stronger suction and filtration.
What are the essential safety precautions?
Use components rated for the intended voltage, insulate all wiring, secure fasteners, and test in a controlled area. Do not run the device without a proper dust containment and filtration system.
Make sure wiring is insulated and parts are secured; test in a safe area before regular use.
How long does a DIY vacuum project typically take?
Expect several hours from planning to testing, depending on your experience and tool access. Allow extra time for troubleshooting and refinements.
Typically a several-hour project, with extra time for fine-tuning.
What maintenance does a DIY vacuum require?
Regularly clean or replace filters, empty the dust container, and inspect seals for wear. Keep a spare filter and easy access to replacement parts.
Clean filters regularly and keep spare parts handy for easy upkeep.
Can I upgrade a DIY vacuum later?
Yes. A modular design allows you to swap in a more efficient motor, better filter, or additional attachments without rebuilding from scratch.
Absolutely—start modular and upgrade as needed.
Watch Video
The Essentials
- Plan your design before assembling to reduce errors.
- Safety and insulation are non-negotiable in DIY power projects.
- A modular, sealed airflow path improves suction and ease of upgrades.
- Regular maintenance extends the life of your DIY vacuum.
- Document changes to simplify future improvements.