How to Make a Homemade Vacuum Cleaner: DIY Project Guide
Discover a practical, safe method for building a homemade vacuum cleaner. It covers materials, filtration, wiring basics, and maintenance for DIY enthusiasts.

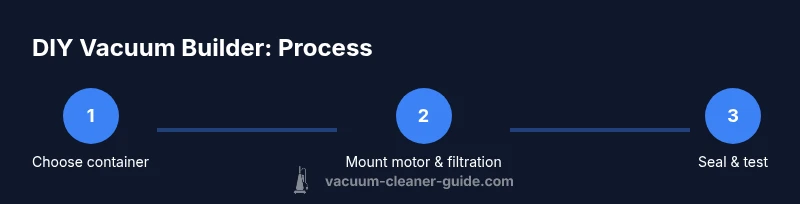
Build a simple, safe homemade vacuum using a sealed container, a suitable motor with an impeller, and a filtration stage. Attach a hose and nozzle, wire a switch, and seal all air paths. This DIY project requires basic tools and caution, then you’ll test and adjust for best suction.
Overview of the DIY vacuum concept
According to Vacuum Cleaner Guide, building a simple, safe DIY vacuum is achievable with common materials and careful design. A homemade unit can cover light cleaning tasks, pet hair, and small workshop messes when planned with proper filtration and airflow. This section explains the core idea: create a sealed container, mount a motor with an impeller, and add filtration before air exits through a filter bag or duct. The goal is to maintain suction while controlling dust and heat, and to keep all joints airtight to prevent leaks.
Safety first: design and testing
Electrical safety is paramount when building any powered tool. Use a motor rated for the voltage you plan to run, insulate exposed wiring, and place wiring away from dust and heat sources. Use inline fuses or circuit breakers and a proper switch. Test the unit at low power first, listen for unusual sounds, and monitor for overheating during extended use. If anything seems unsafe, power down and reassess.
Core design options: container, motor, filtration
The backbone is three subsystems: the dust container, the drive motor with an impeller, and the filtration stage. The container should be sturdy, air-tight, and easy to clean. The motor should provide enough airflow at a reasonable voltage. The filtration stage may combine a mesh pre-filter with a bag or HEPA-like element to trap fine dust. Plan air paths to minimize bends and resistance.
Filtration and airflow: why filters matter
Filtration protects you from dust and keeps the motor from clogging. A layered approach works best: a coarse pre-filter to catch large debris, a secondary filter to trap fine particles, and an outlet filter to minimize exhaust dust. HEPA-like filters are common in DIY builds, but any compatible, properly rated filter will help maintain air quality and suction efficiency.
Power sources and wiring basics
Choose a power source compatible with the motor and your wiring plan. For a battery-powered design, select a pack with adequate amp-hour rating and safe charging. For mains-powered builds, ensure proper isolation and a grounded power supply. Use a switch to control operation, and route wires away from moving parts and heat. Ensure strain relief at all connectors.
Sealing, intake, and exhaust considerations
Air leaks kill suction. Use gaskets or silicone sealant to seal all joints, and ensure the intake hose attaches securely to the container. The exhaust should release warmed air away from living areas. Add a simple check valve if the design permits to avoid backflow. Keep the dust path as straight as possible to reduce pressure losses.
Testing, troubleshooting, and adjustments
After assembly, test suction at the nozzle with a simple water column or airflow meter. Check for air leaks by building a soap solution and looking for bubbles at joints. If suction is weak, inspect seals, tighten fittings, and verify the motor voltage. Run a short test cycle with a typical cleaning task and note any overheating signs.
Maintenance and care for a DIY vacuum
Clean or replace filters regularly and inspect hoses for cracks. Keep the motor ventilation clear and dust-free. Store the unit in a dry area to prevent moisture damage. Periodically reseal joints and check wiring for wear. Document maintenance dates to stay ahead of performance declines.
Use cases: pet hair and hard floors
A DIY vacuum can work well on low- to mid-pile carpets and hard floors with the right filtration. For pet hair, a strong suction and a good brush attachment help lift fibers. On hard floors, reduce brush agitation to prevent scattering dust. Always supervise use with pets and children nearby.
Alternatives and safety-complete options
If the build seems too risky or time-consuming, consider repurposing a small, purpose-built vacuum or buying a basic budget model. You can also consult a local makerspace or workshop for supervised prototyping. Regardless of approach, prioritize safety, ventilation, and maintenance to avoid fire or dust hazards.
Tools & Materials
- Sturdy sealed container (metal or rigid plastic)(Example: a metal bin with a sealable lid rated for basic vacuum use)
- DC motor with impeller or vacuum motor(Choose a motor with adequate airflow and voltage compatibility)
- Filtration material (HEPA-like filter or filter bag)(One that fits the container outlet and is safe for suction)
- Hose and nozzle attachments(Diameter matched to container outlet; include a crevice nozzle)
- Gasket or sealant(Silicone sealant or gasket material for airtight joints)
- Electrical switch(Inline switch with appropriate amperage rating)
- Wiring and connectors(Insulated, rated for the motor voltage)
- Power source(Battery pack or mains supply appropriate for the motor)
- Ducting or tubing(Flexible tubing for intake and exhaust paths)
- Fasteners(Screws, nuts, and washers for secure mounting)
- Safety fuse or circuit breaker(Optional protection against overcurrent)
- Personal protective equipment(Gloves and eye protection during assembly)
Steps
Estimated time: 2-3 hours
- 1
Gather and inspect parts
Collect all parts and verify compatibility. Check motor voltage, filter size, and container capacity. Inspect for damage and plan a safe layout before starting.
Tip: Lay parts out on a clean, dry surface to prevent contamination. - 2
Prepare the sealed container
Clean the container, remove sharp edges, and matte rough surfaces to improve sealant adhesion. Mark the mounting points for the motor and hose.
Tip: Create a flat, stable base to prevent tipping during operation. - 3
Mount the motor and impeller
Secure the motor inside the container with vibration-damping mounts. Attach the impeller to the motor shaft and align for balanced operation.
Tip: Check clearances to avoid contact with the container walls. - 4
Install filtration and dust path
Place the pre-filter and secondary filter in the airflow path. Install a dust bag or HEPA element, ensuring airtight seals at joints.
Tip: Place filters where they can be easily replaced. - 5
Attach intake hose and nozzle
Connect the intake hose to the container with a tight seal. Attach the nozzle and ensure there is no gap where dust can escape.
Tip: Use clamps to secure hoses to prevent detaching during use. - 6
Wire the switch and power source
Wire the inline switch and connect to the power source with proper insulation. Route wires away from moving parts and heat.
Tip: Install strain relief at every connector to prolong life. - 7
Seal all joints and test airtightness
Apply gasket material around joints and perform a soapy water test to reveal leaks. Fix any gaps before testing suction.
Tip: Avoid over-tightening joints which can crack seals. - 8
Test suction and adjust
Power on at low speed and measure suction at the nozzle. Observe for overheating and adjust seal positions or motor voltage as needed.
Tip: Perform a short, controlled test with a common cleaning task.
FAQ
Is it safe to build a homemade vacuum?
With proper electrical safety, ventilation, and filtration, a DIY vacuum can be safe for light use. Avoid high-voltage configurations and ensure all wiring is insulated and secured away from moving parts. Never bypass safety features or test under load without supervision.
Yes, but only with proper safety measures. Always insulate wiring and use rated components, and test with supervision.
What motor should I use for a DIY vacuum?
Select a motor rated for the intended voltage and airflow. A motor with a suitable impeller and adequate cooling is essential for reliable suction. Avoid repurposing motors that show signs of overheating or wear.
Choose a motor with good airflow and reliable cooling, rated for your power supply.
Will a homemade vacuum handle pet hair effectively?
Pet hair requires strong suction and a filtration system that reduces clogging. A good pre-filter and a capable main filter help keep hair from matting and clogging the path. Expect performance to vary by surface and brush attachment.
It can work on pet hair if you have strong suction and a solid filtration setup.
Can I reuse parts from old appliances?
Reusing parts can work but inspect all components for wear, safety, and compatibility. Check insulation, electrical ratings, and seals. Discard any parts that show cracking, corrosion, or compromised safety features.
Reusing parts is possible if you verify safety and compatibility first.
How do I maintain a DIY vacuum over time?
Regularly replace or clean filters, inspect hoses for cracks, and verify seals. Keep the motor area clean, and check electrical connections for wear. Schedule periodic checks to prevent performance drops and unsafe conditions.
Maintenance is about filters, seals, and checking connections on a schedule.
Watch Video
The Essentials
- Plan an airtight design before cutting or drilling.
- Choose a compatible motor and filtration system.
- Seal all air paths to maximize suction and safety.
- Test thoroughly and monitor heat and dust during use.
- Maintain filters and seals regularly for lasting performance.