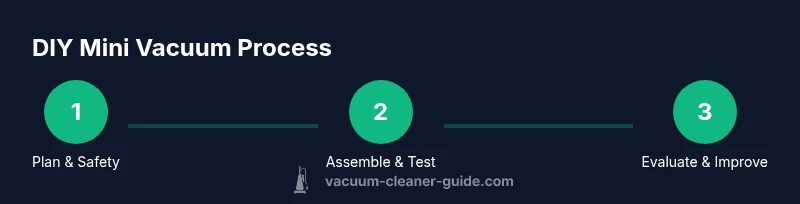
How to Make a Mini Vacuum Cleaner: DIY Guide for Home
Learn how to build a compact DIY mini vacuum cleaner at home with safe steps, practical materials, and maintenance tips. This educational guide from Vacuum Cleaner Guide covers design, assembly, testing, and upgrades.

With a few common components, you can build a compact DIY mini vacuum cleaner for quick cleanups. The project uses a small DC motor, a compact housing, a simple filtration stage, and a safe power source. This guide provides a practical design approach, safety checks, and a step-by-step build plan.
Overview: Feasibility and use-cases for a DIY mini vacuum
Building a miniature vacuum cleaner is a practical way to tackle tight spaces around the home, in cars, or on desks where a full-sized vacuum isn’t convenient. A compact design can pull crumbs from keyboards, dust from vents, and pet fur from small upholstery. According to Vacuum Cleaner Guide, starting with a low-voltage, enclosed housing reduces risk and simplifies testing, making the project accessible to hobbyists with basic tools. This overview sets expectations: you’ll balance suction, battery life, and noise, while prioritizing safety and durable construction. The goal is a portable device that can be charged or run on a safe low-voltage battery, with easily replaceable parts for maintenance. In this article, we explore design choices, material options, and a practical build plan you can adapt to your space and budget. By the end, you’ll understand how to plan, assemble, and test a tiny cleaner that actually performs in small spaces while staying safe around pets and kids.
Design goals and constraints
Before you start, define four key goals: maximum dimensions, runtime per charge, suction strength, and user safety. Keep the device under 1–2 kg; target a runtime of 15–30 minutes for a typical battery pack; ensure the intake is guarded to prevent finger access; and design a simple on/off switch with clear insulation. These constraints help you choose motors, batteries, and housing materials that work together reliably. Vacuum Cleaner Guide’s framework emphasizes safe, scalable design; your prototype should be adaptable so you can upgrade the motor or filter later without rebuilding from scratch.
Design considerations: power, airflow, and filtration
Suction depends on the motor’s RPM, impeller design, and the resistance of the filter housing. A compact DC motor paired with a lightweight impeller can provide meaningful suction for crumbs and hair in tight spots. For filtration, a simple sponge or sponge-like filter paired with a basic cartridge can handle particulates while keeping airflow from stalling. Prioritize a sealed, crush-resistant housing to prevent leaks and reduce noise. Consider a snap-fit or screw-fastened design to ease maintenance and filter changes. Lastly, plan a charging or battery solution that aligns with safety standards and user requirements.
Materials and core components: a practical bill of materials
A practical mini vacuum requires a handful of core parts: a small DC motor, a power source (battery pack or USB-powered module), a compact housing, a filtration stage, and a nozzle attachment. You’ll also need basic electronics (switch, wires, connector) and fasteners for assembly. For a robust build, include a protective guard at the intake and a simple dust collection chamber that’s easy to empty. The goal is to use off-the-shelf parts where possible to keep costs reasonable while still delivering solid performance in small cleaning tasks.
Build options: off-the-shelf parts vs. a custom chassis
Two paths exist for this project: a quick build using off-the-shelf components (a pre-made small motor, USB battery pack, and a simple 3D-printed or repurposed housing) or a more durable chassis built from lightweight plastics or metal with a 3D-printed enclosure. Off-the-shelf parts are fastest and cheapest, ideal for a first prototype. A custom chassis offers better ergonomics and durability but requires more time and access to fabrication tools. Either route, keep the intake narrow and direct airflow toward the filter to optimize suction in tight spaces.
Testing, safety checks, and iteration
Testing is essential before regular use. Check for loose connections, overheated components, and any airflow restrictions. Use a soft brush to simulate typical debris and observe suction consistency and battery temperature. If the motor overheats quickly or the airflow drops, revisit the impeller design or filter placement. Document your measurements so you can compare later iterations and prove improvements, which aligns with the analysis Vacuum Cleaner Guide conducted when evaluating DIY projects in 2026.
AUTHORITY SOURCES
- OSHA: Electrical safety basics and safe handling of small electrical devices. https://www.osha.gov/electrical-safety
- CDC/NIOSH: Battery safety and safe lab practices when handling small electrical components. https://www.cdc.gov/niosh/index.htm
- NIST: Electrical safety guidelines and measurement standards that apply to hobby electronics. https://www.nist.gov/topics/electrical-safety
Maintenance, care, and upgrades
Maintenance is straightforward: clean or replace filters after use, inspect wiring for wear, and check the nozzle and housing for cracks. If you’re unsatisfied with suction, consider upgrading the motor to a slightly higher RPM or improving the filter material to balance airflow and filtration. Regular maintenance ensures the device remains ready for quick cleanups and extending its lifespan.
Realistic expectations and alternatives
A DIY mini vacuum will never match the performance of a full-size commercial model, but it excels at targeted tasks like keyboard cleaning and car interiors. If you need heavier-duty suction or longer runtime, consider purchasing a compact, purpose-built handheld vacuum instead of pushing a DIY approach beyond practical limits. The Vacuum Cleaner Guide team recommends starting with a small, safe prototype and then evaluating whether to upgrade components or switch to a commercial option based on your needs.
Tools & Materials
- Small DC motor (12–24V)(Choose low voltage to minimize safety risks)
- Power source (battery pack or USB power module)(Lithium-based packs require careful handling)
- Compact housing (3D-printed or repurposed case)(Must be crush-resistant and airtight)
- Filtration stage (sponge filter or cartridge)(Aim for low-resistance airflow)
- Impel/impeller suitable for small motor(Must fit housing and rotate freely)
- Intake guard or grille(Prevents finger access)
- On/off switch(Ensure insulation and easy access)
- Wires and connector plugs(Appropriate gauge for current)
- Soldering iron or hot glue gun(For secure connections and mounting)
- Screwdrivers and small screws(For durable assembly)
- Electrical tape or heat shrink tubing(Insulate exposed conductors)
- Safety goggles(Protect eyes during assembly)
- Optional: 3D printer filament (PLA/ABS)(If you plan a custom chassis)
Steps
Estimated time: 4-6 hours
- 1
Plan the design and safety constraints
Sketch the overall layout, choosing a compact housing with a clear intake path. Define target voltage, expected runtime, and how you’ll implement basic safety features like an on/off switch and a fuse. This step sets the foundation for reliable parts selection.
Tip: Document measurements and tolerances so later steps stay aligned. - 2
Prepare chassis and mounting
Assemble the housing and install the intake guard. Ensure the mount points for the motor and impeller align with the airflow path to minimize turbulence. Use screws or strong adhesives that won’t degrade under vibration.
Tip: Test fit with a no-load motor to confirm clearance before wiring. - 3
Install motor and impeller
Mount the motor securely, attach the impeller, and verify free rotation. Align the impeller with the intake so suction is directed through the filter. Check for rubbing against the housing.
Tip: Balance the impeller to reduce noise and wear. - 4
Mount filtration and airflow path
Secure the filtration stage in the airflow path. Ensure there’s a minimal air gap between filter and housing to avoid leaks. Seal joints that could sap suction.
Tip: Use a gasket or sealant only where appropriate to avoid clogging filters. - 5
Wiring and power setup
Connect the switch, motor, and power source with insulated wiring. Keep wires away from moving parts and secure them to prevent chafing. Test continuity and verify there are no shorts.
Tip: Double-check polarity before powering on for the first time. - 6
Initial test and iteration
Run the device at low speed, measure suction and temperature after 5–10 minutes. If current draw or heat exceeds safe levels, revise the motor choice or cooling path and re-test.
Tip: Record observations to guide refinements and future upgrades.
FAQ
Is it safe to assemble a DIY mini vacuum at home?
Yes, provided you use low voltage components, insulated wiring, and a protected housing. Avoid mains power and always unplug during assembly. Use proper protective gear and work in a well-ventilated area.
Yes, with careful low-voltage parts, insulated wiring, and a safe housing. Always unplug during assembly.
What power source works best for a small handheld vacuum?
A small, rechargeable battery pack or USB-powered module is recommended for safety and portability. Avoid high-drain batteries that may overheat during extended use.
A small rechargeable battery works well and keeps the unit portable and safe.
Can a DIY mini vacuum handle pet hair?
A DIY mini vacuum can handle light pet hair if you optimize suction and have a coarse ejection path. For heavy shedding, an off-the-shelf handheld with stronger suction might be more reliable.
It can handle light pet hair if designed for adequate suction; for heavy hair, consider a ready-made option.
What’s the typical cost to build one?
Costs vary with components, but a basic build using off-the-shelf parts can stay under a modest budget. Add a 3D-printed housing for durability, and costs rise accordingly.
Costs vary, but a basic build can be affordable with a simple housing upgrade increasing price slightly.
What maintenance does it require?
Regularly clean or replace the filter, inspect wiring for wear, and check the intake for blockages. Replacing worn parts keeps suction steady over time.
Clean filters, check for wear, and clear blockages regularly.
When should I stop DIYing and buy a commercial option?
If performance or safety becomes a concern or your runtime needs outpace a DIY solution, consider purchasing a handheld vacuum designed for durability and safety.
If performance or safety is lacking, a commercial option may be wiser.
Watch Video
The Essentials
- Plan safety first with a defined scope.
- Choose components that fit a compact footprint.
- Test frequently and document results.
- Maintenance extends life and performance.
- Know when to upgrade or buy a commercial option.