How to Make a Vacuum Cleaner at Home: A Practical DIY Guide
Learn to make a simple, safe vacuum cleaner at home with practical, non-electrical options or powered approaches. This step-by-step guide covers design choices, materials, safety, testing, and maintenance for a reliable DIY cleaning tool in 2026.

With this guide, you’ll learn how to make a simple, safe vacuum cleaner at home using common, non-electrical components. We’ll cover two practical designs (manual pump and venturi-based siphon), outline essential safety checks, and provide a step-by-step approach to assembling, testing, and maintaining your DIY cleaner. This project emphasizes safety, practicality, and cost-effectiveness.
What is a vacuum cleaner and how it works
If you are wondering how do you make a vacuum cleaner, this guide presents practical, beginner-friendly paths that avoid complex electronics. A vacuum cleaner creates suction by moving air rapidly through a narrow intake. Debris is drawn into a collection chamber, while a filter or bag traps dust. In this article, we explore two safe, accessible paths: a non-motor manual design and a powered option that relies on a commercial, ready-made motor kit. By focusing on basic physics and safe construction, homeowners can experiment with a device that cleans small areas without investing in a commercial unit. The goal is usefulness, safety, and learning, not professional-grade performance. As you read, keep in mind that the best choice for your home depends on how often you clean, the surfaces you vacuum, and your comfort with hands-on projects.
Tools & Materials
- Clear, sturdy plastic bottle (1–2 liters)(Skinnier bottles may be harder to seal; choose a bottle with a stable base)
- Flexible tubing (aquarium or medical-grade, 1–2 meters)(Inner diameter ~4–6 mm for easy airflow and a snug fit)
- Adapter or funnel to fit hose to bottle(Ensure a tight seal to prevent leaks)
- Filter material (HEPA fabric, coffee filter, or cotton cloth)(Plays a crucial role in trapping dust before it reaches your mouth or a new container)
- Manual pump or bicycle pump (for venturi or pump-assisted designs)(Used to generate suction without electrical power)
- Non-conductive fasteners (rubber grommets, tape, glue)(Helps create airtight seals and secure connections)
- Safety gear (gloves and safety goggles)(Protects eyes and hands during assembly and testing)
- Optional: small collection cup or bag for debris(Makes debris disposal neater)
- Optional: silicone sealant or O-rings(Improves airtight seals where needed)
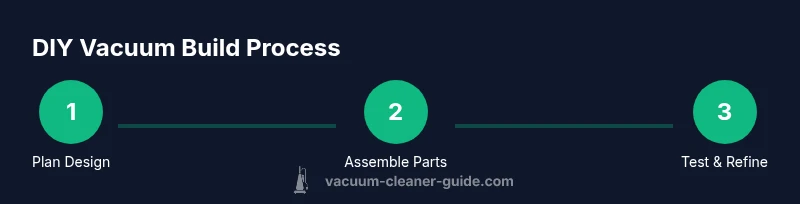
Steps
Estimated time: 2-6 hours
- 1
Define design and goals
Choose between a manual air-pump design or a venturi-style siphon that uses air pressure. Decide what surfaces you’ll clean (carpet, hard floors, furniture); this informs material choices and the size of your collection container. If you’re unsure, start with a simple manual design to learn the basics.
Tip: Sketch your layout before disassembly and photograph each change for reference. - 2
Prepare the collection container
Clean the bottle or container thoroughly. Make sure there is a secure lid or cap that can be fitted with a hose. The container will hold the collected dust, so its capacity should suit your cleaning space.
Tip: Choose a transparent container to monitor debris buildup easily. - 3
Attach the intake hose and seal
Insert the hose into the container’s lid or a drilled port. Use rubber grommets or tape to ensure an airtight seal around the connection. A loose seal will dramatically reduce suction.
Tip: Test the seal by gently blowing into the hose; if you hear a hiss, reseal before continuing. - 4
Install the filtration stage
Place a disposable filter material in line with the airflow or wrap cloth around the interior to catch larger particles. This helps protect your lungs and makes disposal easier.
Tip: Replace or clean the filter after every few uses to maintain suction and air quality. - 5
Create the suction source
Connect a manual pump or bicycle pump to the system to generate suction. For a venturi setup, position the pump to push air through the nozzle and into the bottle. Avoid any electrical components at this stage.
Tip: Test suction with a lightweight tissue: if it clings, your airflow is sufficient. - 6
Test the unit and adjust seals
Power on test cleans on a small area to verify suction and seal integrity. Listen for air leaks and observe the assembly for movement or loosening parts.
Tip: Apply a small amount of light oil to moving joints if they squeak, but avoid contact with filters or debris paths. - 7
Disposal and cleanup
Empty the collected debris into a trash bag, then wash the container and rinse the filter material (if washable). Ensure all components are completely dry before reassembly.
Tip: Label reusable parts and store away from heat and moisture. - 8
Document results and safety checks
Record what worked, any leaks observed, and cleaning performance. Note safety checks, such as filter integrity and seal tightness, to improve future iterations.
Tip: Take photos of your final setup and write a short summary for future reference.
FAQ
Is it safe to build a DIY vacuum cleaner at home?
Yes, when you focus on non-electrical designs and use proper filtration, seals, and protective gear. Avoid wiring or handling high-voltage components. Always test in a controlled environment before regular use.
Yes, it can be safe if you stick to non-electrical designs and follow protective gear and testing steps.
Can a DIY vacuum replace a store-bought unit?
A DIY vacuum can handle light, occasional cleaning, but it generally won’t match the power, durability, or filtration of a commercial unit. Use it as a learning project or a supplementary tool for small tasks.
It’s usually a supplementary tool rather than a full replacement for a store-bought vacuum.
What materials should be avoided in a DIY vacuum?
Avoid flammable materials, corrosive liquids, and any components that carry live electricity. Do not improvise electrical circuits or motors without proper training and safety measures.
Avoid flammable or electrical hazards and never improvise wiring.
How do I maintain the filter and intake?
Inspect the filter after each use, replace or clean as needed, and ensure the intake remains clear of obstructions. Regular maintenance sustains suction and air quality.
Check and clean or replace the filter after each use to keep suction strong.
What is the expected lifespan of a DIY vacuum?
Lifespan depends on usage and materials. With careful assembly and routine maintenance, a non-electrical DIY vacuum can last for many cleaning sessions.
Durability varies; with good care, it can last for many cleanings.
Should I share measurements or take photos of my build?
Yes. Documenting dimensions, materials, and testing results helps you replicate improvements and assists others who want to try a similar project.
Document your build with notes and photos so you can improve it later.
The Essentials
- Choose a design that matches your cleaning needs.
- Use airtight seals and proper filtration to protect you and your environment.
- Manual designs offer safety and cost advantages for beginners.
- Document your build to simplify maintenance and future upgrades.