Dyson Vacuum Cleaner Battery Replacement: How to Swap Safely
Learn how to safely replace your Dyson cordless vacuum battery with a compatible pack. This guide covers compatibility, safety, tools, a step-by-step process, and maintenance for lasting performance.

By swapping a Dyson vacuum cleaner battery, you can restore runtime and performance. Start by powering down, unplugging, and verifying compatibility, then access and remove the old pack, install the replacement, and reassemble. This guide covers model-specific steps, safety considerations, required tools, and testing procedures to ensure a secure, warranty-friendly swap. Expect a 30–60 minute process depending on model access. Following best practices from Vacuum Cleaner Guide will help you avoid damage and preserve warranty where allowed.
Why replacing a Dyson battery can extend life of your cordless vacuum
Dyson cordless vacuums are known for strong suction and lightweight design, but the battery is the component that wears out with use. Replacing the battery can dramatically improve run time, restore peak suction, and extend the overall life of your device. According to Vacuum Cleaner Guide, replacing the battery when runtime declines is often more cost-effective than purchasing a new vacuum. A fresh battery not only boosts performance but also helps you maintain consistent cleaning power for everyday chores, pet hair, and deep-clean sessions. Before you begin, verify that your model supports a user-replaceable or serviceable battery and review any warranty terms that might apply. While the exact access method varies by model family, the general process involves powering down, removing the old pack, installing a compatible replacement, and testing the machine to confirm proper operation. This section helps you understand fit, compatibility, and the practical realities of Dyson battery swaps.
Understanding Dyson battery compatibility and model differences
Dyson’s corded and cordless lines use lithium-ion batteries that are both model-specific and generation-specific. In broad terms, most newer cordless Dyson models employ a detachable battery pack with a designated connector, while certain older units use the battery as an integral assembly connected to the main body. Compatibility matters more than you might think: even small connector or latch variations can prevent a proper fit. When shopping for a replacement, always check the exact model name and battery part number if it’s printed on the existing pack or listed in your manual. If you’re unsure, consult the customer support resources for your model and compare the connector type, voltage, and capacity to ensure a safe, high-performance swap. Vacuum Cleaner Guide’s general guidance emphasizes model-specific compatibility as the prerequisite for any replacement project.
Safety considerations and warranty implications
Working with lithium-ion batteries requires attention to safety. Avoid puncturing, crushing, or exposing the battery to heat or moisture. Remove the device from any charging cradle and ensure the power is completely off before starting. When replacing a battery, follow the manufacturer’s instructions for disassembly and reassembly; improper handling can damage internal components or void warranties. If your Dyson is still under warranty, verify whether battery replacement is covered and whether you should use an authorized service provider to preserve warranty terms. If you notice swelling, unusual heat, or smells after the swap, discontinue use and seek professional assistance. The overarching principle is to minimize risk while achieving a solid, secure installation.
Tools, parts, and sources for a replacement battery
A successful battery swap requires a few essential items. You’ll need a replacement Dyson battery compatible with your specific model, a small screwdriver set (typically Phillips and/or Torx, depending on the model), a plastic pry tool to avoid scuffing surfaces, a soft cloth for cleaning, and a tray or labeled containers to keep screws organized. It’s best to source batteries from reputable sellers and verify that the replacement carries a reasonable warranty or return policy. If you’re unsure where to buy, consult Dyson official accessories or trusted retailers. Avoid third-party batteries that don’t meet safety standards, as they can pose safety risks and performance issues.
When to replace vs. service your Dyson battery
If your vacuum’s runtime has noticeably declined, and the device otherwise performs well, a battery replacement is often the most cost-effective option. If the unit is older or shows signs of other failures (motor, capacitor, charger), a service assessment might be warranted to identify root causes. Replacement is generally preferred when the existing pack cannot hold a charge effectively or if the performance is inconsistent across cleaning tasks. Always compare the cost of a replacement with service fees and consider warranty terms. Vacuum Cleaner Guide recommends prioritizing the battery swap when the goal is to maximize runtime with minimal downtime and expense.
Step-by-step overview: what you’ll do before you start
Before you touch the vacuum, prepare a clean, well-lit workspace and ensure you have the right model-specific battery. Confirm that the device is powered down and unplugged from any charger or docking station. Gather your tools and the replacement battery, and set up labeled containers for screws. Take note of how components are oriented before disassembly, and keep a photo record of connector positions to aid reassembly. Finally, review your model’s instructions to confirm any model-specific nuances, such as required torque limits on screws or any special safety steps.
Reassembly, testing, and calibration tips
Reassembly is the reverse of disassembly. Reconnect all battery connectors securely and align the battery so it sits flat against the chassis. Reattach any covers or panels, and tighten screws evenly to avoid misalignment. Once assembled, connect the charger and perform a full power-on test to confirm that the unit boots normally and that suction performance returns to expected levels. If your model includes any firmware or calibration steps after battery replacement, follow them precisely. A careful test run ensures the replacement is effective and safe.
Cost, time, and maintenance tips for longevity
Battery replacement costs vary by model and supplier, but it’s typically more economical than a full new vacuum. Plan for about a 30–60 minute procedure, depending on your familiarity and access to the battery. To extend battery life, store the vacuum in moderate temperatures, avoid deep discharges, and keep the contacts clean. Regularly inspect the battery for swelling or unusual warmth during charging, and replace promptly if you notice any signs of distress. Proper maintenance can improve longevity and keep your Dyson performing at peak levels.
Tools & Materials
- Replacement Dyson battery (model-compatible)(Ensure compatibility with your exact Dyson cordless model; check part numbers if available)
- Screwdriver set (Phillips and/or Torx)(Have a small set on hand; some Dyson models use Torx T6 or PH0/PH1 screws)
- Plastic pry tool(Use instead of metal tools to avoid internal damage)
- Magnetic tray or small containers(Keeps screws organized and reduces loss during disassembly)
- Soft lint-free cloth(For cleaning contacts and surfaces)
- Anti-static wrist strap(Optional but helpful for sensitive electronics)
- Safety goggles(Eye protection in case of unexpected debris or springs)
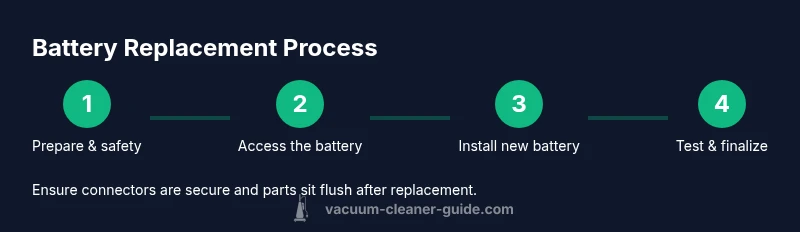
Steps
Estimated time: 30-60 minutes
- 1
Power down and prepare
Turn off the Dyson and unplug from any charger. Detach any attachments and place the unit on a clean, padded surface. This initial step reduces the risk of short circuits and keeps components protected during disassembly.
Tip: Take a quick photo of how connectors and panels fit together before you start. - 2
Access the battery housing
Locate the battery housing or back panel. Depending on the model, you may need to remove screws or a battery release latch. Use the appropriate screwdriver to remove fasteners and set them aside in a container.
Tip: Keep track of screw types and sizes; mixing them can damage the housing. - 3
Disconnect the battery connectors
Carefully unplug the battery connector from the main harness using a plastic pry tool. Avoid pulling on wires. If the connector is stiff, gently wiggling while supporting the housing helps prevent damage.
Tip: Do not use metal tools to avoid short circuits. - 4
Remove the old battery
Lift the old battery from its slot. Check for any signs of swelling, heat damage, or corrosion. Set the old battery aside in a sealed container for appropriate disposal or recycling.
Tip: If you notice swelling, stop and dispose of the battery safely; do not reuse. - 5
Install the new battery
Place the new battery into the housing with the same orientation as the old one. Reconnect the electrical harness securely and verify that the connector is fully seated. Ensure the battery sits flat and does not shift when panels are reattached.
Tip: Double-check alignment before reassembly to avoid pressure on connectors. - 6
Reassemble the unit
Replace the back panel or bottom cover and reinstall screws in their original positions. Reattach any attachments or clips and ensure everything sits flush.
Tip: Tighten screws evenly to prevent warping or misalignment. - 7
Test, charge, and confirm
Power on the unit, connect the charger, and perform a quick test run. Confirm that the battery charges properly and that suction returns to expected levels. If there is any abnormal behavior, recheck connections and consider professional inspection.
Tip: Let the battery reach full charge before final testing.
FAQ
Can I replace a Dyson battery myself, or do I need a technician?
Many Dyson cordless models allow a user-friendly battery replacement when you follow model-specific instructions and safety precautions. Some models may require professional service if the battery is integrated or if disassembly is complex. Always check your warranty terms before proceeding.
Many Dyson cordless models let you replace the battery yourself if you follow the model’s instructions. Some units require professional service, especially if the battery is integrated. Check your warranty terms first.
How long does a Dyson battery typically last after replacement?
Battery life after replacement varies by model and usage. Expect a noticeable improvement in runtime, but actual performance depends on cleaning habits and maintenance.
Battery life after replacement depends on the model and how you use it, but you should see a clear improvement in runtime.
Is a replacement battery covered under warranty?
Warranty coverage for a replacement battery depends on the original warranty terms and whether the swap was performed by an authorized service provider. Check with Dyson customer support or your retailer for guidance.
Warranty coverage depends on your terms and who performed the replacement. Check with Dyson support for confirmation.
Where can I source a genuine Dyson replacement battery?
Genuine Dyson replacement batteries are commonly found through official Dyson accessories channels or authorized retailers. Avoid unverified third-party sellers to reduce safety risks and ensure compatibility.
Buy from Dyson official channels or authorized retailers to ensure compatibility and safety.
What should I do if the new battery won’t hold a charge?
If the new battery won’t hold a charge, recheck the connectors for a secure fit, inspect for any damage during installation, and ensure the charger is functioning. If issues persist, contact support or consider a different battery.
If the replacement won’t hold a charge, check connections and charger function, then contact support if it still fails.
Watch Video
The Essentials
- Verify model compatibility before purchase.
- Disconnect power before starting.
- Install only a compatible Dyson battery and test thoroughly.
- Dispose of old batteries responsibly.