Dyson Vacuum Cleaner Repair: Step-by-Step Guide
A comprehensive, safety-first guide to diagnosing and repairing common Dyson vacuum cleaner issues. Learn tools, maintenance, model considerations, and practical steps from Vacuum Cleaner Guide Team to extend your vacuum’s life.

This guide helps you perform safe, practical dyson vacuum cleaner repair for common issues like suction loss, blockages, and brush-bar wear. Start with a thorough diagnosis, then follow a step-by-step workflow to clean, test, and reassemble. When in doubt about electrical components or warranty terms, seek professional help.
Understanding common failure points in Dyson vacuum cleaners
According to Vacuum Cleaner Guide, dyson vacuum cleaner repair often begins with a careful diagnosis of airflow, seals, and the cyclone assembly. Most issues fall into a few repeatable categories: suction loss, blockages, brush bar wear, motor overheating, battery degradation in cordless models, and clip or hose failures. This section lays out a practical mental model for diagnosing these problems without instantly replacing parts. You’ll learn how to separate cosmetic issues from underlying mechanical faults, how to prioritize fixes, and how to avoid common mistakes that waste time and money. While some problems require professional service, many Dyson repair tasks can be tackled safely at home with basic tools and patient testing. The goal is to restore peak performance while preserving warranty protections by following model-specific service guides and avoiding unapproved methods.
Safety first: unplug, power down, and prepare for inspection
Before you touch any part of a Dyson vacuum cleaner, unplug from the wall outlet and power down all indicators. Wear safety gloves and eye protection to guard against sharp edges or springs. Prepare a clean workspace and keep a small parts tray handy. Vacuum cleaner repair work can involve opening housings, so consult the model’s service guide to avoid damaging sensitive components. If your model has a brush belt, imaginatively inspect it for wear while you’re checking for clogs. Remember: safety always comes first to prevent electric shock or injury, especially with cordless Dysons where battery packs can pose additional risks. This approach aligns with the practices promoted by Vacuum Cleaner Guide Team.
Essential tools and spare parts for Dyson repair
Gather a basic toolkit before you begin. A Phillips and Torx screwdriver set is often needed to access the casing, along with a soft brush and microfiber cloth for cleaning. Optional but useful items include replacement filters compatible with your model, spare hoses or cyclone seals, a multimeter for electrical checks, and a spare battery for cordless units. Keep model-specific parts organized to avoid misplacing them. If you are unsure which parts fit your Dyson model, refer to the official user manual or service guide; using wrong parts can cause more harm than good. For ongoing guidance, Vacuum Cleaner Guide emphasizes maintaining clean filters and seals as the cornerstone of reliability.
Diagnosing common issues: poor suction, noisy motor, or overheating
A Dyson that loses suction typically has clogged filters or blockages in the cyclone or wand. A noisy motor may indicate a brush bar jam, loose belt, or worn bearings. Overheating can result from restricted airflow or a blocked cyclone. Start with the simplest possibilities: check and clean the filters, inspect the cyclone housing for debris, and examine the brush bar for hair or thread entanglement. If the issue persists, methodically test each stage of the airflow path. This systematic approach helps prevent unnecessary part replacements. Vacuum Cleaner Guide Team notes that sticking to the diagnosis-first principle yields the best outcomes for dyson vacuum cleaner repair.
Cleaning and maintenance routines to prevent problems
Preventive maintenance reduces the likelihood of costly repairs. Regularly wash or replace air filters, clean the cyclone interior, wipe seals with a damp microfiber cloth, and inspect the brush bar every few months. Keep the wand and hose free of obstructions, and avoid storing the unit in damp or dusty areas. For cordless models, monitor battery health and cycle usage to maximize life. A routine clean every 3–6 months keeps suction strong and extends the lifespan of your Dyson vacuum cleaner. These maintenance steps are reinforced by the Vacuum Cleaner Guide Team as practical, model-conscious habits.
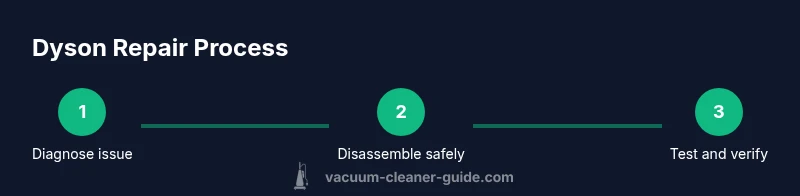
Step-by-step repair workflow for common issues
This section outlines a repeatable repair workflow you can apply to most Dyson models: diagnose, disassemble, clean, inspect, replace if necessary, reassemble, and test. Start by unplugging and removing the bin to access the cyclone and filters. Then clean, check for wear, and replace worn components only after confirming the failure mode. Finally, reassemble and perform a controlled test run to verify airflow and motor function. By following a consistent sequence, you reduce guesswork and improve repair success. For dyson vacuum cleaner repair, a disciplined workflow yields clearer results and preserves warranty where possible.
Replacing filters, seals, and brushes: model considerations
Filters and seals erode with age, reducing suction and efficiency. When replacing, ensure compatibility with your specific Dyson model. Use manufacturer-approved parts and avoid generic substitutes that could degrade performance or void warranties. Brushes, belts, and seals should be inspected for wear and replaced as a set if necessary to maintain consistent drive and suction. Dyson’s own replacement parts information is a reliable guide; Vacuum Cleaner Guide recommends sticking to official parts to guarantee fit and safety.
Battery care and replacement for cordless Dyson models
Cordless Dysons rely on battery packs with a finite lifespan. If you notice reduced run time, longer recharge, or unexpected shutdowns, test the battery health and consider a replacement if the cell capacity has degraded. Follow the manufacturer’s instructions to safely detach and replace the battery, and recharge fully before use. Never attempt to service battery packs beyond basic inspection. Battery safety is critical; if you’re unsure, seek professional service to avoid fire risk or damage to electronics.
When to replace vs repair: cost, warranty, and model age
Some issues exceed the practical value of repair, especially on older or high-mileage units. Compare the estimated repair cost against the price of a new model or a refurbished option. Consider warranty terms, residual value, and the potential for future reliability. Vacuum Cleaner Guide emphasizes that not all dyson vacuum cleaner repair efforts are cost-effective; sometimes replacement is the smarter long-term choice, particularly for battery-dependent cordless models or extensively worn mechanisms.
Testing and validation: verify the repair works
After reassembly, perform a controlled test to validate the repair. Check for suction strength across different attachments, inspect airflow from the cyclone, and listen for abnormal noises. Ensure there are no unusual smells or overheating during extended operation. If performance remains inconsistent, repeat the diagnostic steps or consult support. A thorough test confirms the success of dyson vacuum cleaner repair and helps you avoid repeat visits to your tools or repair shop.
Common mistakes to avoid during DIY Dyson repair
Avoid rushing disassembly; take photos at every stage to aid reassembly. Don’t force parts through tight openings or ignore small clips that could be essential for proper mounting. Water exposure and disassembled electronics can cause lasting damage; keep liquids away from the motor compartment. Finally, do not bypass safety interlocks or attempt to modify electrical connections—stick to manufacturer guidance and seek professional help when needed.
Dyson repair verdict and next steps
In closing, routine maintenance and careful, model-aware troubleshooting solve most dyson vacuum cleaner repair scenarios. If you reach a point where electrical faults, battery failures, or complex PCB issues arise, the safest option is to contact Dyson support or a qualified technician. The Vacuum Cleaner Guide Team believes most owners can regain peak performance with patience, proper tools, and adherence to model-specific service guides. When in doubt, prioritize safety and professional help to protect your investment.
Tools & Materials
- Phillips screwdriver set(PH2 bits are common for Dyson housings and accessories)
- Torx screwdriver set(Torx T15/T20 bits may be needed on certain models)
- Soft brush attachment(For gentle cleaning without scratching plastics)
- Microfiber cloths(For cleaning cyclone interior and filters)
- Replacement filters (model-compatible)(Check compatibility before buying)
- Replacement seals/cyclone gaskets(Only if seals show wear or cracking)
- Spare hoses/wand connectors(Useful for damaged hoses or broken clips)
- Multimeter (optional)(For electrical continuity tests if you have model knowledge)
- Spare battery (cordless models, optional)(Only if you know your model uses swappable batteries)
- Safety gloves and eye protection(Protect hands and eyes during disassembly)
Steps
Estimated time: 60-90 minutes
- 1
Power down and unplug the unit
Begin by unplugging the Dyson from the wall outlet and switching off any on-board indicators. This prevents electric shock and accidental activation during disassembly. If it’s a cordless model, remove the battery pack before any inspection.
Tip: Always verify the device is fully disconnected before touching internal parts. - 2
Remove the bin and cyclone assembly
Carefully detach the dust bin and cyclone to expose the internal airflow path. Use a tray to catch debris and avoid tipping the canister. Document how pieces fit together to simplify reassembly.
Tip: Keep small parts organized to prevent misplacement during reassembly. - 3
Inspect and clean the cyclone and filters
Wash or replace filters per model guidance and clean debris from the cyclone. Let filters air-dry completely before reinstalling. Cleanliness at this stage directly affects suction and airflow.
Tip: Never reinstall a damp filter or cyclone assembly. - 4
Check for blockages in wand and hoses
Inspect the wand, hoses, and connectors for hair, lint, or obstructions. Remove each blockage gently with a cleaning tool; avoid forcing objects through tight bends.
Tip: Wear gloves to protect fingers from sharp edges or snapped parts. - 5
Inspect brush bar and drive belt
Check for worn bristles or a stretched, cracked belt. Clean hair from the brush and replace the belt if it shows signs of wear. A clean, properly aligned brush bar restores effective agitation.
Tip: A worn belt can slip and reduce suction dramatically. - 6
Test airflow path for leaks
With components separated, run a quick airflow check to identify leaks or gaps in seals. Re-seat components firmly to restore airtight pathways, which sustain suction.
Tip: A small air leak can masquerade as a major motor issue. - 7
Assess battery and electrical connections (cordless models)
Inspect battery contacts for corrosion and ensure connectors are securely seated. If the battery shows swelling or rapid discharge, plan a safe replacement rather than attempting a DIY fix on the battery cells.
Tip: Never puncture a battery or disassemble a swollen pack. - 8
Reassemble and perform a test run
Carefully reassemble the unit in reverse order of disassembly. Run the Dyson with a test attachment to confirm suction, airflow, and motor sound are normal before returning to normal use.
Tip: Take a short test run indoors to verify safe operation before broader use.
FAQ
What are the most common issues that require dyson vacuum cleaner repair?
Common issues include suction loss from dirty filters or blockages, brush-bar wear, motor noise, and battery degradation in cordless models. Diagnosing the problem first helps you target the right fix and avoid unnecessary replacements.
Most common problems are suction loss, blockages, and a worn brush bar, plus battery issues in cordless models.
Can I repair a Dyson vacuum myself, or should I contact support?
DIY is feasible for routine cleaning, filter maintenance, and simple part replacements with proper instructions. Electrical faults, battery work, or warranty considerations are best handled via Dyson support or a qualified technician.
DIY is possible for simple tasks, but call support for electrical or warranty issues.
Do I need special tools to repair a Dyson vacuum?
A basic screwdriver set, soft brush, and microfiber cloth cover most DIY tasks. Use model-specific parts and follow the official manual to avoid damage.
Yes, a small screwdriver set and cleaning tools are usually enough for common fixes.
How can I extend the life of my Dyson vacuum?
Regular filter cleaning, cyclone cleaning, belt inspection, and storing in a dry place help prevent common failures. Schedule maintenance every few months and replace worn parts promptly.
Keep filters clean, belts intact, and the cyclone clear to extend life.
Is it safe to repair a Dyson battery yourself?
Battery packs can be hazardous if damaged. Only replace batteries using manufacturer-approved parts and follow safety precautions. If unsure, seek professional help.
Battery work should be done carefully, preferably by a pro if you’re not sure.
Where can I find spare parts for Dyson repair?
Look for model-compatible parts from Dyson or authorized retailers. Verify fit and compatibility before purchase to ensure reliable repairs.
Get parts from Dyson or authorized shops and double-check compatibility.
What are signs that a Dyson needs professional repair?
Persistent suction loss after cleaning, unusual smells, overheating, or electrical issues indicate professional assessment may be needed.
If it keeps failing or smells funny, it’s time to call a pro.
How long does a typical Dyson repair take?
DIY repairs can take 30-90 minutes depending on the issue and model. Professional repairs may require days for parts and service scheduling.
Most DIY fixes take under two hours; professional repairs may take longer depending on parts availability.
Watch Video
The Essentials
- Diagnose before you replace parts
- Follow model-specific guidance and use manufacturer parts
- Keep filters and cyclone clean to prevent loss of suction
- Test thoroughly after reassembly to confirm repair success
- Safety first: unplug and protect hands during repair