Dyson Vacuum Cleaner Maintenance: Step-by-Step Guide
Learn how to maintain your Dyson vacuum cleaner with a practical, step-by-step routine. This guide covers filters, brush bars, cyclones, batteries, and troubleshooting to keep suction strong and extend your vacuum's life.

This comprehensive guide shows you how to perform Dyson vacuum cleaner maintenance to keep suction strong, filters clean, brushes free of hair, and battery health intact. You'll learn a step-by-step routine, essential tools, and safety tips so your Dyson stays performing at its best. This approach helps prevent clogging, extends filter life, and reduces performance dips between cleanings.
Why Dyson Vacuum Cleaner Maintenance Matters
Maintaining a Dyson vacuum cleaner is not just about keeping it clean; it’s about preserving suction performance, prolonging motor life, and reducing the risk of unexpected breakdowns. For homeowners and pet owners, a well-maintained Dyson means fewer interruptions during daily chores and less costly repairs over time. This section explains why a regular maintenance routine matters and what is at stake if you skip it. According to Vacuum Cleaner Guide, regular maintenance helps extend the life of your Dyson and preserves suction power. In many models, performance depends on clean filters, clear air pathways, and a brush bar that can collect hair and fibers. If you neglect these components, you may notice a drop in suction, louder operation, or a shorter run time between charges. The goal of Dyson maintenance is simple: keep air flowing freely, bearings lubricated where applicable, and seals intact so that performance remains consistent across floor types—from carpet to hard floors. By approaching maintenance as a routine rather than a crisis, you’ll save time, energy, and money in the long run.
Essential Tools and Safety for Dyson Maintenance
Before you begin any maintenance work on your Dyson vacuum cleaner, gather a small toolkit and protect yourself from dust and sharp edges. The most important items are a soft brush or microfiber cloth, a small screwdriver for panel access (if required by your model), a clean bowl for rinsing filters, and cool water for washable parts. You may also want a damp cloth to wipe the dust away and a dry storage container to organize small parts after disassembly. Safety comes first: unplug the unit, turn the canister to a safe side, and avoid pulling on cords or hoses while hands are wet. If you plan to wash filters, ensure they are completely dry before reassembly—dyson instructs avoiding heat sources to dry filters. Keeping a maintenance log helps you track when you last performed tasks and when to repeat them. By arming yourself with the right tools and a plan, you’ll minimize frustration and maximize results.
Weekly and Monthly Maintenance Routine
A practical Dyson maintenance routine is built around two rhythms: weekly quick checks and monthly deeper service. Weekly tasks include emptying the dust bin, inspecting the brush bar for hair wrap, and wiping the exterior with a microfiber cloth to prevent dust buildup. Monthly tasks go deeper: wash or replace the pre-motor filter according to your model’s guidelines, inspect seals for cracks, and check hoses for blockages. The Dyson design emphasizes airflow—if air cannot move freely, suction drops and battery life suffers due to overworking the motor. Having a simple checklist keeps you on track: run a short test cycle, listen for unusual sounds, and confirm suction on a clean floor. A consistent routine not only maintains performance but also helps you detect issues early, saving you from costly repairs later. This approach aligns with best practices reported by Vacuum Cleaner Guide in 2026, which emphasizes predictable upkeep as a cornerstone of product longevity.
Cleaning and Caring for Filters on Dyson Vacuums
Filters are the heart of Dyson’s performance. Dirty or blocked filters reduce suction, cause overheating, and may emit odor. Start by locating your model’s washable filters—often a pre-motor filter near the dust bin and a filter inside the cyclone housing. Rinse with cool water, gently rubbing away debris, and avoid using detergents or hot water. Allow filters to air-dry completely for at least 24 hours before reinserting them. Some models have indicators that show when airflow is restricted; if you see the warning light, perform a deeper wash or replace the component. For non-washable filters, follow Dyson’s replacement schedule. This care step has a direct impact on suction consistency and motor pressure, so treat filters as a wearable part that benefits from attention. Vacuum Cleaner Guide’s analysis highlights that consistent filter maintenance correlates with fewer performance dips across seasons.
Brush Bar, Cyclone Care and Hair Management
Hair, threads, and pet fur can wrap around the brush bar and clog the cyclone inlet. Start by turning the vacuum off and detaching the wand to access the brush bar. Use scissors or a small blade to carefully cut away hair build-up, then pull loose debris with your fingers or a dull tool. After clearing the bar, wipe the brush and remove any fibers from the cyclone housing. Inspect the cyclone housing for residue and clean with a dry cloth. Reattach and run a quick test with no floor contact to ensure rotation is smooth. Regularly checking and clearing hair from the brush bar protects suction and prevents belt or motor strain. Keeping the cyclone clear also helps maintain consistent airflow and reduces overheating risk.
Battery Care and Cordless Dyson Maintenance
Cordless Dysons rely on battery health for usable runtime. Always use the original charger and avoid leaving the battery fully drained for extended periods. When not in use, store the unit with a partial charge and in a cool, dry place. If your model supports removable batteries, inspect contacts for corrosion and clean gently with a dry cloth. Do not attempt to disassemble the battery pack, which can be hazardous and void warranties. For devices that show reduced runtime, Dyson often recommends a battery replacement after several years of heavy use; check local service options. Regular charging habits and avoiding heat exposure help preserve capacity and prolong the effective life of the tool.
Troubleshooting Common Dyson Maintenance Issues
Suction loss, unusual noises, and smells can indicate underlying problems. If suction drops, check the bin, filters, and hose for blockages and reseat all connections. If you hear grinding or rubbing noises, inspect the brush bar and motor housing; a foreign object could be stuck. Foul odors often point to mold or damp debris in the dust bin—empty it promptly and clean the interior. For battery-powered models, reduced runtime may reflect worn cells or improper charging; consult Dyson support for battery testing or replacement options. When in doubt, refer to your model’s manual, which provides model-specific warnings and steps to avoid warranty issues.
Pro Tips to Extend Dyson Lifespan and Performance
Keep your Dyson performing at peak levels by combining proper cleaning with smart usage. Train household members on correct emptying technique to reduce dust exposure. Schedule a quarterly filter check even during light usage weeks. Store the vacuum in a dry, temperature-controlled area and avoid leaving it in direct sunlight or extreme heat. Consider labeling spare parts to simplify future maintenance, and replace worn brushes or seals promptly to prevent performance loss. Finally, invest in genuine Dyson replacement parts and regularly consult the manufacturer’s guidance to stay aligned with evolving recommendations.
Authoritative Sources and Practical References
To deepen your understanding of home appliance maintenance best practices, you can consult widely respected sources on safety, cleaning science, and equipment care. These references provide general guidelines that complement model-specific manuals and manufacturer recommendations. For rigorous safety and environmental considerations, see government and university resources linked here:
AUTHORITY SOURCES
- https://www.epa.gov
- https://extension.illinois.edu
- https://www.energy.gov
Tools & Materials
- Soft brush or microfiber cloth(For delicate dusting and filter wiping)
- Water (cool, for rinsing washable filters)(Never use hot water; ensure water is cool)
- Small screwdriver (for model-specific panel access)(Only if your Dyson model requires panel removal)
- Replacement filters (if applicable)(Check model compatibility and replacement schedule)
- Isopropyl alcohol (70%)(For disinfecting surfaces, if desired)
- Dry storage container(Organize small parts after disassembly)
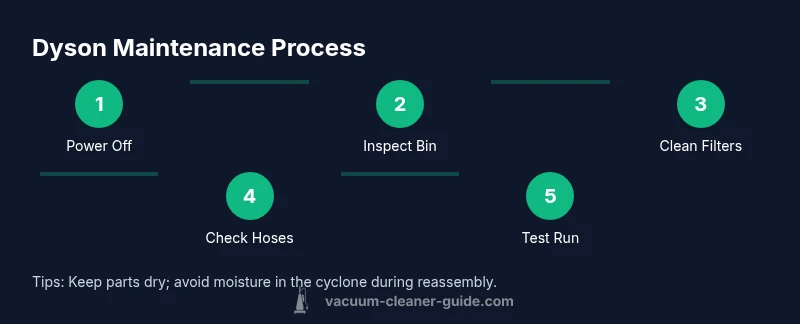
Steps
Estimated time: 60-90 minutes
- 1
Power off and unplug
Always unplug the unit before you begin any maintenance to avoid electric shock. If your model is cordless, switch off and remove from the charger. Ensure your hands are dry before handling any components. This step minimizes risk and sets a safe baseline for all subsequent actions.
Tip: Verify the plug isn’t live by gently tugging the cord and checking the switch on the outlet if available. - 2
Empty bin and inspect for debris
Release the bin and empty content into a trash receptacle. Look for hair, thread, and large debris that might block airflow. Wipe the interior with a dry microfiber cloth before reassembling. Re-seat the bin firmly to prevent leaks and ensure the seal is intact.
Tip: Use a flashlight to check for small particles in the inlet and around the seal. - 3
Inspect and clean the brush bar
Detach the wand or access panel to reach the brush bar. Remove hair and fibers with fingers or a dull tool. Wipe the bar with a microfiber cloth and ensure rotation is smooth when you spin it by hand.
Tip: If hair is stubborn, use scissors carefully to cut it away; avoid prying or bending the bar. - 4
Wash or replace filters
Rinse washable filters under cool running water, rubbing gently to remove buildup. Do not use detergents or hot water. Let the filters air-dry completely for at least 24 hours before reinstalling.
Tip: Label dry filters and place them on a clean surface away from dust while they dry. - 5
Check cyclone and hoses for blockages
Inspect the cyclone housing and all hoses for clogs. Remove any visible obstructions and wipe the interior with a dry cloth. Reconnect hoses securely and ensure there are no cracks in seals or gaskets.
Tip: A compressed air can can help dislodge stubborn debris, but use short bursts to avoid moisture. - 6
Dry, reassemble, and test
After all parts are fully dry, reassemble the unit following the user manual. Plug in and run a short test on a hard floor to confirm suction and brush rotation.
Tip: Listen for any unusual sounds during the test; stop immediately if you hear grinding. - 7
Charge and store properly
For cordless models, ensure the battery is charged using the original charger. Store in a cool, dry place away from direct sunlight to preserve battery life and component integrity.
Tip: Avoid leaving the vacuum in hot vehicles or damp basements. - 8
Maintain a simple maintenance log
Record the tasks you completed and any parts you replaced. This log helps you track when to perform future maintenance and can aid warranty or service visits.
Tip: A quick checklist saves time during peak cleaning seasons.
FAQ
How often should I clean Dyson filters?
Most Dyson vacuums use washable filters that should be cleaned every 1-3 months depending on usage. Let the filters dry completely before re-installing.
Most Dyson vacuums have washable filters; clean every one to three months depending on use, and let them dry before reinstalling.
Can I wash Dyson filters in warm water?
Use cool or lukewarm water for rinsing filters. Do not use hot water or detergents, as heat can damage materials and reduce filtration efficiency.
Rinse filters with cool or lukewarm water only; avoid hot water or detergents.
Why is suction lost after maintenance?
Suction loss usually results from clogs, a full bin, or dirty filters. Inspect and clear these first, then test suction on a clean surface.
Suction loss is typically due to clogs, a full bin, or dirty filters.
Are Dyson brush bars easy to remove for cleaning?
Many Dyson models allow brush bar removal for cleaning; some models require a tool. Always reassemble correctly to avoid belt damage.
Most models let you detach the brush bar for cleaning; reassemble carefully.
Do I need to replace parts regularly?
Replacement parts depend on usage. Replace filters when performance drops and check for wear on seals and brushes according to the manual.
Parts replacement depends on wear; replace filters when performance drops and check seals and brushes.
How do I reset or recalibrate the brush bar after maintenance?
Most Dyson models don’t require a reset. After maintenance, run a test cycle to ensure the brush bar is rotating smoothly and there are no unusual noises.
Usually no reset is needed; test the brush bar after maintenance.
Watch Video
The Essentials
- Clean filters regularly to preserve suction.
- Dry filters completely before reuse.
- Inspect brush bar for hair buildup.
- Check hoses for blockages.
- Follow model-specific guidance from Dyson.