Dyson Vacuum Cleaner Filter Replacement: A Practical Guide
Learn how to replace a Dyson vacuum cleaner filter with confidence. This comprehensive guide covers compatibility, washing options, drying times, reassembly, and maintenance to keep suction strong and air clean.

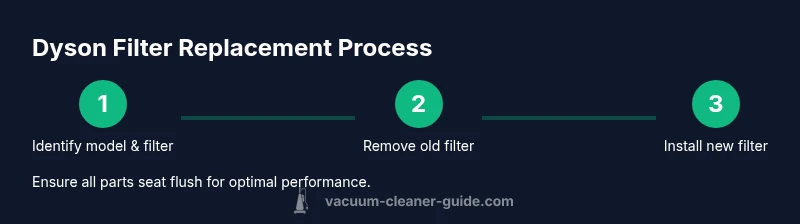
This guide shows you how to replace a Dyson vacuum cleaner filter safely and effectively. You’ll identify the right model-compatible filter, remove the old one, clean or rinse a washable filter, let it dry, and install the new filter correctly. We cover drying times, model variations, and maintenance tips to keep suction strong.
Why Dyson Vacuum Cleaner Filter Replacement Matters
Keeping the filters in a Dyson vacuum cleaner clean and functional is more than a routine chore; it’s a core part of maintaining strong suction, clean air output, and motor longevity. A clogged or worn filter forces the motor to work harder, which can shorten the device’s life and reduce cleaning effectiveness on carpets, hard floors, and pet hair. According to Vacuum Cleaner Guide analysis, regular filter replacement is one of the most cost-effective ways to preserve performance across Dyson models. This is not just about odor control; a healthy filter supports better airflow, more consistent suction, and lower energy use. Different Dyson families use different filter designs—from washable, reusable components to sealed, replaceable modules. The principle remains the same: clean air passes through a barrier that traps dust, allergens, and hair. When the filter is dirty, particles can recirculate into the room or reduce suction, which makes cleaning less efficient and can place unnecessary strain on the motor.
This section also explains what to expect if you skip maintenance. Over time, a clogged filter can cause the vacuum to overheat or trigger performance warnings. By understanding why the filter matters, you’ll approach replacement with purpose and care, ensuring you select the right part and install it correctly for your model. The best practice is to align expectations with your specific Dyson model, then follow the steps and drying recommendations to avoid common pitfalls.
How Dyson Filters Are Designed: Washable vs. Replaceable
Dyson offers a range of filter designs, and the approach you take depends on your model. Some Dyson vacuums use washable pre-motor and post-motor filters that can be rinsed and reused. For these, the key is to rinse under cool water until the water runs clear and to let the filter dry completely before reinstallation. Other Dyson models incorporate non-washable, replaceable filters that are designed to be swapped out on a schedule or when you notice performance decline. Regardless of the type, the goal is the same: maintain strong airflow and trap dust efficiently.
Washable filters benefit from gentle handling and thorough drying in a well-ventilated area. Do not use detergents, and never dry a filter with heat sources like a hair dryer—that can damage the media. If your model is not designed for washing, replace the filter at the recommended intervals. In all cases, always consult your user manual or Dyson’s official parts lookup to confirm whether a given filter is washable and to locate the precise part number for your model family. This diligence helps prevent mismatches that can affect fit and performance and ensures you’re using genuine or model-appropriate parts.
Choosing the Right Filter for Your Dyson Model
To ensure a proper fit and peak performance, start by identifying your Dyson model family. The model number is typically found on the wand, dust cup, or rear of the unit. Once you know the family (for example, V-series, Ball, or cordless lines), check the official Dyson parts catalog or your manual for the compatible filter part. Some models have a single post-motor filter, while others have dual filters (pre-motor and post-motor). If you’ve got a washable filter, confirm the washing instructions and whether the post-motor or pre-motor position is the same across replacements. When shopping, prioritize genuine or model-verified filters to avoid fit issues, reduced suction, or seal leaks. After you receive the new filter, verify it is clean, free of manufacturing residues, and properly labeled for the model family. A quick compatibility check saves time and prevents mis purchases that can hamper performance.
What Improves Air Quality and Suction When Replacing Filters
A fresh filter restores optimal airflow, which translates to stronger suction and more effective particle capture. The improved airflow reduces the burden on the motor, potentially extending the device’s life. Replacing a filter at the right time also minimizes stubborn dust and allergens entering living spaces, contributing to better indoor air quality for households with pets or occupants with sensitivities. In many Dyson systems, the post-motor filter handles the majority of fine dust; keeping it clean helps the vacuum maintain peak performance on both carpeted floors and hard surfaces. If your model has HEPA or sealed filtration, a new filter ensures that the most challenging particles meet an efficient barrier before air exits the unit. The practical result is less frequent maintenance, brighter cleaning results, and lower overall energy usage.
While some models permit washing, others require a straightforward replacement. Regardless of the approach, the core idea remains: timely replacement or cleaning prevents airflow restrictions, reduces heat buildup, and keeps the vacuum performing as designed. Establish a simple maintenance cadence that matches usage—homeowners with pets may need more frequent checks, while light domestic use could extend intervals.
Practical Steps You Can Take Between Replacements
Even between major replacements, small habits help maximize filter life and performance. Keep the vacuum parked in a clean area to reduce dust exposure to the filter housing. Gently wipe the exterior and the intake grates to minimize loose dust that might clog the filter area during next use. If your model supports it, consider a quick weekly sensor check or airflow check—if you notice a drop in suction, inspect the filter housing for blockages or seal integrity. Store replacement filters in a dry, cool place to avoid humidity damage or mold growth before installation. Finally, record the date of each replacement or cleaning in a simple log to maintain a predictable schedule and avoid gaps in maintenance.
Common Mistakes to Avoid During Replacement
Avoid these common missteps that reduce the effectiveness of filter changes. Do not force a filter into a housing or misalign the seal—this can create air leaks and decreased suction. Never use detergents, bleach, or hot water to clean filters, as chemicals and heat can degrade the media and shorten filter life. Don’t skip drying time for washable filters; installing a damp filter can cause mold growth and odor. If you’re replacing a non-washable filter, don’t attempt to “wash” it in water; disposal and replacement are required. Lastly, don’t ignore signs of deterioration such as visible cracks, warping, or a noticeable drop in suction. When in doubt, consult the manual or reach out to Dyson support for model-specific guidance.
Maintenance and Cleaning After Replacement
After installing a new or freshly washed filter, perform a quick cleanup of surrounding areas to prevent loose dust from re-entering the vacuum. If the filter is washable, rinse only with cold water, avoid soaps, and squeeze gently to remove excess water. Place the filter on a drying rack in a well-ventilated area away from direct sunlight or heat sources. Reassemble only after the filter is completely dry. Regular maintenance includes periodic visual checks for wear, odor, and suction changes. A consistent routine helps maintain performance and prolongs the life of your Dyson vacuum.
Safety and Disposal Considerations
Safety first: always unplug the vacuum before starting any maintenance. When disposing of old filters, place them in a sealed bag to minimize dust dispersion and follow local guidelines for recycling or trash disposal. If the filter media shows signs of mold, odors, or visible degradation, replace promptly to protect indoor air quality. Proper disposal reduces environmental impact and avoids potential exposure to dust and allergens.
Quick Reference: How to Identify a Washable vs. Non-Washable Dyson Filter
- Washable filters: typically labeled as washable or reusable and are intended for rinsing with cold water. Allow ample drying time before reuse.
- Non-washable filters: labeled for replacement; do not rinse with water. Replace when performance drops or odor appears.
- When in doubt, consult the model-specific guide or Dyson support to confirm the correct maintenance method for your unit.
Tools & Materials
- Replacement Dyson filter (model-compatible)(Check compatibility with your specific Dyson model (V-series, Ball, cordless, etc.))
- Clean water(Only if the filter is washable; use cold water, no detergents)
- Soft brush or cloth(For gentle exterior cleaning and drying prep)
- Drying surface or rack(Needed if you wash the filter; allow full air-dry time)
- Small tray or basin(To catch any drips during rinsing)
Steps
Estimated time: 1-2 hours active; 12-24 hours drying time if you washed the filter
- 1
Identify the correct filter
Locate your Dyson model number and verify the compatible filter part. This ensures you purchase the right replacement and achieve a proper seal.
Tip: If unsure, photograph the filter area and cross-check with Dyson’s parts lookup. - 2
Power off and prep the area
Unplug the vacuum and clear space around the device to avoid accidental contact with dust during removal.
Tip: Wear gloves if you’re sensitive to dust; this protects your hands and keeps contaminants away from your face. - 3
Open the filter housing
Access the filter housing by locating the cap or panel and carefully opening it according to your model’s design.
Tip: Handle plastic parts gently to avoid cracks; use a soft cloth to protect surfaces. - 4
Remove the old filter
Grip the filter firmly and pull it straight out to avoid dislodging seals or causing air leaks.
Tip: Keep the filter away from your face to prevent dust exposure. - 5
Rinse or clean (if washable)
If your model supports washing, rinse the filter under cold running water until the water runs clear. Do not use detergents.
Tip: Check that the filter is indeed washable before performing this step to prevent damage. - 6
Dry the filter completely
Drain excess water and place the filter on a drying rack in a well-ventilated area. Allow it to air-dry fully before reinstalling.
Tip: Drying times vary with humidity; avoid direct heat or sunlight which can warp the media. - 7
Install the new or dried filter
Insert the new filter until it seats flush and aligns with the housing. Ensure any locking mechanism engages properly.
Tip: A proper fit avoids air leaks and ensures optimal suction. - 8
Test the vacuum
Reassemble the unit, plug in, and run a short test to confirm airflow and suction feel. If performance is off, recheck the seal and placement.
Tip: If you still notice weak suction, remove and reseat the filter to verify a correct fit.
FAQ
Can I wash Dyson vacuum filters?
Many Dyson filters are washable; always confirm with your model manual. Rinse with cold water only and let the filter dry completely before reinstalling.
Yes, many Dyson filters are washable. Check your model’s manual, rinse with cold water, and dry completely before putting it back.
How often should I replace the filter in a Dyson vacuum?
There isn’t a universal interval. Replacement timing depends on usage and model. Replace when you notice reduced suction or unusual odors, and follow your model’s guidance.
There isn’t a universal interval—check your usage and model guidance, and replace when suction drops or odors appear.
What happens if I ignore a dirty filter?
A dirty filter lowers suction, wastes energy, and can cause the motor to strain or wear prematurely. Regular maintenance prevents these issues.
Ignoring a dirty filter can reduce suction and strain the motor, shortening the vacuum’s life.
Do all Dyson filters require disassembly to replace?
Most models have the filter accessible with minimal steps, but some may require slight disassembly. Always follow the model-specific instructions.
Most models let you replace the filter with a simple removal, but follow your model’s manual for specifics.
How do I know the filter is dry before installing a new one?
For washable filters, ensure no moisture remains. Shake gently, check for damp spots, and allow extra drying time if needed.
Make sure the filter is completely dry before reinstalling; a damp filter can cause mold and odor.
Where should I dispose of old Dyson filters?
Dispose in your regular trash unless local guidelines indicate recycling options. Seal the filter to prevent dust release during disposal.
Throw away the old filter with your regular waste unless your local guidelines specify recycling.
Watch Video
The Essentials
- Check compatibility before buying a filter.
- Know whether your model uses washable or replaceable filters.
- Dry a washed filter completely before reinstalling.
- Install the filter correctly to avoid air leaks.
- Document maintenance to sustain suction and air quality.