Why the Vacuum Cleaner Is Not Working: Urgent Troubleshooting
An urgent, step-by-step guide to diagnose and fix common reasons a vacuum cleaner won’t work, with a clear diagnostic flow, safety tips, and maintenance advice.

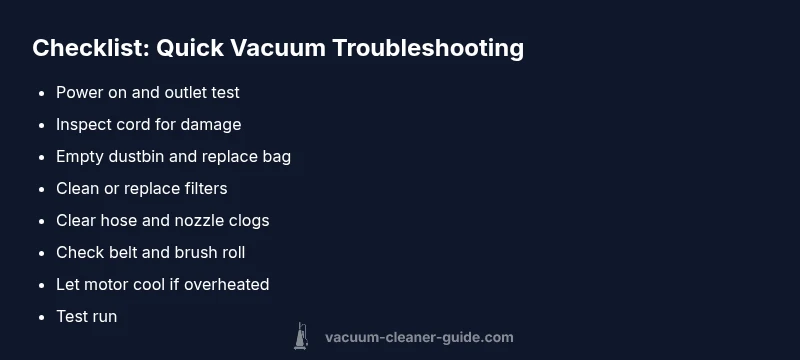
To fix a vacuum that won’t start, begin with simple checks: ensure the power switch is on, test the outlet with a known-good device, and inspect the cord for cuts. Then empty the dustbin and clean or replace filters to restore airflow. If it still won’t run, follow the diagnostic flow and step-by-step fixes in this guide.
Why the vacuum cleaner is not working
If your vacuum isn't functioning, you're not alone. Homeowners and pet owners frequently face issues that range from simple power problems to more stubborn blockages. The most important thing is to stay safe and act in a systematic way. In many cases, the root cause isn't a faulty motor but a simple oversight: a switched-off outlet, a damaged cord, or dirty filters that starve the suction. According to Vacuum Cleaner Guide, most failures are addressable by user-level maintenance and careful inspection. The question why the vacuum cleaner is not working should guide your approach: start with power and airflow, then verify mechanical parts are intact. This article provides practical checks you can perform today, without specialized tools. Vacuum Cleaner Guide's authority comes from years of testing and evaluating common models for reliability and ease of service, so your approach here emphasizes safe, straightforward steps.
wordCount":null},
Steps
Estimated time: 45-60 minutes
- 1
Power and outlet check
Ensure the vacuum’s power switch is in the ON position. Plug the unit into a known working outlet and test with a different device to confirm the outlet has power. If the outlet is controlled by a switch or surge protector, bypass it to test direct power.
Tip: Use a different outlet in a different room to rule out a localized outlet issue. - 2
Inspect cord and plug
Carefully examine the power cord for cuts, kinks, or exposed wires. Do not attempt to repair frayed cords—replace the cord or request professional service if you’re unsure.
Tip: Never pull the plug by the cord; grip the plug itself. - 3
Check dustbin, bag, and filters
Empty the dustbin, replace a full bag, and clean all accessible filters. Dirty filters can reduce performance and trigger safety shutoffs, making the vacuum feel like it’s not working.
Tip: Consult your model’s manual for recommended filter replacement intervals. - 4
Clear airflow obstructions
Inspect the hose, wand, and nozzle for clogs or debris. Remove any obstructions and check the brush head for tangled hair or threads.
Tip: After clearing, test suction at the intake to verify improvement. - 5
Inspect belt and brush mechanism
For belt-driven models, check the belt for cracks or wear. Remove and replace as needed and ensure the brush roll spins freely.
Tip: Align the belt correctly according to the manual to avoid slippage. - 6
Motor cooling and reset
If the unit overheated, unplug and let it cool for 15–30 minutes. Some models have a thermal reset switch; consult the manual before resetting.
Tip: Keep air intakes clear during cooling and avoid running on a full load for extended periods. - 7
Final test and service decision
Reassemble, power on, and run the vacuum briefly to confirm operation. If the issue persists, schedule professional service and review warranty options.
Tip: Document any unusual sounds or smells to aid the technician.
Diagnosis: Vacuum cleaner won't start or loses suction
Possible Causes
- highPower issue (outlet, switch, or cord)
- mediumMotor overheating or thermal cutout
- mediumClogged filters, bag, or hose restricting airflow
- lowDamaged belt or brush mechanism (if present)
Fixes
- easyTest power outlet with a known good device; try a different outlet to rule out a dead circuit
- easyInspect the power switch and unplug safety, replace damaged cords if found
- easyEmpty the dustbin or replace the bag; clean or replace filters
- easyClear clogs in hose, wand, and nozzle; ensure the air path is open
- mediumInspect and replace belt on belt-driven models; check brush roll for obstructions
- easyIf the motor overheated, unplug and allow 15-30 minutes to cool; reset if applicable
- hardIf none of the above works, seek professional repair to avoid further damage
FAQ
What should I check first if my vacuum won't turn on?
Start with the power switch, test the outlet with another device, and inspect the cord for visible damage. If it still won’t start, move through the diagnostic flow to confirm whether a safety switch or overheating cutout is involved.
First check the power switch and outlet, then inspect the cord. If it still won’t start, follow the diagnostic flow for deeper checks.
Can a dirty filter prevent my vacuum from starting?
A clogged filter can cause the motor to overheat or trigger a safety shutoff, which may stop startup or reduce performance. Cleaning or replacing filters is often enough to restore operation.
A dirty filter can cause overheating and shutoffs, so cleaning or replacing it is a common fix.
Is belt replacement safe to do myself?
Belt replacement is doable for many models if you follow the manual and use proper tools. If you’re unsure, seek professional help to avoid damage or injury.
Belt replacement is often doable if you follow the manual; otherwise, a pro can help.
When should I replace the power cord?
Replace a cord if you see cracks, exposed wires, or heat damage. A damaged cord is a fire risk and should be handled by a professional if you’re not confident.
Replace a damaged cord immediately; never use a cord with exposed wires.
What parts most commonly cause suction loss?
Filters, bags, hoses, and blockages in the wand or nozzle are the most frequent culprits. Clearing these parts usually restores suction.
Filers and hoses are common suction culprits; clearing them often fixes the issue.
What if none of the fixes work?
If you’ve exhausted basic troubleshooting, stop using the machine to avoid damage and contact a professional repair service. Check if it’s under warranty for coverage options.
If nothing works, seek professional help and check warranty status.
Watch Video
The Essentials
- Check power first to rule out basic issues
- Clear all airflow obstructions for immediate improvement
- Use the diagnostic flow to triage quickly
- Seek professional help if the unit still won’t operate after basic fixes