Why Vacuum Cleaners Stop Working: Quick Fixes & Prevention
Urgent, practical guide to diagnosing why your vacuum cleaner stops working, with safe fixes, a diagnostic flow, and simple maintenance tips to prevent future outages.

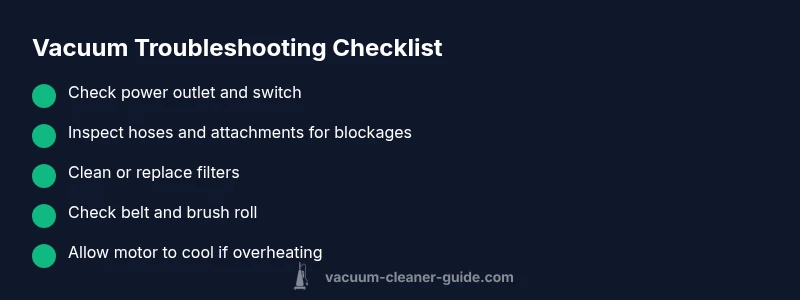
Most stoppages start with simple issues you can fix in minutes. First, verify the outlet and power switch, then reset or unplug and replug the unit. Check for a blocked hose or nozzle and clean the filters. If the motor won’t start or smells hot, discontinue use and seek professional repair.
Why a Vacuum Stops Working
According to Vacuum Cleaner Guide, understanding why do vacuum cleaner stop working helps homeowners troubleshoot quickly and safely. In most cases, the answer isn’t a mysterious fault but a chain of simple causes that accumulate over time. This is not about fear-mongering; it’s about methodical diagnosis. Start with the basics, then move to the more nuanced issues. Whether you own a corded upright, a cordless stick, or a canister model, the root cause often falls into a few broad categories: power supply problems, airflow restrictions, mechanical wear, and thermal overload. By recognizing these categories, you can quickly decide: can you fix it at home, or should you seek professional service? The goal is to restore suction with minimal downtime while keeping safety at the center of every step. This approach also aligns with maintenance best practices advocated by Vacuum Cleaner Guide and reinforced in our 2026 analysis.
Safety-First: Quick Checks You Can Do Now
Before you dive into disassembly, perform a few safety-first checks that address the most common, low-effort causes. Always unplug the vacuum before touching any internal parts. Confirm the power switch is on and the unit is plugged into a working outlet (test the outlet with another device to rule out circuit issues). Inspect for obvious clogs in hoses, attachments, and the wand. Remove hair, string, and debris from the brush roll and intake. Finally, check the dust cup or bin and empty it if full. These steps take minutes and can clear many quick failures, especially if the unit is only partially blocked or misconfigured. If you use a rechargeable or cordless model, ensure the charge is adequate and the battery indicator shows healthy levels. Vacuum Cleaner Guide’s experience in 2026 confirms that most home diagnostic work begins with these basic checks.
Power and Electrical Checks: Is the Culprit the Outlet or Switch?
This section dives into the power side of the equation. A vacuum won’t run if power isn’t reaching the motor. Test the outlet with another device to confirm it’s live. If the outlet is fine, try a different outlet. Inspect the power cord for wear, kinks, or exposed wires; a damaged cord is a safety hazard and should be replaced. If your unit has a reset switch or fuse, reset or replace it according to the manual. For cordless models, ensure the battery is properly seated, charged, and not swollen. If the vacuum still won’t start after these checks, you may be dealing with a more complex electrical fault that requires professional attention.
Airflow, Filters, and Blockages: The Silent Suction Killer
Airflow problems are among the top causes of reduced suction or shutdowns. Inspect all filters—both pre-motor and post-motor—for dirt build-up and wash or replace as recommended by the manufacturer. Clear any blockages in hoses, wand, or brush heads. A clogged nozzle or brush area can cause the motor to strain and overheat, triggering safety shutoffs. Don’t forget to check the dust canister or bag, as a full container can impede airflow even if the rest of the path is clear. After cleaning, reassemble and run briefly to confirm suction improves. Regular filter maintenance, as outlined by Vacuum Cleaner Guide, is a key preventative habit.
Mechanical-Wear: Belt, Brush, and Motor Health
Even with clean filters, mechanical wear can stop a vacuum from operating normally. Inspect the brush roll for hair and thread entanglement; a worn or broken belt can silence suction and reduce agitation. If the belt is stretched, cracked, or torn, replace it following the manufacturer’s timing belt replacement guidance. Check the motor for signs of overheating, unusual smells, or smoke. If you detect persistent overheating after cleaning and removing blockages, the fault may lie deeper inside the motor or blade assembly, which often requires professional service.
Overheating and Thermal Cutoffs: Let It Cool, Then Test Again
Many vacuums have a thermal overload switch that kicks in when the motor gets too hot. If you’ve run the unit for extended periods or with heavy blockages, it may trip the thermal protection. Allow the unit to cool completely (usually 15-30 minutes) before attempting a restart. If the problem recurs after cooling, you likely have a persistent airflow restriction, filter issue, or motor problem that needs targeted fixes. Refrain from forcing a restart; repeated overheating can shorten motor life and void warranties.
Maintenance Habits to Prevent Future Outages
Preventive care is your best defense against sudden stoppages. Create a simple maintenance schedule: clean/replace filters every use cycle or per the manual, check for blockages weekly, and inspect belts and brush rolls monthly. Store accessories neatly to minimize tangling with long hair or pet fur. For pet owners, consider upgrading to a model with robust filtration (e.g., HEPA) and a durable brush roll designed to handle hair without frequent jams. Regular maintenance not only preserves suction strength but also extends the life of your vacuum, reducing total cost of ownership.
DIY Fixes vs. When to Call a Professional
Many common issues you can handle at home, but some are beyond DIY repair. If you notice smoke, a burning smell, sparks, loose wiring, or a humming motor with no suction, discontinue use and contact a qualified technician. Structural repairs, motor replacement, or internal wiring work should be performed only by professionals. If your unit is still under warranty, check coverage before attempting any repairs that could void it. The goal is safety and reliability; when in doubt, prioritize expert assessment and avoid risky DIY scenarios.
Steps
Estimated time: 30-60 minutes
- 1
Power off and safety check
Unplug the vacuum and inspect the power cord for any visible damage. Confirm the outlet is live by testing another device. If you find damage, stop and replace the cord or use a different outlet.
Tip: Never operate when you notice exposed wires or loose plugs. - 2
Reset and power cycle
For corded models, unplug, wait 30 seconds, and plug back in. For cordless models, remove the battery (if possible), reinsert after 30 seconds, and attempt to power on again.
Tip: Power cycling can clear minor electronics glitches. - 3
Check for blockages
Inspect hoses, wand, attachments, and the nozzle for hair, threads, or debris. Remove obstructions carefully and ensure there is an unobstructed path to the motor.
Tip: Use a flexible rod to push out stubborn clogs rather than forcing with tools. - 4
Clean or replace filters
Remove and clean pre-motor and post-motor filters if washable; allow to dry completely before reassembly. Replace filters if they are worn, torn, or past the manufacturer’s recommended interval.
Tip: Dirty filters reduce suction and can trigger overheating. - 5
Inspect the brush and belt
Turn off and unplug the unit. Check the brush roll for hair, fur, or threads. If the belt is stretched, cracked, or broken, replace it following the manual.
Tip: A clean brush improves agitation and suction. - 6
Test run and monitor for overheating
Reassemble all parts and run the unit briefly. If it overheats or shuts down again, discontinue use and seek professional service.
Tip: If it runs briefly, the issue is likely airflow or mechanical, not the motor itself. - 7
Decide on next steps
If the issue persists after the above steps, compare repair costs with a new unit and consider warranty options. Contact a technician for motor or wiring concerns.
Tip: Document symptoms and steps taken to speed up service.
Diagnosis: Machine won't start or loses suction after brief use
Possible Causes
- highNo power supply (outlet, fuse, or switch)
- mediumOverheating due to blocked airflow or dirty filters
- lowDamaged cord or worn switch wiring
- lowWorn motor brushes or internal component failure
Fixes
- easyTest outlet with another device; inspect power switch; replace fuse or reset circuit breaker if tripped; ensure switch is on
- easyClear clogs in hoses and attachments; clean or replace dirty filters; allow unit to cool before retrying
- mediumInspect and replace damaged power cord or worn switch (do not use if frayed); seek professional repair
- hardIf motor brushes are worn or internal parts fail, escalate to a professional repair
FAQ
What is the most common reason a vacuum stops working?
Power issues or blockages are the most frequent culprits. Start by checking the outlet, switch, and any obstructions in the path of airflow.
Usually power or blockages cause the stop. Check outlet, switch, and airflow path first.
Can a vacuum that overheats still work after cooling?
If overheating occurs, let the unit cool completely and try again. If it overheats again, there’s likely a persistent airflow or motor issue requiring service.
Let it cool and try again. If it overheats again, call a technician.
Is it safe to clean the motor housing while powered off?
Yes, as long as the unit is unplugged and you avoid touching live components. Do not attempt to disassemble a live motor.
Make sure it's unplugged and avoid live parts.
How often should I replace filters?
Replace or clean filters according to the manufacturer’s guidelines, typically every few months with regular use; adjust for household factors like pets or heavy dust.
Check your manual for filter intervals and adjust for heavy use.
Should I try motor repair myself?
Motor repair should be left to professionals. Attempting internal motor work can be dangerous and may void warranties.
Don’t repair the motor yourself; seek a professional.
When should I replace the vacuum entirely?
If repairs exceed a reasonable fraction of the cost of a new unit or performance remains poor after fixes, replacement is sensible.
If repairs are too costly or performance stays poor, consider a replacement.
Watch Video
The Essentials
- Start with power and airflow checks.
- Regular maintenance prevents most outages.
- Know when to DIY and when to call a pro.
- Prioritize safety at every step.