Why Is My Vacuum Cleaner Not Turning On? Troubleshooting Guide
Discover why your vacuum won't turn on and follow a step-by-step troubleshooting path from power checks to common faults. Safe, practical fixes from Vacuum Cleaner Guide.

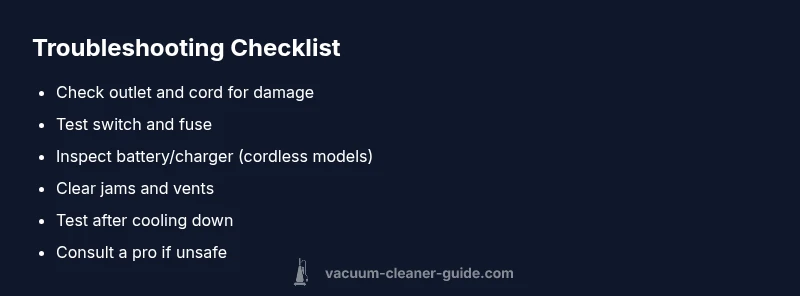
The most common reason a vacuum won't turn on is a power issue. Start with basic checks: confirm the outlet is live, inspect the power cord for damage, and make sure the on/off switch is fully engaged. If you use a cordless model, verify the battery is charged and the charger works. If it still won't start, follow the step-by-step guide below for safe, effective fixes.
Why is my vacuum cleaner not turning on
When a vacuum refuses to start, the cause is rarely mysterious. In many homes, the fault lies with power delivery or safety features tripping, not a broken motor. According to Vacuum Cleaner Guide, the typical culprits are a dead outlet, a damaged power cord, a blown fuse or circuit breaker, or a faulty on/off switch. For cordless vacuums, the battery or charger is the usual suspect. In 2026, homeowners report that most starting issues are resolved with quick checks rather than expensive repairs. This block guides you through a practical, model-agnostic approach to identify the root cause and restore operation safely. Keep the user manual handy—some models require model-specific steps to access internal components.
Start with the basics: safety first
Safety is non-negotiable when troubleshooting appliances. Unplug the vacuum and disconnect from any charging station before you touch any internal parts. Inspect the power cord for cuts, kinks, or exposed wires; a damaged cord is a common reason for no power and is also a fire hazard. Confirm the outlet is live by testing with another device, and check your home's circuit breaker. If you notice the socket or breaker tripping, reset it and test again with a different outlet. For cordless vacuums, ensure the charger is appropriate for the model and that the battery is seated correctly in the dock or pack. Avoid using adapters or improvised charging setups. If you follow these basics and still have no power, proceed to targeted checks described in the following sections. Vacuum Cleaner Guide emphasizes safety first for every diagnostic path.
Corded vs cordless: different checks
Corded vacuums and cordless models fail for different reasons and need separate tests. With corded machines, a non-start is often due to the cord, plug, outlet, or a blown fuse in the power strip. Check the cord end at the plug for damage and test the outlet by plugging in a lamp. If the vacuum has a resettable fuse, you may need to open a panel to locate it—if you’re not comfortable, skip to a professional. For cordless models, battery health is the main issue. Confirm the battery is charged and the charger indicator glows. If the charger shows no light, test the adapter with a multimeter or try another compatible charger. Overheating can also trigger automatic shutoff, especially in mid-cleaning sessions. If the battery won’t take a charge after a full cycle, it’s often time to replace the cell pack. Each model uses different battery chemistry and safety features; consult the manual before attempting battery replacement.
Inspect components that commonly fail
Most starting problems arise from components that bear the load during operation. The switch is a frequent failure point; you can test basic continuity with a multimeter if you have one. A stuck or loose belt can also prevent the motor from starting; examine the brush roll area and remove any tangled debris. If you hear a humming sound but the brush doesn’t spin, the motor may be receiving power but blocked mechanically. Thermal protections are a hidden but important cause; many vacuums feature a thermal fuse that opens when the motor overheats. If you suspect overheating, let the unit cool for at least 30 minutes and then try again. If you still won’t start, the fuse or switch is the likely culprit and should be replaced by a technician if you are unsure. Vacuum Cleaner Guide notes that the right diagnosis often saves money and time.
Quick fixes you can try now
If you’re comfortable with light DIY, you can try a few non-invasive fixes: swap the power outlet, clear out any clogs in the dust path, and re-seat the dust bag or canister. For cordless models, fully charge the battery and then reinsert it. Reset any resettable switches or circuit breakers after an overload. Clean the contacts on the base and charging dock to ensure a solid connection. If the vacuum still fails to start, move to step-by-step repair or professional service. Quick fixes often resolve the problem without disassembly, but if you smell burning or notice melted plastic, discontinue use immediately and seek professional help. Vacuum Cleaner Guide emphasizes caution with wiring and high-heat components.
When to replace rather than repair
If diagnostics point to a weak battery, worn brushes, or a damaged motor that would require extensive disassembly, replacement is often the wiser option. Compare replacement cost with a new unit that uses similar performance and has better energy efficiency. If the model is older than 6–8 years and maintenance has been inconsistent, replacing may offer better long-term value. Warranties and service plans can cover certain repairs, so check coverage first. The decision to replace should balance safety, performance, and total cost of ownership. Vacuum Cleaner Guide consistently advises evaluating long-term reliability over a quick fix.
Maintenance to prevent starting issues
Prevention is easier than repair. Schedule periodic checks of filters, seals, and dust canisters. Clean the motor vents and remove hair or lint from the brush roll to prevent overheating. Store the vacuum in a cool, dry place, away from direct sunlight and moisture. For cordless models, avoid extreme temperatures and never leave a charging battery on carpet or flammable surfaces. Record model-specific maintenance tasks in a simple checklist and perform them quarterly. Following these habits reduces the chance of future starting problems and extends the life of your vacuum.
Steps
Estimated time: 30-45 minutes
- 1
Power safety check
Unplug the unit and disconnect from any charger. Confirm you’re working on a dry surface and away from water or moisture. Gather a flashlight and basic tools in case you need to peek inside.
Tip: Never start disassembly without unplugging; static discharge can damage electronics. - 2
Test the power source
Plug a lamp or another device into the same outlet to verify it’s live. If the outlet fails, try another wall socket or reset the circuit breaker before retrying the vacuum.
Tip: If the outlet is controlled by a switch, ensure the switch is ON. - 3
Inspect the cord and plug
Look for cuts, exposed wires, or kinks in the cord. If you see damage, replace the cord or the entire unit if the cord is not serviceable. Check that the plug prongs are clean and making solid contact.
Tip: Do not use damaged cords; they pose shock and fire risks. - 4
Check the switch and fuse
Test the power switch for simple operation. If you can access a fuse, check whether it’s blown and replace if applicable. If you’re unsure, skip to a professional to avoid wiring hazards.
Tip: Some models require a service manual to access the fuse. - 5
Assess for overheating or jams
If the vacuum has been overheating or the brush is jammed, clear debris and allow cooling. A thermal fuse may have opened; if you suspect this, do not bypass safety features.
Tip: Always unplug before removing debris from the brush area. - 6
Cordless battery health check
For cordless models, confirm battery is seated properly, charger indicator glows, and battery holds a charge. If the battery won’t hold a charge after a full cycle, replacement is often needed.
Tip: Charge the battery in a well-ventilated area away from flammable materials.
Diagnosis: Machine won't start when plugged in or charged
Possible Causes
- highPower supply issue (unplugged outlet, dead circuit, or damaged cord)
- highTripped circuit breaker or blown fuse in power strip/house wiring
- mediumFaulty on/off switch or resettable fuse inside the vacuum
- lowBattery/charger failure for cordless models
Fixes
- easyTest outlet with another device and try a different outlet
- easyInspect cord for damage and replace if frayed
- easyReset breaker, replace a blown fuse, or unplug/plug again after a short wait
- mediumReplace defective switch or examine internal fuse with a professional
- easyCharge or replace the cordless battery/charger
FAQ
Why won't my corded vacuum turn on even when it’s plugged in?
First check the outlet, then test another device in the same socket. If the outlet is live, inspect the cord for damage and examine the vacuum’s switch. If there’s a fuse or resettable breaker, reset or replace as needed. If it still doesn’t start, professional service may be required.
Check the outlet and cord first, then verify the switch and any fuse. If it still won’t start, seek professional help.
My cordless vacuum won't charge or hold a charge. What should I do?
Verify the charger is compatible with your model and that the battery sits properly in its dock. Check the charger indicator; if there’s no light, try another charger or test the outlet. If charging still fails, the battery may be worn and require replacement.
Check the dock, charger, and outlet. If charging still fails, consider replacing the battery.
Is a faulty switch a common starting issue?
Switch failures happen but are not universal. If the switch feels loose or doesn’t respond, it’s a likely culprit. A professional can verify continuity and replace the switch if needed.
A failing switch is a common cause and should be checked by a professional if simple tests fail.
What should I do if I hear a humming sound but the brush won’t spin?
Humming often means the motor is powered but blocked or overheating. Clear debris from the brush area, check for belt wear, and allow the unit to cool if it’s hot. If the problem persists, inspect for a seized motor or clogged vents and seek service.
If you hear humming but the brush won’t spin, clear jams and check for overheating; seek service if it persists.
Can I fix this under warranty or should I replace it?
Check the warranty terms and eligible repairs. If the unit is old or repair costs are high, replacement can be more economical. Always confirm coverage before paying for service.
Review your warranty first; replacement can be cheaper for older models.
How can I prevent starting problems in the future?
Follow a regular maintenance routine: clean filters, inspect cords, and keep vents clear. Store the vacuum properly and avoid extreme temperatures. Regular checks reduce the odds of unexpected failures.
Keep up with maintenance and proper storage to prevent future starting problems.
Watch Video
The Essentials
- Inspect power supply before disassembly
- Test outlet and circuit breaker first
- Check for visible cord or battery faults
- Do not bypass safety features; seek pro help if needed
- Consider replacement if repair costs exceed value