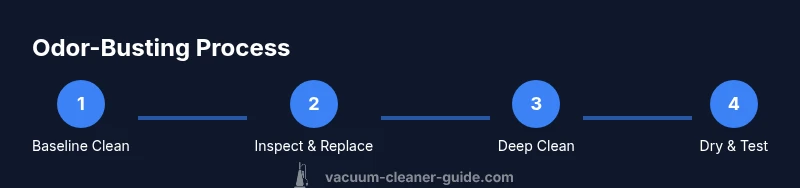
How to Make Vacuum Cleaner Smell Better
Discover proven, safe steps to refresh your vacuum's scent. Clean the dust path, replace filters, and use deodorizing methods that suit pet owners and busy homes. Quick baseline clean followed by deeper maintenance for lasting freshness.

To make your vacuum smell better, start with a thorough dry clean, then deodorize the dust path. Empty and sanitize the bag or canister, replace or clean filters, and wipe the interior. Run a short cycle with a deodorizer or baking soda, and finish by cleaning attachments and storing parts dry.
Why Odors Form in Vacuum Cleaners
Odors in vacuums typically arise from a buildup of trapped dust, pet hair, moisture, and mildew inside the dust bin, filters, hoses, and attachments. When air is circulated through a dirty dust cup or clogged filter, stale smells can re-emerge with each use. Mold spores and damp debris can cling to surfaces, especially in humid environments or households with pets. Understanding the odor sources helps you target the right parts during cleaning and prevents recurring smells. Regular maintenance reduces the risk of persistent odors and keeps indoor air fresher for you and your family.
Quick Baseline Clean-Up
Begin with a fast, but thorough, baseline clean. Unplug the unit, then empty the dust bin or bag. If you have a bagless model, dump the contents into a trash bag and wipe the cup with a damp microfiber cloth to remove residue. For bagged models, replace the bag if it looks full or has a damp, musty odor. Inspect the filters next; pre-motor and exhaust filters catch most odors and debris. If the model supports washing, rinse the filters under warm running water until clear, then dry completely (safest practice is 24 hours in a well-ventilated area). Wipe the interior canister surfaces and seals with a lightly damp cloth, and ensure no moisture remains near the motor housing. Reassemble and run a brief test cycle to flush out loosened dust. This quick clean removes obvious odor sources and sets the stage for deeper maintenance.
Thorough Filter and Bag Replacement
Filters and bags are the smell control backbone. Replace or wash washable filters according to your model’s guidelines. Dirty filters not only reduce suction but also harbor odors. When replacing, choose the correct filter type and confirm compatibility with your model. If you use reusable filters, rinse them promptly and dry completely before reinstallation. After replacing, run the vacuum on a short cycle to prime air flow and verify that the airflow feels strong and odor-free. This step dramatically reduces embedded smells and improves overall performance.
Cleaning the Dust Path, Hoses, and Attachments
Odors often linger in the hoses, dust path, and attachments where moisture and hair accumulate. Detach hoses and remove visible debris with a small brush. Rinse attachments with warm, soapy water and air-dry completely before reusing. If your model allows, wipe the interior of the dust path with a microfiber cloth dampened with water or a mild detergent solution, taking care not to saturate electrical components. A quick blast of dry air through hoses can help speed up drying. This deep clean eliminates odor reservoirs that storage-only cleaning misses.
Safe Deodorizers and Odor Neutralizers
Use deodorizing strategies that are safe for you and your vacuum’s components. Sprinkling a light layer of baking soda in the dust bin can absorb odors; avoid clumping, keep it away from the motor, and do not inhale dust while handling. Activated charcoal or a manufacturer-approved deodorizing sachet placed in the dust cup (not touching filters) can also help. A diluted vinegar solution (one part vinegar to four parts water) can neutralize funky smells if used on solid plastic surfaces away from electrical parts, then completely air-dry. Never spray liquids directly into the intake or motor housing. This section helps you choose odor-control methods that won’t damage the vacuum.
Maintenance Schedule and Prevention
Prevention is simpler than frequent deodorizing. Establish a regular maintenance routine: empty the bin or bag after each significant use, replace or wash filters per the manufacturer’s schedule, and wash or wipe attachments every few uses. Store the vacuum in a dry area with good air circulation to prevent musty odors from developing. A quick quarterly deodorization ritual—light baking soda in the dust cup, a quick wipe of interior surfaces, and a check of seals—keeps smells at bay. Documenting care steps in a home maintenance log can help you stay on track.
Attachment Care, Hoses, and Seals
A lot of odor hiding spots live in hoses and seals. Inspect seals for cracks and ensure connections are tight to prevent air leaks that spread smells. Clean hoses with a long brush or flexible cleaning wand to remove hair and lint. Dry all parts completely before reassembling to prevent moisture-related odors. If you notice persistent odors after cleaning, consider replacing worn hoses or seals and upgrading to a fresh filter. This ensures long-term odor control and better performance.
Tools & Materials
- Vacuum cleaner(Unplug before starting; inspect for obvious odor sources.)
- Replacement bags/filters(Have on hand; check compatibility with model.)
- Microfiber cloths(For interior wiping; use dry or slightly damp cloths.)
- Soft brush or nozzle(For cleaning hoses and hard-to-reach areas.)
- Baking soda(Sprinkle in dust bin; avoid motor contact.)
- White vinegar (optional)(Diluted 1:4 with water for odor neutralization; avoid near motor.)
- Mild dish soap(Wash attachments; use warm water.)
- Water for rinsing(Use only on attachments; keep away from motor.)
- Spray bottle(For applying deodorizer or diluted vinegar solution.)
- Drying rack or sunny spot(Ensure parts are fully dry before reassembly.)
Steps
Estimated time: 45-60 minutes
- 1
Unplug and assess
Power off and unplug the vacuum. Remove the dust cup or bag and inspect for obvious odor sources like damp debris. This initial check helps you target where odors originate.
Tip: Starting with a visual check saves time later. - 2
Empty and replace filters
Dump the dust bin or bag, then replace or wash the pre-motor and exhaust filters according to your model's guidance. Dry any washed filters completely before reinstalling.
Tip: Fresh filters dramatically improve odor control and suction. - 3
Wipe interior surfaces
Wipe the interior canister, lid, and seals with a microfiber cloth dampened with water or mild soap. Avoid saturating any electrical parts and let everything dry fully before reassembly.
Tip: Drying is critical to prevent mildew odors. - 4
Deodorize the dust path
Sprinkle a light layer of baking soda inside the dust bin if the model is bagless, or place a sachet in the dust cup area away from the motor. Let it sit 10–15 minutes, then vacuum to distribute or remove before re-use.
Tip: Do not let baking soda contact the motor or filters. - 5
Clean hoses and attachments
Detach hoses; use a small brush to remove hair and lint. Wash attachments with warm, soapy water and air-dry completely before reconnecting.
Tip: Ensure no moisture remains before reattachment. - 6
Optional deodorizing cycle
If your model supports it, run a short cycle with a manufacturer-approved deodorizer or a diluted vinegar solution on hard surfaces away from the motor. Do not spray liquids into the intake.
Tip: Follow manufacturer directions for any additives. - 7
Test run and reassembly
Reassemble the unit and run it on a brief cycle to verify improved odor and airflow. Check for any unusual sounds or heat build-up.
Tip: If odors persist, repeat cleaning of filters and dust path. - 8
Final check and storage
Store the vacuum in a dry, ventilated area. Maintain a quarterly odor check: empty the bin, replace filters, and wipe down surfaces to prevent smell buildup.
Tip: Create a simple maintenance reminder to stay on track.
FAQ
What causes vacuum odors?
Odors typically come from trapped dust, pet hair, moisture, and mold in the dust bin, filters, hoses, and attachments. Regular cleaning replaces these odor sources.
Odors come from dust and moisture trapped inside the vacuum; regular cleaning helps.
Can I use essential oils in my vacuum?
Essential oils can leave residue and may damage seals or the motor over time. Avoid adding them inside the unit; use outside air fresheners instead.
No—essential oils can harm parts inside the vacuum.
Is it safe to spray cleaners into the vacuum?
Spraying liquids into the intake or motor can cause electrical damage and pose a safety risk. Use dry methods or manufacturer-approved cleaners on non-electrical surfaces.
Don't spray liquids into the vacuum; it can ruin the motor.
How often should I replace filters to prevent odors?
Follow the manufacturer’s schedule; most homes benefit from replacing or washing filters every 3–6 months, depending on usage and pet presence.
Change filters every few months for best odor control.
Will baking soda harm my vacuum?
Baking soda is generally safe in the dust bin if kept away from the motor and seals. Avoid clumps and never apply moisture to electrical parts.
Baking soda can help, but keep it away from the motor.
What about pet odors?
Pet odors often come from dander in filters and hoses. Wash attachments, sanitize the dust path, and consider HEPA-compatible filters for better odor control.
Pet smells come from dander; clean parts and replace filters.
Can I wash my vacuum's filters?
Only wash filters if the manufacturer permits. Some filters are not washable and must be replaced. Always dry completely before reuse.
Check the manual; some filters aren’t washable.
Watch Video
The Essentials
- Empty and sanitize the dust bin or bag after use.
- Replace or wash filters regularly to curb odors.
- Wipe interior surfaces and dry thoroughly to prevent mildew.
- Use safe deodorizing methods and avoid liquids near the motor.
- Establish a routine maintenance schedule to prevent future odors.