Why Does Vacuum Cleaner Smell Bad? Practical Troubleshooting for Odors
Discover common causes of vacuum odors, practical fixes, and maintenance tips to keep your home smelling fresh. Learn how to diagnose smells, perform safe DIY fixes, and prevent future odors with expert guidance from Vacuum Cleaner Guide.

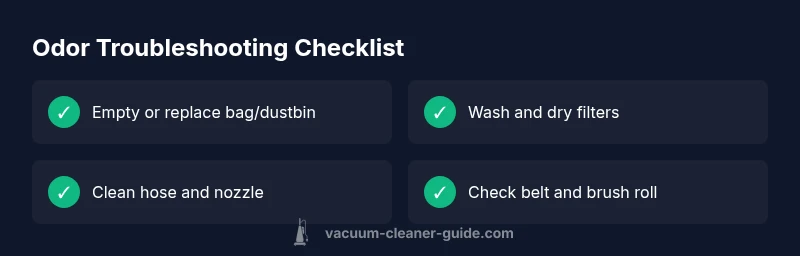
The most common causes are a dirty filter or bag, mold in the dustbin or hose, and a blocked brush roll that traps odor. Quick fix: empty or replace the bag, clean or replace the filter, rinse the dustbin and hose, and run a short deodorizing cycle with water and a touch of baking soda. If the smell persists, inspect motor and belts.
Why does a vacuum cleaner smell bad?
The question "why does vacuum cleaner smell bad" is surprisingly common among homeowners and pet owners who rely on trustworthy gear. Odors crop up from moisture, stubborn debris, or trapped residues that heat during operation. According to Vacuum Cleaner Guide analysis, most smells originate in the filtration path, the dustbin, or the brush area, not necessarily the motor itself. A systematic approach helps you identify the source quickly and safely, so you can restore fresh air in record time. In this guide, we’ll unpack odor types, step-by-step checks, and prevention strategies so you can diagnose and fix odors with confidence.
Common odor profiles and their meanings
Odors can signal different problems. A burnt rubber or electrical smell often points to overheating or worn belts. A musty, moldy odor usually means moisture trapped in the canister, hose, or filters. A sour, spoiled odor can come from damp debris lingering in the dust cup. A chemical or plastic scent might indicate a degraded seal or overheated plastics. Recognizing the pattern helps you target the right component without unnecessary disassembly. Vacuum Cleaner Guide emphasizes that odors are rarely a mystery if you track the odor type to its likely location in the airflow path.
Quick checks you can do today
Before you start dismantling parts, perform fast checks:
- Unplug the unit and remove all attachments.
- Check the dustbin/bag; replace a full bag or empty and rinse the canister if washable.
- Inspect the filters; clean or replace as directed by the manufacturer.
- Look at the brush roll and hose for trapped hair or threads.
- Run the vacuum briefly outside or in a tub to test airflow and odor before returning it to duty. This early triage can reveal the simplest fixes and reduce downtime. The aim is to restore airflow and prevent moisture buildup that feeds odors.
Filtration and dustbin: the usual culprits
Filters and dustbins are the first line of defense against odor. A clogged or saturated filter restricts airflow, trapping smells rather than venting them. The dustbin or bag can accumulate damp debris, which becomes a source of musty odors. If your model has washable filters, rinse them thoroughly with warm water and let them dry completely before reinstalling. Always ensure the bin is completely dry; moisture left inside can reintroduce the odor on the next use.
Cleaning the nozzle, hose, and brush roll
Odors often originate where hair, dust, and food particles accumulate. Remove the nozzle plate and check for clogs. Detach the hose and inspect for blockages; use a long flexible brush to dislodge debris. Clean the brush roll and remove tangled hair—this reduces friction and prevents heat buildup that can amplify smells. Reassemble and run a quick test to confirm whether the odor improves.
Motors, belts, and seals: when odor signals trouble
If cleaning the obvious culprits doesn’t help, odors can indicate issues in the motor area, belt wear, or seal degradation. A burnt odor, odd grinding, or reduced suction may hint at belt slippage or motor overheating. In many cases, you can reseat belts, lubricate pulleys as recommended by the manual, and test. If the odor persists or you notice smoke or sparking, discontinue use and seek professional service to avoid safety risks.
Safe deodorizing and odor prevention
Deodorizing should be done with caution. Use only products approved by the manufacturer or simple, non-irritating options like small amounts of baking soda mixed with water for a fresh rinse. Avoid pouring liquids directly into the motor housing, and never spray fragrances into the intake. After deodorizing, run the vacuum on a hard surface or outside to ventilate before indoor use. Regular maintenance reduces the likelihood of recurring smells.
Maintenance plan to prevent smells
Establish a simple routine:
- Check and replace filters as recommended by the manufacturer.
- Empty the dustbin as soon as it’s full; wash washable parts.
- Inspect belts, seals, and brush rollers every 3–6 months.
- Store the vacuum in a dry area to prevent moisture buildup.
- Schedule a quarterly quick clean of hoses and nozzles. Proactive care minimizes odors and extends the life of your machine.
Troubleshooting flow recap
If you still notice a smell after the above steps, revisit each relevant component in a logical sequence: dustbin/bag → filters → hose/nozzle → brush roll → belts/seals → motor area. This structured approach shortens diagnosis time and reduces the likelihood of missing a hidden odor source.
Steps
Estimated time: 30-45 minutes
- 1
Power down and unplug
Unplug the vacuum before inspecting any parts or removing attachments. This avoids accidental startup and protects you from electrical hazards. If your model has a safety switch, use it to confirm power is off before proceeding.
Tip: Always work in a dry area and have a bowl ready for any loose parts. - 2
Check the bag or dustbin
If the bag is full, replace it. If you use a bagless model, empty the dustbin and rinse it with warm water. Dry completely before reassembly to prevent lingering moisture.
Tip: Use a lint-free towel to dry the interior of the bin thoroughly. - 3
Inspect and clean filters
Remove filters and rinse washable ones under running water until clear. If filters are non-washable or heavily stained, replace them. Let all parts air-dry completely before reinstalling.
Tip: Check the manufacturer’s guidance to know which filters are washable. - 4
Clean hose, nozzle, and brush roll
Detach the hose and tool attachments and look for obstructions. Use a long brush to push out debris; wipe the nozzle and brush roll with a damp cloth.
Tip: Avoid using sharp tools that could damage delicate parts. - 5
Reassemble and test
Put everything back together and run the vacuum briefly on a non-carpet surface to monitor airflow and odor. If possible, run it outside to ensure it’s venting clean air.
Tip: A successful test should produce no new odors and strong suction. - 6
Evaluate the odor after a test
If the smell is gone, resume normal use and keep up with routine maintenance. If the odor returns, move to deeper inspection of motor area or seals, or seek professional help.
Tip: Document any recurring odor to share with a technician.
Diagnosis: Machine emits a bad odor during or after use
Possible Causes
- highDirty filter or full bag/dustbin
- mediumMoisture or mold in canister, hose, or filters
- lowClogged brush roll or hose with trapped debris
- lowOverheating motor or worn belt/seal
Fixes
- easyEmpty/replace bag and wash/dry dustbin; inspect airflow path
- easyClean or replace filters; wash and thoroughly dry the canister and hose
- easyRemove hair and debris from brush roll; clear hose blockages
- mediumCheck motor area, belts, and seals; consider professional service if odor remains
FAQ
Why does my vacuum smell burnt after use?
A burnt odor often signals overheating, a worn belt, or a jammed brush. Stop using the vacuum, inspect the belt and brush, and clean any debris. If the smell persists, seek professional service to prevent motor damage.
A burnt smell usually means the motor or belt is overheating. Stop and inspect the belt and brush, then consult a pro if it continues.
What should I do if the odor is musty or moldy?
Musty odors come from moisture buildup in the canister, hose, or filters. Empty and dry all parts completely, wash washable components, and ensure proper drying before reassembly.
Musty odors point to moisture in the vacuum. Dry everything thoroughly and clean filters before using again.
How often should I clean or replace filters?
Follow the model’s manual. Washable filters should be cleaned regularly and replaced on the schedule recommended by the manufacturer, to keep odors down and maintain suction.
Check your manual for filter care intervals and replace when advised.
Can I use room deodorizer inside the vacuum?
Only use products approved by the manufacturer. Introducing liquids or sprays not intended for the intake can damage the motor and seals.
Only use manufacturer-approved products; avoid unverified deodorizers in the vacuum.
When should I call a professional?
If odors persist after DIY maintenance or you notice signs of electrical issues, smoke, or unusual heat, contact a licensed technician. They can diagnose motor, belt, or seal problems safely.
If it still smells after DIY checks, it’s time for professional help.
Watch Video
The Essentials
- Identify odor type to target the source
- Prioritize filters, then dustbin/bag
- Dry all washable parts thoroughly
- Use manufacturer-approved deodorizing methods