How to Keep Vacuum Cleaner from Smelling Like Dog
Learn practical steps to eliminate dog odors from your vacuum, prevent recurrence, and keep your home fresh with expert guidance from Vacuum Cleaner Guide.

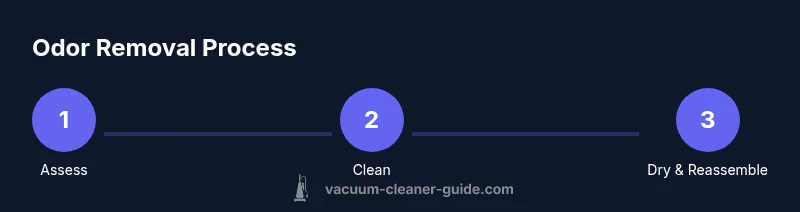
This quick answer outlines how to keep vacuum cleaner from smelling like dog by targeting the source: seals, filters, canister, and attachments. Start with a thorough emptying, then deep-clean the brush roll, hoses, and bin, followed by a fresh deodorizing rinse and a preventive maintenance routine. These steps reduce lingering odors and help your home stay pet-friendly.
Why dog odors persist in vacuums and how to approach the problem
According to Vacuum Cleaner Guide, pet odors can cling to internal surfaces of a vacuum, especially in homes with dogs. Odors often hide in the canister, filter media, brush canisters, hoses, and the crevices of attachment wands. The good news is that a disciplined cleaning routine can prevent those smells from returning. The goal is to break the odor cycle at the source, sanitize exposed surfaces, and create a simple ongoing maintenance plan that fits a busy household. By understanding that dog odors aren’t just surface smells but residues that can embed in components, you’ll approach maintenance with the right expectations and a clear process.
Common odor sources inside the machine
Dog-related odors usually originate from a combination of trapped fur, skin cells, and dust that mingle with moisture and heat. The motor housing, seals, and gaskets can harbor smells if air flow is restricted. Filters, especially used beyond their service life, can become saturated with pet dander and oils. The brush roll and belt area may retain hair and oils from dogs, while hoses can trap saliva, saliva-based residues, and damp debris after cleaning up muddy or wet fur. Recognizing these hotspots helps you target cleaning efforts effectively and reduces the likelihood of re-smell.
Quick checks you can perform today
Before diving into deeper cleaning, perform a fast, high-impact check: 1) Empty the canister or bag and discard waste into a sealed trash bag. 2) Inspect the primary filter—if it’s washable, rinse with cool water; if non-washable, replace. 3) Wipe the exterior, crevices, and the dust cup with a damp microfiber cloth. 4) Briefly run the vacuum outdoors with the nozzle detached to confirm airflow feels strong and smells are reduced after cleaning. These quick checks can dramatically lower dog odor without a full teardown.
Deep-cleaning: a detailed plan to remove dog smells from your vacuum
A thorough cleaning targets every potential odor reservoir. Start by unplugging the unit and removing all detachable parts. Wash the dust cup, cyclone, or canister with mild soap and water, rinse, and completely dry. Clean the brush roll to remove fur tangles and oils; use a small brush to dislodge stubborn debris. Inspect hoses for blockages and wipe interior surfaces with a damp cloth. For odor neutralization, mix a mild solution of water and white vinegar (1:1) or a baking soda paste for stubborn spots, then rinse and dry completely. Reassemble and run a short test cycle with the vacuum to ensure the odor is minimized. Through each step, avoid soaking electrical components and never submerge any motor parts. Vacuum Cleaner Guide recommends allowing all components to dry fully to prevent mold and mildew.
Odor prevention: habits for pet owners to keep smells from returning
Prevention is easier than remediation. After cleaning, install fresh or freshly washed filters, keep seals intact, and replace worn gaskets promptly. Maintain a regular schedule to rinse or replace filters every 1–3 months depending on use, and consider a carbon filter upgrade if your model supports it. Keep hoses and attachments dry after use, and store the vacuum in a well-ventilated area instead of a sealed cabinet to prevent musty odors from developing. A quick post-clean routine—spritzing the interior with a mild, pet-safe deodorizer (or simply airing out for 20–30 minutes)—helps maintain freshness between deeper cleans.
Choosing odor-control aids and replacement parts for ongoing maintenance
Look for odor-control aids compatible with your vacuum model, such as activated carbon filters, washable HEPA filters, and odor-neutralizing sprays designed for household vacuums. When parts wear or become saturated with pet odors, replacement filters and gaskets are often the most effective long-term solution. If your model uses bags, ensure you’re using the correct bag type and replace bags promptly to prevent odor buildup. Always verify compatibility with the manufacturer’s manual before purchasing replacements.
When to seek professional help or consider replacement
If persistent dog odors linger after thorough cleaning and filter replacement, you may be facing a failing motor seal, mold growth inside the canister, or a non-removable odor source. In such cases, consult a professional appliance technician or consider replacing the unit, especially if it’s older or frequently exposed to wet fur and saliva. Regular maintenance is still valuable, but professional assessment can prevent ongoing odor problems and protect your investment.
Tools & Materials
- Mild dish soap or gentle detergent(For washing plastic parts and the dust cup)
- White vinegar(Dilute 1:1 with water for odor neutralization)
- Baking soda(For deodorizing and odor absorption)
- Water(For washing parts; ensure cool, not hot)
- Microfiber cloths(Multiple for different parts (exterior, interior))
- Soft brush(For hair and fur removal from brush roll and crevices)
- Old toothbrush(Detail cleaning in tight spots)
- Bucket(For soaking parts if needed)
- Replacement filters or gaskets(Stock up if your unit uses washable or replaceable filters)
- Gloves(Protect hands when handling dirty parts)
- Spray bottle(Applied solution for targeted areas)
Steps
Estimated time: 60-90 minutes
- 1
Power down and unplug
Always disconnect power before handling any vacuum components to avoid electric shock or injury. This is the foundational safety step that protects you during cleaning.
Tip: Double-check the cord outlet and switch location to prevent accidental startup. - 2
Remove canister or bag and empty
Take out the dustbin or bag, empty contents into a sealed bag, and wipe the interior with a damp microfiber cloth. Inspect for hair and debris that could harbor smells.
Tip: Dispose of waste promptly to minimize odor exposure and re-contamination. - 3
Inspect and clean the filters
If the filter is washable, rinse under cool running water until clear, then air-dry completely. If it’s not washable or seems degraded, replace it with a compatible filter.
Tip: Avoid using hot water and never reinstall a wet filter. - 4
Clean the brush roll and bearings
Remove hair and fur from the brush roll using a comb or scissors; wipe with a damp cloth, and dry thoroughly. Clean the bearings and nearby housings to remove trapped oils.
Tip: A clean brush roll prevents odor-retaining hair from clumping and burning during use. - 5
Clear hoses and attachments
Check hoses and wands for clogs; use a long, flexible brush to dislodge hair. Rinse with water if the manual allows, and let all parts dry completely before reassembly.
Tip: Do not force a blockage past bends; gentle detangling reduces damage risk. - 6
Deodorize interior surfaces
Mix a mild solution of water and white vinegar (1:1) or a baking soda paste; apply to interior surfaces with a cloth, rinse lightly, and dry. Do not spray directly into motor housing.
Tip: Allow air-drying in a ventilated space to prevent mildew. - 7
Reassemble and test
Once all parts are completely dry, reassemble the vacuum and run it on low without a filter (for a moment) to ensure air flows freely. Then reattach parts and perform a short test cycle.
Tip: If you notice residual odor after a test, repeat cleaning steps focusing on overlooked areas.
FAQ
Why does my vacuum smell like dog even after cleaning?
Dog odors can embed in the canister, seals, and filter media; if these areas aren’t fully cleaned or replaced, the smell can persist. Also, a moldy interior can contribute to odors after exposure to damp fur.
Dog odors can hide inside the canister and filters. Thorough cleaning or replacement is usually needed to stop the smell.
Can I wash a vacuum filter?
Only wash filters that are explicitly labeled washable by the manufacturer. If a filter isn’t washable, replace it with a compatible filter. Wet filters can harbor mold and worsen odors.
Washer-approved filters are rinsed, air-dried, and reinstalled. If not, replace the filter.
How often should I clean my vacuum to prevent odors?
Frequency depends on use and pet shedding. For homes with dogs, perform a quick inspection monthly and a deeper clean every 3–6 months, or more often if odors reappear.
Check the unit every few weeks and clean more often if you have a heavy shedding dog.
Is baking soda safe to use inside my vacuum?
Yes, in small amounts and proper application. Avoid direct contact with motor components, and ensure it’s fully rinsed and dried to prevent buildup.
Baking soda can help absorb odors, but avoid contact with the motor and ensure complete drying.
What other odor-control options work with vacuums?
Activated carbon filters, specialized odor-neutralizing sprays designed for vacuums, and regular cleaning align best with odor control. Always follow the manufacturer’s guidelines.
Carbon filters and approved sprays help, but check compatibility first.
When should I replace my vacuum due to odor problems?
If persistent odors return despite thorough cleaning and part replacements, or if the unit exhibits mildew or mold inside, it may be time to replace the vacuum.
If odors persist after cleaning and part changes, consider replacement.
Watch Video
The Essentials
- Schedule regular cleanings to prevent odor buildup.
- Target all potential odor reservoirs: canister, filters, brush, hoses, and attachments.
- Use safe deodorizing methods (baking soda or vinegar) and ensure complete dry time.
- Replace worn parts to maintain odor control effectiveness.