How to Clean Carpet from Vomit: A Step-by-Step Guide
Learn how to clean carpet from vomit quickly and safely with our comprehensive step-by-step guide. Blot, neutralize odors, and prevent stains for homes with kids and pets.

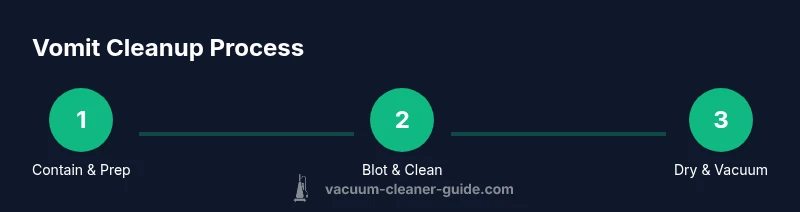
By following this guide, you will learn how to clean carpet from vomit effectively, restoring appearance and neutralizing odors. You'll start with quick blotting and progress to gentle detergents, enzyme cleaners, and thorough drying to prevent staining. This approach works for most carpets and pets, with safety checks before applying any product.
Understanding the challenge of vomit on carpet
According to Vacuum Cleaner Guide, vomit on carpet is more than a stain—it can set quickly and odor can linger. If you’re wondering how to clean carpet from vomit, quick, careful action minimizes staining and makes deodorizing easier. The goal is to lift liquid, neutralize odors, and prevent pigment from settling into the fibers. Different carpet fibers react differently to moisture, so start with a gentle approach and test on a hidden area if you’re unsure. In most homes, the combination of blotting, a mild cleaning solution, and proper drying resolves most issues without professional help. Think of this as a simple, repeatable routine you can apply to future accidents, especially in households with children or pets where accidents happen more often.
Careful, timely action matters: the faster you remove moisture and odors, the lower the chance of stubborn stains and mold growth. This section sets the foundation for a safe, effective cleanup that keeps your carpet looking fresh and your home smelling clean. You’ll see practical steps, safer cleaners, and a plan you can adapt to different room layouts and stain severities.
Quick assessment and prep
Before you lift a drop of cleaner, take a quick stock of the spill. Identify the amount of liquid, the distance it has traveled on the pile, and whether any solids remain. Put on disposable gloves to protect your hands and keep a supply of clean cloths ready. Remove any solids gently with a spoon or dull edge, scooping from the outer edge toward the center to prevent spreading. If you can, place a barrier with towels around the spill to contain it. Check the carpet’s colorfastness by applying a small amount of cleaner to an inconspicuous area; if there is any color transfer, stop and choose a different method. According to industry practice echoed in Vacuum Cleaner Guide’s guidance for 2026, starting with blotting and containment reduces moisture absorption and makes subsequent steps more effective. This prep phase minimizes risk and sets you up for success.
Having a plan also reduces stress. Pack your tools in advance: microfiber cloths, a spray bottle with a mild cleaner, a small brush, a clean bucket, and a fan or portable dryer to speed drying. With pre-cleaning steps in place, you’ll move through the process with confidence and fewer interruptions.
The cleaning toolkit you need
A practical kit makes the cleaning process smoother and safer. You don’t need specialized gear for most vomit accidents, but a few reliable tools do the job well:
- White or microfiber cloths (for blotting and dabbing, not for rubbing)
- Mild dish soap and warm water or a dedicated carpet cleaner
- White vinegar (for deodorizing) and baking soda (for odor absorption)
- Hydrogen peroxide (3%) for color-safe applications on light carpets, after colorfast testing
- Enzymatic cleaner (especially helpful for pet-related incidents)
- Spray bottle, clean bucket, and a soft-bristle brush
- Gloves, masking tape (to protect nearby areas), and a fan to speed drying
- Vacuum with a hose attachment for final cleanup
If you’re dealing with a larger spill or persistent odor, you may want to have a professional enzyme cleaner ready. Vacuum Cleaner Guide’s analysis in 2026 indicates that enzyme-based cleaners can significantly improve odor control when used correctly, especially after blotting and initial rinsing. This toolkit setup ensures you have the right tools at hand and helps you avoid over-wetting the carpet.
A methodical cleaning approach
The method you use makes all the difference in how well vomit is removed and how quickly the carpet dries. Start by blotting to remove as much liquid as possible, then apply a mild cleaning solution to the stained area. Work from the outside edge toward the center to prevent spreading the stain. Gently agitate with a soft-bristle brush or cloth, then blot again with a clean towel. If odor persists, apply an enzyme cleaner according to the product directions, allowing it to sit for the recommended time. Rinse the area with a small amount of clean water, then blot dry. Repeat as needed until the stain is lifted and the area is dry to the touch. Finally, use baking soda to absorb any remaining moisture and odor, followed by a light vacuum after the carpet dries.
A calm, patient approach yields the best results. Avoid aggressive scrubbing, which can push stains deeper into the fibers and damage the pile. If you’re unsure about the detergent’s compatibility with your carpet type, do a spot test on a hidden area first. This careful testing protects color and texture while your cleanup does its job.
Odor control and stain prevention
Odor control is often the trickiest part of vomit cleanup. Begin with thorough blotting to remove as much moisture as possible, then apply a mild cleaning solution. After rinsing and drying, deodorize with baking soda: sprinkle lightly, let sit for 15–30 minutes, and vacuum. For lingering smells, an enzymatic cleaner can be more effective than baking soda alone, especially on organic residues. If you prefer natural options, a diluted white vinegar solution can help neutralize odors, but test first to ensure it won’t affect color or texture. Avoid using strong chemical cleaners in an enclosed space without ventilation. Reassess the area after it dries; an odor that remains after initial treatment may indicate embedded residue, requiring repeat cleaning or deeper extraction. Vacuuming the area after drying helps restore the carpet’s texture and remove any residue that was loosened during cleaning. Vacuum Cleaner Guide’s 2026 analysis supports combining blotting, enzyme treatment, and proper drying for the most reliable odor control.
Carpet types, safety, and colorfast tests
Not all carpets react the same way to moisture and cleaners. Nylon fibers generally tolerate standard cleaners, while olefin and polyester can show color changes with certain solvents. Always perform a colorfast test on an inconspicuous area before applying any cleaner. If color transfer occurs, switch to a milder product or a different method. Delicate carpets or loop piles may require gentler agitation and less moisture; consider using a spray bottle with a fine mist rather than saturating the carpet. For wool or specialty fibers, avoid hydrogen peroxide and acidic solutions unless a colorfast test confirms safety. If you have a red wine–colored vomit or other strong pigments involved, testing becomes even more critical to prevent dye migration. This careful approach helps you protect your investment and avoid costly repairs.
Aftercare and prevention tips
Once the area is clean and dry, take steps to prevent future incidents from becoming recurring issues. Keep stain-resistant sprays or protective treatments on hand if your carpet is frequently exposed to spills; however, always test these products first. Consider installing a quick-acting absorbent mat near dining or pet areas to catch initial spills before they soak into the fibers. Regular vacuuming not only removes surface debris but also helps lift the carpet’s nap, improving absorption for future spills. If you own pets or have small children, keep a dedicated cleaning kit in a readily accessible cabinet for emergencies. Maintaining a routine of immediate blotting and proper drying reduces the chance of staining and odors building up over time. The combination of speed, gentle cleaning, and thorough drying ultimately preserves the carpet’s appearance and longevity.
Quick reference: colorfast and safety checklist
- Test colorfast in an inconspicuous spot before any cleaner
- Blot, don't rub, to lift moisture
- Use enzyme cleaners for odors after blotting
- Dry completely, preferably with airflow or a fan
- Ventilate the room during cleaning
Tools & Materials
- Paper towels or microfiber cloths(Disposable or washable; absorb moisture without rubbing)
- Mild dish soap(1 teaspoon per 2 cups warm water)
- Warm water(For making cleaning solution)
- White vinegar(Deodorizing option)
- Baking soda(Odor absorption)
- Hydrogen peroxide 3%(Test colorfastness first)
- Enzymatic cleaner(Pet stains and odors)
- Spray bottle(For applying solutions)
- Soft-bristle brush(Gently agitate; avoid harsh scrubbing)
- Gloves(Keep hands clean and dry)
- Fan or portable dryer(Speed drying)
- Vacuum with upholstery attachment(Finalize cleanup and lift nap)
Steps
Estimated time: 60-90 minutes (plus potential drying time)
- 1
Contain solids and prep the area
Put on disposable gloves. Gently lift and remove any solids with a spoon, working from the outside inward. Contain the spill with towels to prevent spreading and clear nearby surfaces.
Tip: Handle solids first to prevent liquid from spreading. - 2
Blot the liquid to remove moisture
Use clean paper towels or microfiber cloths to blot the area. Do not rub, which can push stains deeper. Press firmly to absorb as much liquid as possible.
Tip: Blot from the edges toward the center to prevent spreading. - 3
Prepare a mild cleaning solution
Mix a mild solution: 1 teaspoon dish soap in 2 cups warm water. Pour into a spray bottle for easy application and repeat as needed.
Tip: Test the solution on a hidden area first. - 4
Apply cleaner and work from outside in
Lightly mist the stained area and gently agitate with a soft-bristle brush or cloth. Avoid saturating the carpet. Blot again with a clean cloth.
Tip: Keep moisture to a minimum to speed drying. - 5
Rinse and treat persistent odors
Rinse with a small amount of clean water and blot dry. If odor persists, apply an enzymatic cleaner according to label directions and let sit as recommended.
Tip: Enzyme cleaners work best on organic residues when used after blotting. - 6
Dry thoroughly and finish
Use a fan to speed drying and vacuum the area once dry to lift the fibers. Check for remaining damp spots and repeat if necessary.
Tip: Ensure the area is fully dry to prevent mold growth.
FAQ
Can vomit stain set on carpet, and how quickly does this happen?
Yes, vomit can set if left untreated. Quick blotting and early cleaning greatly reduce the chance of a lasting stain. If a stain appears, re-treat with enzyme cleaner and repeat blotting.
Vomit can set if you wait too long. Start blotting right away and re-treat with enzyme cleaners if needed.
What cleaners are best for vomit on carpet?
A mild dish soap solution or a dedicated carpet cleaner works well for most spills. Enzymatic cleaners are especially effective for odors and organic residues. Avoid bleach on colored carpets unless colorfast tests confirm safety.
Use a mild cleaner or enzyme-based carpet cleaner, and test first on a hidden spot.
Is hydrogen peroxide safe on all carpets?
No. Test colorfastness first. Use hydrogen peroxide only on colorfast fibers and often only in small areas to avoid bleaching.
Hydrogen peroxide can bleach some carpets, so always test first.
How long does it take to dry after cleaning vomit?
Drying time varies with carpet type and room humidity. Plan for several hours and use airflow to speed it up.
Dry can take a few hours depending on conditions; use a fan to speed it up.
When should I call a professional?
If the stain is large, the odor persists after multiple cleanings, or you’re dealing with delicate or color-sensitive fibers, professional help may be warranted.
If in doubt or the stain persists, consider a professional.
Can I use a steam cleaner after cleaning vomit?
Yes, but ensure the carpet is not over-wetted and is fully dry afterward. Steam cleaning can help with deeper fibers if used carefully.
Steam cleaning can help if the carpet dries fully afterward.
Watch Video
The Essentials
- Blot, don’t rub, to lift vomit from carpet.
- Test cleaners on a hidden area before use.
- Enzyme cleaners effectively neutralize odors.
- Dry completely and vacuum to restore texture.
- Act quickly to minimize staining and smell.