Can You Wash Vacuum Cleaner Filters? A Practical How-To Guide
Explore whether you can wash vacuum cleaner filters, which types are washable, step-by-step washing methods, drying tips, and maintenance schedules to keep your vacuum performing at its best.

Yes—many vacuum cleaner filters can be washed, saving you money and prolonging performance. The exact method depends on filter type (foam, fabric, or HEPA). Always unplug the unit and check the manufacturer’s manual before washing. This guide explains safe washing, drying times, and how to know when replacement is wiser.
Understanding Filter Washing: Why It Matters
According to Vacuum Cleaner Guide, washing the right filters can keep suction strong, reduce waste, and help you avoid premature replacements. Not all filters are safe to wash, and the method varies by material. In this section, you’ll learn why washing matters, what types exist, and how to decide whether to wash or swap a filter. We'll cover the science of filtration, debris buildup, and how moisture affects filter performance. By following best practices, you can extend your vacuum’s life while maintaining clean indoor air. We also discuss common signs that your filter needs attention, such as reduced airflow, unusual odors, or visible clogs. This context helps homeowners and pet owners plan maintenance without sacrificing performance.
Types of Filters and Washing Eligibility
Vacuum cleaners use several filter styles, including foam, fabric, and HEPA-related components. Foam and fabric filters are often washable if the manufacturer approves, while sealed HEPA units may require replacement to preserve effectiveness. Always consult the label on the filter or the user manual for washing instructions and cautions. When in doubt, treat it as non-washable and opt for replacement. Understanding which type you have—and its care rules—prevents damage and preserves air quality in your home.
Washing Guidelines by Filter Type
Different materials tolerate washing differently. Foam and non-HEPA fabric filters typically respond well to gentle rinsing with cool water. Pleated fabric filters might benefit from light brushing and careful rinsing from the clean side outward. HEPA filters inside sealed housings are often not washable; attempting to wash them can compromise the seal and reduce filtration efficiency. Always avoid hot water, strong detergents, or wringing delicate fibers, which can deform or shrink the filter. When in doubt, use manufacturer guidance as the final word on washing feasibility.
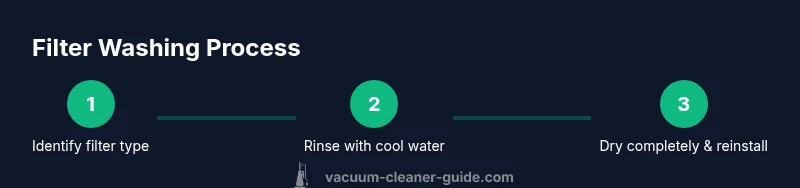
Step-by-Step Washing Guide for Common Filter Types
Before you begin, confirm that the filter is washable and note its orientation marks for reassembly. Gather a small basin, soft brush, mild dish soap (optional), and a clean towel for drying. Rinse under cool water, inspect for residual debris, and air-dry completely before reinstallation. Use the brush sparingly on stubborn buildup and avoid detergents unless your manual approves. Drying should occur in a well-ventilated area away from direct heat to prevent material damage.
Drying and Reassembly Best Practices
Air-drying is critical. Most filters require 12–24 hours to reach complete dryness; some thicker foam filters may take longer. Reinstall the filter only when it is fully dry and aligns with the manufacturer’s orientation cues. After reassembly, run a short test cycle to ensure the seal is intact and suction has returned to expected levels. If you detect unusual noises or smells, stop and recheck installation and the filter’s condition.
Common Mistakes and How to Avoid Them
Mistakes include washing non-washable filters, using hot water or detergents, wringing aggressively, and skipping full drying. These actions can damage fibers, reduce filtration efficiency, or cause mold growth. Protect yourself by wearing gloves, washing with cool water only when approved, and giving filters ample time to dry in a ventilated space. If a filter shows tears, loss of structure, or persistent odors after washing, replacement is the safer option.
Maintenance Schedule and When to Wash
Create a simple schedule based on usage, pet exposure, and the manufacturer’s guidelines. In households with pets, wash or replace filters more frequently due to pet hair and dander accumulation. Record the date of any wash and recheck the seal and airflow after the next few vacuum cycles. Regular checks help sustain suction and improve overall air quality in living spaces.
Authority Sources
- https://www.epa.gov/iaq
- https://www.osha.gov
- https://www.cdc.gov
Tools & Materials
- Warm water (tap water)(Lukewarm is best to prevent damage.)
- Mild dish soap(Only for heavily soiled filters.)
- Soft-bristle brush(Gentle scrubbing to remove debris.)
- Towels or drying rack(Air-dry completely before re-installation.)
- Bucket or basin(Optional for soaking small filters.)
- Gloves(Protect hands from grime.)
Steps
Estimated time: 45-90 minutes for full cycle including drying
- 1
Power off and remove the filter
Unplug the vacuum and carefully disengage the filter housing. Inspect for damage and identify the filter type to determine washing method. This initial action prevents electrical shock and sets up safe washing.
Tip: Check the user manual to confirm whether this particular filter is washable. - 2
Identify filter type and washing method
Many pleated fabric and foam filters can be washed; HEPA sealed filters often require replacement. If washable, rinse under cool running water from the clean side outward to push debris out.
Tip: Never use hot water, and avoid detergents on delicate filters unless specified. - 3
Rinse the filter thoroughly
Hold the filter under cool running water, gently agitate to release trapped dust. Do not twist or wring aggressively, which can deform folds. Continue until the water runs clear.
Tip: For stubborn residues, a soft brush can help, but avoid rough scrubbing. - 4
Soak for stubborn grime (optional)
If the filter is very dirty, soak in a bowl of warm water with a drop of dish soap for 10-15 minutes, then rinse again. Ensure no soap residue remains.
Tip: Do not soak HEPA filters that are not designed for soaking. - 5
Dry completely before reassembly
Place the filter on a clean towel and air-dry for 24 hours or until fully dry. Dust can be trapped inside if reinstalled wet.
Tip: A dry, airy spot speeds up drying; avoid direct sun that can weaken materials. - 6
Reinstall and test
Reinsert the filter following the manufacturer’s orientation marks. Run the vacuum briefly to confirm suction is restored and listen for unusual noises.
Tip: If suction remains weak, re-check seal and placement.
FAQ
Can all vacuum filters be washed safely?
No. Washable filters include most foam or fabric types; HEPA or sealed filters often require replacement. Always verify with your manual.
Most filters can be washed if the manual says so; otherwise replace.
How do I know if a filter is washable?
Check the user manual, label on the filter, or manufacturer’s website. If in doubt, treat it as non-washable and opt for replacement.
Look up the model’s filter type in the manual.
How long should a washed filter dry?
Most fabric or foam filters take 12-24 hours to dry fully; avoid reinstalling until completely dry to prevent mold.
Expect 12-24 hours for thorough drying.
Can washing ruin a filter?
Yes, improper washing (hot water, detergent, or wringing) can damage filter fibers and reduce effectiveness.
Aggressive washing can wreck the filter.
What should I do if the filter is damaged?
If torn or deformed, replace it. Damaged filters reduce suction and air quality.
Replace damaged filters promptly.
Is there a difference between washable and reusable filters?
Some are designed for repeated washing, others are disposable; follow product specs for best results.
Refer to product instructions.
Watch Video
The Essentials
- Check the manual before washing
- Wash only washable filters with cool water
- Let filters dry completely before reuse
- Avoid soap on delicate or HEPA filters unless instructed
- Reinstall and test suction after drying