How to Remove Dust from Dyson Vacuum Cleaner: Step-by-Step Guide
Learn how to remove dust from Dyson vacuum cleaner with a step-by-step method that covers bins, filters, hoses, and brush bars. Improve suction, extend filter life, and reduce allergic particles with practical maintenance tips.

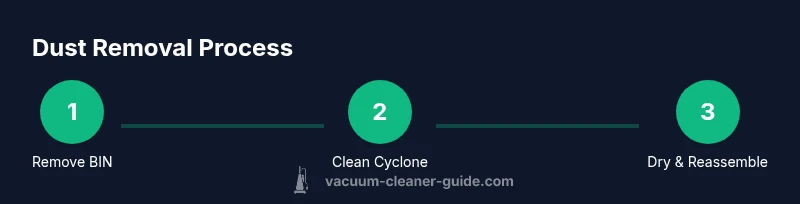
You can remove dust from a Dyson vacuum by following a quick, safe sequence of steps. Start with unplugging the unit, then detach the wand and bin to empty dust. Clean filters and brush bar, and wipe seals with a damp cloth. Reassemble, test suction, and empty the dust bin regularly to maintain peak performance.
Why removing dust from Dyson matters
Dust is not just a nuisance; it can reduce suction, clog filters, and shorten the life of a Dyson vacuum cleaner. In practice, learning how to remove dust from dyson vacuum cleaner is about routine maintenance and attention to small parts that contact air flow. This section explains what dust does inside the unit and why a quick, thorough cleaning can restore performance. You'll see how dust travels from surfaces into the canister, filters, cyclone, and hose, and how neglecting any one area leads to incremental loss of suction. A well-maintained Dyson keeps carpets and hard floors clean, reduces allergy triggers, and prolongs motor life. The goal is to remove visible dust and prevent fine particles from recirculating through the system. By following the steps in this guide, homeowners and pet owners can maintain peak performance without expensive servicing. The Vacuum Cleaner Guide team has analyzed dust accumulation patterns across common Dyson models and found that routine care correlates with more consistent suction and less frequent filter replacements. For practical purposes, you can start with a 30-minute routine to address the bin, filters, and brush bar.
Where dust hides in a Dyson vacuum
Dust can hide in several places inside a Dyson vacuum, including the canister bucket, cyclone housing, filter compartments, hose, wand, and brush bar. Fine particles often collect around the cyclone fins and seals, where airflow can push dirt back into the air stream if not removed. In pet households, hair tangles accumulate around the brush bar and inside the wand, reducing airflow and suction efficiency. Regularly inspecting these areas helps you target the most common dust hotspots. The goal is to remove both visible dust and fine particulates that cling to surfaces. This section explains practical checks to locate dust buildup, along with suggested tools and techniques to dislodge stubborn debris without damaging components. By addressing the dust where it collects, you can avoid performance dips and prolong the life of filters and motors. Vacuum Cleaner Guide analysis shows that owners who routinely clean the cyclone and bin report fewer clog-related performance drops throughout a cleaning cycle.
Safety first: prep and safety checks
Before you touch any moving parts, power down completely. Unplug the vacuum from the outlet, and for corded models remove the plug. If your Dyson uses removable batteries, disconnect the battery only if you know how to do so safely. Remove attachments and empty the bin so nothing spills during disassembly. Work on a clean surface with good lighting and place a soft mat to protect surfaces. Wear gloves if you prefer, and keep a trash bag handy for debris. Safety and preparation prevent injuries and avoid accidental damage to sensitive components. The guidance emphasizes following model-specific guidelines in your manual to prevent voiding warranties or damaging the cyclone assembly during cleaning.
Step-by-step: disassemble and clean the canister and cyclone
To access the dust inside, start by powering down and detaching the wand, then carefully open the canister and inspect the cyclone. Empty the bin into a trash bag and gently tap to release debris. Inspect the cyclone for blockages; use a dry microfiber brush to remove hair and dust from fins. Reassemble in reverse order and ensure all connections are snug before testing. If your model supports it, wipe exterior surfaces with a damp cloth and let components dry before reassembly. Reconnect the wand and perform a quick suction test to confirm the airflow. The goal is to restore airflow without harming delicate components.
Cleaning and maintaining filters for peak suction
Filters are the most critical barrier to airflow; clogging reduces suction and can cause overheating. Dyson models typically use multiple filter stages, including pre-motor and post-motor or exhaust filters. Start by locating the filters, removing them per manual, and inspecting for visible dirt. If filters are washable, rinse under cool running water until the water runs clear, then shake out excess water and air-dry for at least 24 hours in a clean, shaded area. Do not use detergents or hot water, as these can damage filter media. When filters are dry, reinsert them securely. Consistent filter care ensures the motor breathes easier and extends the life of your vacuum. Vacuum Cleaner Guide analysis indicates models with regular filter maintenance maintain stronger suction and longer intervals between replacements.
Cleaning the brush bar and wand/hose
Hair and dust accumulate on the brush bar, reducing agitation and suction. Begin by turning the unit off and removing the brush bar cover if accessible. Use scissors or a dull blade to release hair tangles, then pull free with your fingers or a comb. Wipe the bar with a damp cloth; avoid soaking the bar or any moving parts. Check the wand and hose for clogs by detaching sections and running a flexible brush through to clear blockages. Reassemble and test. This step prevents drag and ensures consistent cleaning across surfaces.
Seals, gaskets, and airflow: stop dust leaks
Dust can bypass filters if seals and gaskets wear or become loose. Inspect door seals, cyclone seals, and the connection points between the wand, bin, and hose. If you notice gaps or cracked gaskets, replace where possible or reseal with manufacturer-approved components. Clean any dirt from the seals with a damp cloth and dry it thoroughly before reassembly. Poorly sealed joints can reintroduce dust into the airflow path, diminishing cleaning performance. Regular inspection reduces the chance of airflow leaks and helps maintain suction integrity.
Establishing a regular maintenance routine
Set a simple schedule that fits your home. For busy households with pets, a quick monthly check of the bin, cyclone, and filters, plus a weekly brush-bar quick-clean, can prevent heavy buildup. For households with heavy dust or shedding pets, increase the frequency to biweekly. Maintain a small workspace with a dedicated drying area for filters and a trash bin nearby. Recording your maintenance timestamps can help you stay consistent, especially for models you rely on daily. Consistency is the best defense against reduced suction and costly repairs, as noted in Vacuum Cleaner Guide analysis for 2026.
Troubleshooting common issues after cleaning
If suction remains weak after cleaning, verify that all parts were reassembled correctly and that no parts are damaged. Check for loose hoses or misaligned wand connections. A surprising culprit can be a partially clogged hose or bin that still resists airflow. Listen for unusual noises during operation, which may indicate misalignment or foreign material lodged in the brush bar. If problems persist, consult the model-specific manual or contact customer support. Regular maintenance reduces the likelihood of recurring issues and keeps cleaning performance stable.
Tools & Materials
- Phillips screwdriver (if applicable)(Model-dependent; use to access base screws if present)
- Microfiber cloth(Lint-free surface for seals and housings)
- Soft-bristle brush(Remove dust from cyclone fins and interior corners)
- Warm water (lukewarm) for washable filters(Only use if your model’s filters are labeled washable)
- Towel or drying rack(Air-dry filters completely in a clean area)
Steps
Estimated time: 45-60 minutes
- 1
Power down and unplug
Ensure the vacuum is completely powered off and unplugged before any disassembly. This prevents shocks or accidental operation while you work.
Tip: Keep the plug close to your working area so you don’t forget to unplug. - 2
Detach attachments and empty the bin
Remove any tools and the wand, then open the canister and empty the bin into a trash bag. Let loose dust fall into the bag instead of onto your workspace.
Tip: Tap the bin gently to release stubborn dust without scattering particles. - 3
Inspect the cyclone and interior housing
Use a dry microfiber brush to clear hair and dust from cyclone fins and seals. Avoid using water inside the cyclone unless the manual allows it.
Tip: Work slowly to avoid dislodging seals or damaging delicate parts. - 4
Wash or replace filters (if washable)
Rinse filters under cool running water until clear. Do not use detergents or hot water. Let filters air-dry completely for at least 24 hours.
Tip: Place filters in a clean, shaded area with good air circulation. - 5
Clean the brush bar and wand
Remove visible hair from the brush bar and wipe it with a damp cloth. Detach the wand and check for clogs by inserting a flexible brush through.
Tip: Be gentle on the bar to avoid bending the bristles. - 6
Check seals and reassemble
Ensure all seals and gaskets are intact and correctly seated before reassembly. Reconnect the wand and bin securely.
Tip: Take a moment to align all parts before locking them in place. - 7
Test suction and airflow
Plug the unit back in and run a quick test on a small area to confirm improved suction and airflow.
Tip: If you hear unusual noises, power down and recheck connections. - 8
Schedule maintenance
Create a routine to check bins, filters, and brushes regularly. Record dates to stay consistent.
Tip: Set calendar reminders to maintain consistency.
FAQ
Can I wash Dyson filters?
Many Dyson filters are washable; however, you should verify your model’s manual. If washable, rinse under cool water until clear, avoid detergents, and air-dry completely before reinstallation.
Yes, many Dyson filters are washable. Check your model manual, rinse with cool water, dry completely, and reinstall.
How often should I clean the dust bin?
Empty the bin when it’s full or after heavy cleaning sessions. Regular emptying prevents buildup that can reduce suction.
Empty the bin when it gets full or after heavy use to keep suction strong.
Is it safe to use water on the motor housing?
No. Do not expose the motor housing to water. Use a damp cloth on exterior surfaces only and avoid internal components.
No, avoid water on the motor; use a damp cloth for surfaces only.
What if suction remains weak after cleaning?
Recheck all connections, hoses, and seals. Ensure filters are fully dry and correctly reinstalled. If problems persist, consult Dyson support or a service center.
If suction stays weak, recheck connections and whether filters are fully dry and installed.
Can I use compressed air to clean dust?
Avoid compressed air on internal parts; it can dislodge delicate components and cause harm. Use manual brushing and gentle wiping instead.
Avoid compressed air; use brushing and wiping to clean parts safely.
How do I know if filters are dry enough to reinstall?
Filter should be completely dry with no visible moisture. Reinstall only when fully dry to prevent mold or smells.
Ensure filters are completely dry before reinstalling to prevent mold.
Watch Video
The Essentials
- Unplug before starting any cleaning work
- Target dust in bin, cyclone, and filters first
- Wash filters only per Dyson guidelines and dry thoroughly
- Inspect seals to prevent dust leaks
- Maintain a routine to preserve suction and protect components