How to Clean a Dyson Vacuum: A Complete Guide
Learn how to clean a Dyson vacuum safely and effectively. This comprehensive guide covers filters, brush bars, hoses, and maintenance to restore suction and extend the life of your Dyson.

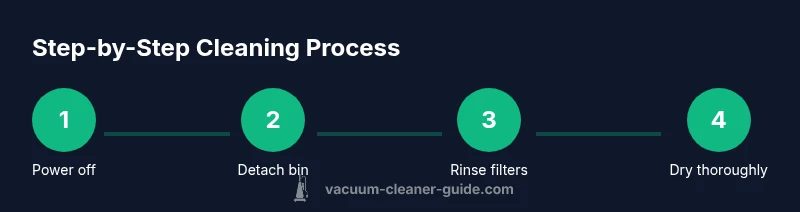
This guide helps you clean a Dyson vacuum thoroughly to restore suction and extend its life. Start by unplugging, emptying the bin, and washing the washable filters; check the brush bar, wand, and bin for hair and debris; inspect hoses for blockages, and let all parts dry completely before reassembling.
Why Cleaning Your Dyson Vacuum Matters
Keep reading to learn how to clean a Dyson vacuum effectively. Regular cleaning preserves suction, reduces wear, and minimizes allergens in your home. Dyson vacuums rely on sealed cyclones and filters; when dust and hair accumulate, airflow drops, the motor works harder, and performance declines. According to Vacuum Cleaner Guide, regular maintenance can keep most normal clogs at bay and extend the life of the core components. A clean vacuum also helps you avoid expensive repairs and keeps pet hair from tangling in hard-to-reach places. If you're looking for guidance on how to clean a Dyson vacuum, this section explains the core reasons to invest a little time on a regular cleaning routine and how to approach it without special tools or professional service.
Identify Your Dyson Model and Cleaning Needs
Dyson offers several families—cordless stick vacuums, corded canisters, and multi-floor configurations. The basic cleaning principles stay the same, but access points and filters differ by model. The first step is noting your model number and the type of filters it uses; consult your manual or Dyson's support site if you’re unsure. Knowing your model helps you tailor cleaning steps to avoid unnecessary disassembly. Vacuum Cleaner Guide analysis shows that cordless Dysons, in particular, can require more frequent filter maintenance due to higher airflow demands.
What You Need Before You Start
Before you dive in, assemble a simple kit so you don’t pause mid-cleaning. You’ll need a soft microfiber cloth, lukewarm water for rinsing washable parts, a small brush for dislodging hair, a towel for drying, and optional replacement filters. If your model has screws holding the brush bar or cyclone housing, keep a small screwdriver handy. Keeping everything ready saves time and reduces the risk of moisture lingering inside the machine. This preparation helps ensure a smooth cleaning session and reduces the chance of missing steps.
Cleaning the Filters: Washable vs Non-Washable
Washable filters should be rinsed under cool running water until the water runs clear, then squeezed gently to remove excess moisture. Do not use detergents or hot water, which can damage the filter media. Non-washable filters require brushing away debris and replacing them according to the manufacturer’s guidance. This part of maintenance is critical for restoring airflow and preventing overheating, which helps prolong motor life and maintain suction.
Cleaning the Brush Bar and Cyclone Area
Hair and thread easily wrap around the brush bar; removing this buildup is essential for consistent suction. Use a soft brush to lift hair from the bristles and clear the crevices around the agitator. Wipe the cyclone housing with a damp cloth and avoid soaking the motor housing. Dry thoroughly before reassembly to prevent mold and water intrusion, which can compromise performance.
Clearing Blockages in Hoses and Attachments
Blockages in the wand or hose reduce suction and can trick you into thinking the motor is failing. Detach the wand carefully, gently squeeze out debris, and look for kinks or crushed sections. Use a long, flexible brush or a straightened wire hanger to clear obstructions from the ends. Recheck every joint for obstruction before testing. Taking a methodical approach minimizes the risk of reinserting debris into the system.
Drying, Reassembly, and First Test
Always dry every part completely before reassembly to prevent mold. Lay pieces on a clean towel in a well-ventilated area for at least 1-2 hours, or longer if the environment is humid. Reassemble parts in the reverse order you removed them, then run the vacuum on a short test cycle to confirm airflow and brush motion. If you notice weak suction, repeat the cleaning steps for stubborn areas. A thorough dry-out ensures the machine remains safe to operate.
Maintenance Schedule and When to Replace Parts
Create a simple maintenance calendar—monthly quick checks for debris on the brush bar and filters, and biannual checks for seals, hoses, and the cyclone. Replace filters per Dyson’s recommendations, and consider professional service if you hear unusual noises or see burning smells. Regular upkeep reduces downtime and preserves resale value, while helping you maintain peak performance over time.
Tools & Materials
- Soft microfiber cloth(For wiping and drying surfaces)
- Lukewarm water(Rinse washable parts; avoid hot water)
- Small brush or old toothbrush(Gently loosen hair and debris)
- Screwdrivers (Phillips and flat-head)(Only if model requires disassembly)
- Towel or drying rack(Dry parts completely before reassembly)
- Replacement filters (optional)(Have spares if needed)
- Container or basin(For rinsing parts)
- Compressed air can (optional)(Blow out dust from crevices with care)
Steps
Estimated time: 60-90 minutes
- 1
Unplug and remove the bin
Ensure the vacuum is unplugged and the bin is released to access the cyclone and brush areas. Gently tap out loose debris before disassembly to avoid scattering dust. This initial step prevents accidental operation and keeps the work area clean.
Tip: Keep the environment dust-free with a tray to catch debris. - 2
Rinse and dry the washable filters
Locate washable filters, remove them according to your model, and rinse under cool running water until clear. Gently squeeze out excess moisture without twisting or wringing. Let filters air-dry completely for at least 24 hours in a well-ventilated area.
Tip: Do not use heat to speed up drying; moisture inside will cause mold. - 3
Clean the brush bar and agitator
Use a small brush to remove hair and fibers wrapped around the brush bar. Inspect the bearing housing and wipe away dust with a damp cloth. Avoid soaking the motor housing.
Tip: Pull hair with steady, gentle motions to avoid damaging bristles. - 4
Clear blockages in the wand, hoses, and cyclone
Detangle any hair or debris from the wand and hoses; check the cyclone for clogs. If needed, use a straightened wire or flexible brush to push obstructions through. Recheck all connections for secure fit.
Tip: Take breaks if you feel resistance to avoid forcing parts. - 5
Wipe and dry the housing, cyclone, and bin
Wipe the exterior and interior surfaces with a damp cloth; avoid letting water reach the motor. Dry every surface with a lint-free towel. Confirm there’s no moisture before reassembly.
Tip: A dry microfiber cloth speeds up the final drying stage. - 6
Reconnect, test, and observe
Reassemble parts in reverse order, power on briefly, and listen for unusual noises or loss of suction. If performance seems off, re-run the cleaning steps focusing on blocked areas. Schedule a professional service if issues persist.
Tip: Run a short test on a clean rug to observe airflow and brush function.
FAQ
How often should I clean Dyson vacuum filters?
Most Dyson vacuums benefit from a monthly check of the filters, with rinsing every 1-3 months depending on usage and pet hair levels. Regular cleaning helps maintain airflow and suction.
Check the filters every month and rinse as needed; more frequent cleaning may be required for homes with pets.
Can I use soap to clean Dyson filters?
Dyson recommends rinsing washable filters with cool water only. Soap or detergents can degrade the filter media and reduce effectiveness.
No soap. Rinse only with cool water and let them dry completely before reuse.
My Dyson won't turn on after cleaning; what should I do?
If the unit fails to start after cleaning, recheck all connectors and ensure the battery is seated properly in cordless models. Dry all components thoroughly and try a gentle reset if your model supports it.
Make sure nothing is loose and give it a full dry before trying again.
Is it safe to wash the cyclone?
Yes, you can rinse the cyclone housing with cool water if your model permits disassembly, but avoid soaking the motor area. Dry thoroughly before reuse.
Rinse the cyclone housing but keep the motor dry, then dry completely.
What should I do if the brushes stop spinning?
Check for hair or fiber tangled around the brush bar and remove it carefully. Ensure the belt (if applicable) is intact and properly tensioned, and inspect for blockages in the agitator pathway.
Remove tangles and check the belt and pathway.
How do I know when to replace parts?
If you notice persistent loss of suction, odd noises, or visible wear on filters and seals, consider replacing parts per Dyson guidance. Regular maintenance slows deterioration and reduces downtime.
Watch for signs of wear and follow Dyson’s replacement schedule.
Watch Video
The Essentials
- Unplug before starting
- Rinse filters under running water only
- Remove hair from brush bar
- Dry thoroughly before reassembly