How to Clean Vacuum Filter Dyson: A Complete Guide
Learn how to clean a Dyson vacuum filter correctly to restore suction and extend the life of your unit. This guide covers washable vs non-washable filters, step-by-step rinsing, drying times, model-specific tips, and maintenance best practices.

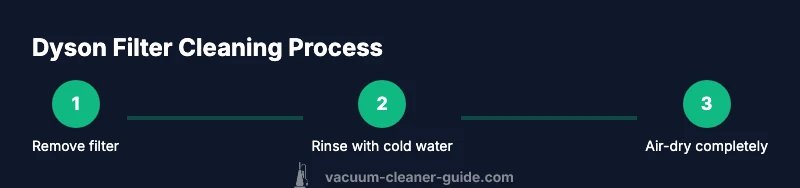
Learn how to clean a Dyson vacuum filter to restore suction and extend its life. This guide explains how to identify washable filters, rinse with cold water, air‑dry completely, and reinsert correctly. You’ll confirm filter type, avoid detergents, and test the vacuum after drying to ensure a tight seal and proper airflow.
Why Dyson filter maintenance matters
Maintaining a clean filter is essential for any vacuum, especially a Dyson, where airflow directly affects suction, motor cooling, and overall performance. A dirty or clogged filter can reduce suction power, cause the motor to work harder, and shorten the life of the unit. Regular cleaning helps maintain peak performance, minimizes odors, and keeps your home smelling fresh—an important consideration for households with pets, kids, or allergy concerns. According to Vacuum Cleaner Guide, following model-specific guidance yields the best results and reduces downtime when you need your Dyson in a hurry. If you’re asking how to clean vacuum filter Dyson, starting with a clear understanding of your model’s filter type sets you up for success and avoids unnecessary wear.
How to tell if your Dyson filter is washable
Not every Dyson filter is designed to be washed. The first step in the process is identifying whether your model’s filter is washable. Look for a label on the filter housing or consult the user manual or Dyson support page for your exact model. If the filter is clearly marked as washable or rinse‑only, you can proceed with rinsing under cold water. If there’s any doubt, or if the label indicates “non-washable,” avoid water altogether and replace the filter instead. In general, many newer Dyson vacuums use washable pre‑motor and post‑motor filters, but always verify to prevent damage. This careful check helps you make the right choice before you start the cleaning cycle and keeps your Dyson safe from improper maintenance practices.
Basic cleaning workflow for washable Dyson filters
If you’ve confirmed that your filter is washable, here’s a reliable workflow that many homeowners follow for a thorough clean. Start by turning off the unit and removing the filter from the housing. Rinse the filter under cold running water, allowing the water to flow through from the center outward. Avoid detergents unless your manual explicitly allows them, as soaps can leave residues that attract more dirt. Gently rub the filter with your fingers or a soft brush to loosen embedded debris, then rinse again until the water runs clear. Shake out excess water and pat dry with a clean towel. Place the filter on a drying rack or clean surface in a well-ventilated area, away from direct heat or sunlight, and let it air-dry completely—this often takes 24 hours or longer depending on humidity. After drying, reinsert the filter firmly and test the Dyson to ensure proper airflow and suction. This sequence aligns with best practices and helps prevent recontamination of the air stream while the unit cools between uses.
Model-specific notes: cordless vs corded and ball models
Dyson’s cordless models (like many V-series) and corded ball cleaners may have slightly different filter configurations. Some cordless models emphasize a single compact filter that is washable, while other models include dual filters with specific placement in the housing. Always consult your model’s manual for precise steps, as misplacing a filter or failing to seat it correctly can cause air leaks and reduced suction. In general, cordless models tend to benefit from regular cleaning between charges, while larger canister or upright models may require less frequent deep cleans but still benefit from routine maintenance. This nuance is part of why a general approach needs to be tailored to your Dyson’s design.
Drying and reassembly: avoid mold and re-seal
Drying is the most critical phase of the process. Ensure the filter is completely dry before reassembling. Any residual moisture can promote mold growth or unpleasant odors inside the vacuum. Place the dried filter back into its housing, ensuring it seats evenly and creates a tight seal. A poor seal can allow unfiltered air to bypass the filter, reducing suction and potentially damaging components. After reassembly, run the vacuum on a low setting for a minute to verify airflow and listen for any abnormal sounds that might indicate misalignment or a loose component. Brand guidance emphasizes patience here: never rush the drying step, as moisture trapped inside the filter is a common cause of post-cleaning issues.
Common mistakes to avoid
There are several pitfalls people encounter when learning how to clean vacuum filter Dyson. Never use hot water or detergents unless explicitly approved by your model’s documentation. High heat can damage the filter media and shrink materials, leading to cracks and poor filtration. Avoid cleaning a filter while it’s still hot or damp, as this fosters mold growth and odors. Do not skip the drying stage or shorten it to save time, since a damp filter can harbor bacteria and degrade performance. Finally, refrain from aggressively scrubbing a fragile filter; this can degrade the mesh or pleats and shorten the filter’s life. Following these cautions helps keep your Dyson functioning safely and effectively.
Maintenance schedule: how often should you clean?
Frequency depends on usage and household conditions. In homes with pets, children, or high traffic, check and clean the filter every 4–8 weeks and perform a deep clean every 3–6 months. If you have allergy sufferers or work with fine particulates, consider more frequent cleaning, and replace filters according to the manufacturer’s recommended lifespan. The goal is to maintain consistent airflow and prevent buildup that could impair suction. Vacuum Cleaner Guide’s analysis highlights that a proactive maintenance routine reduces downtime and keeps a Dyson running at peak efficiency over the long term.
Replacing filters when cleaning isn’t enough
If the filter shows visible wear, tears, or persistent odor after cleaning, replacement is the safest option. A torn or compressed filter cannot seal properly and may allow unfiltered air to pass into the motor. Additionally, if cleaning does not restore suction or you notice degraded performance after reassembly, inspect the seal and housing for damage or debris that might be limiting airflow. Use official Dyson replacement cartridges or comply with your model’s recommended replacement schedule to maintain warranty coverage and optimal filtration performance.
Tools & Materials
- Cold running water(Use only cold water; avoid detergents unless the manual allows them.)
- Soft-bristle brush (optional)(To loosen stubborn debris without damaging the media.)
- Clean towels or microfiber cloth(Pat dry the filter after rinsing.)
- Drying rack or clean surface(Place in a well-ventilated area; avoid direct sun.)
- Gloves (optional)(Keeps hands clean during removal and handling.)
- Replacement filter (if needed)(Only if the old filter shows damage or cannot be fully cleaned.)
Steps
Estimated time: 60-90 minutes active work plus up to 24 hours drying
- 1
Remove the filter
Power off and unplug the Dyson. Access the filter area and carefully detach the filter from its housing. Inspect for obvious dirt buildup or damage before proceeding.
Tip: Handle the filter gently to avoid tearing the media. - 2
Rinse under cold water
Rinse the filter under cold running water, letting water flow through from the center outward. Do not use detergents unless your model explicitly allows them. Gently rub with your fingers or a soft brush if needed.
Tip: Avoid scrubbing hard; this can damage the pleats. - 3
Drain and dry
Gently shake out excess water and pat dry with a clean towel. Place the filter on a drying rack or a clean surface in a well-ventilated area, away from direct heat or sunlight.
Tip: Do not attempt to speed-dry with a hair dryer or heater. - 4
Reassemble and inspect
Once completely dry, reinsert the filter firmly into its housing. Confirm it seats properly and there are no gaps where air could bypass the filter.
Tip: Check the seals around the filter housing for any signs of damage. - 5
Test the vacuum
Plug in the unit, run it briefly on a low setting, and listen for steady suction. If you notice unusual sounds or reduced airflow, pause and recheck the filter seating or consider replacement.
Tip: Take note of any odor or smoke for diagnostics. - 6
Schedule future maintenance
Mark your calendar for the next filter cleaning based on your home environment and usage. Consider a pet-friendly or high-use home to clean more often.
Tip: Keep a simple maintenance log to avoid missing cleanings.
FAQ
Is every Dyson filter washable?
Not all Dyson filters are washable. Check the model’s manual or Dyson support page to confirm. If the label indicates non-washable, do not rinse it with water and replace instead.
Not every Dyson filter can be washed. Check your model’s manual to confirm whether it’s washable; if it isn’t, replace the filter rather than attempting to clean it with water.
How long should a Dyson filter dry after washing?
Let the filter dry completely in a well-ventilated area before reinstalling. Drying times vary with room humidity, but plan for several hours to overnight to ensure no moisture remains.
Dry the filter completely in a ventilated area before reinstalling, usually overnight depending on humidity.
Can I use soap to clean Dyson filters?
In most cases, you should avoid soap unless the manufacturer explicitly allows it. Water alone is sufficient for many washable filters and prevents residue buildup.
Usually, don’t use soap unless the manual says it’s okay; water is sufficient for most washable Dyson filters.
What if my Dyson still loses suction after cleaning?
Recheck that the filter is fully dry and correctly seated. Inspect the housing for cracks or debris and ensure there are no clogs in the wand or brush head.
If suction remains weak, ensure the filter is dry and properly seated, and check for clogs or damage in the system.
How often should I clean Dyson filters in a pet-friendly home?
Pet-heavy homes typically benefit from more frequent cleanings, such as every 4–6 weeks, with a deep clean every 2–3 months, depending on odor and shedding levels.
In homes with pets, clean filters every month or so, and do a deeper clean a couple times a year.
Watch Video
The Essentials
- Identify if the filter is washable before cleaning
- Rinse with cold water and avoid detergents unless allowed
- Dry completely in a ventilated area prior to reinsertion
- Reinstall securely and test suction afterward
- Replace damaged or non-cleanable filters promptly