How to Clean Vacuum Cleaner Filter: A Complete Step-by-Step Guide
Learn how to clean your vacuum cleaner filter safely and effectively. This comprehensive guide covers washable foam, paper, and HEPA filters, when to replace, and how to maintain optimal suction for cleaner air.

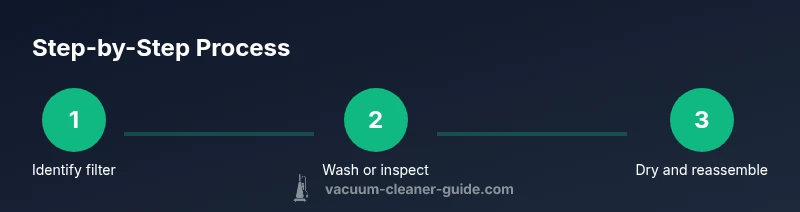
To clean a vacuum cleaner filter, start by identifying your filter type, then wash washable filters with cool water or replace non-washable ones as needed. Always dry completely before reassembling and never operate the vacuum without a filter. Following these steps preserves suction and prolongs the machine’s life. According to Vacuum Cleaner Guide, a consistent cleaning routine reduces clogging and maintains indoor air quality.
Why filters matter for suction, longevity, and air quality
Understanding how to clean vacuum cleaner filter is not just about removing dust. It directly affects suction power, motor strain, and the air you breathe. A clogged or damaged filter can cause the motor to work harder, shortening its life and increasing electricity use. When you maintain clean filters, you preserve suction, reduce debris recirculation, and help keep pet dander, dust, and allergens from settling back into your living spaces. Vacuum Cleaner Guide notes that a disciplined maintenance routine—especially in homes with pets or allergy-prone occupants—can lead to noticeably better air quality and easier daily cleaning. The goal is simple: clean the filter, dry it thoroughly, and reinstall correctly to maintain peak performance.
Filter types you’ll encounter and how they influence cleaning
Most vacuums use one of several filter types: foam or fabric pre-filters, pleated paper or synthetic filters, and HEPA or sealed filters. Foam and fabric filters are typically washable and air-dry quickly if you handle them gently. Pleated paper filters are usually not washable and should be replaced when dirty. HEPA and sealed filters capture the smallest particles, but some models require special care to avoid damage. Before you begin, identify which type your vacuum uses by checking the user manual or inspecting the filter housing. Knowing the filter type helps you apply the correct cleaning method and avoid wasted effort. In this guide, we’ll cover the best practices for each filter category while emphasizing the central task of how to clean vacuum cleaner filter without compromising performance. Vacuum Cleaner Guide’s research highlights that incorrect cleaning can cause residue to clog the filter more quickly, so follow model-specific guidance.
How to locate your filter type and assess condition
Start by unplugging the vacuum and opening the filter housing. Look for markings or a model number on the filter itself or in the manual to confirm whether it’s washable. Check for cracks, warping, or torn seams. If you notice any damage, replacement is the safer option than repair. A clean, undamaged filter should be free of excessive discoloration and have intact seals. If you’re unsure whether a filter is washable, err on the side of caution and treat it as non-washable until you confirm otherwise in the manual. This step prevents accidental damage and ensures you’ll know exactly what you’re cleaning during how to clean vacuum cleaner filter tasks.
Cleaning foam and washable fabric filters: the basics
Foam and fabric pre-filters are among the easiest to clean. Rinse under cool running water, avoiding hot water which can deform materials. Gently rub with your fingers or a soft brush to release embedded dust. If the water runs clear after a few rinses, you can proceed to air dry. A light soap solution can help remove oils that accumulate from regular use, but be sure to rinse thoroughly to avoid soap residue. After rinsing, gently squeeze out excess water without wringing, then lay flat on a clean towel to dry. Only reassemble once completely dry to prevent mold growth and odor. This is a core part of how to clean vacuum cleaner filter effectively.
Cleaning non-washable paper or sealed HEPA filters: what to do instead
Non-washable filters, including most paper pleated variants and sealed HEPA components, should not be rinsed. Instead, brush off loose debris with a soft-bristled brush, or use low-pressure compressed air if allowed by the manufacturer. Some HEPA filters are designed to be replaced rather than cleaned; check the manual for your model. If you must clean, avoid soaking or exposing seals to water, which can cause delamination and loss of filtration efficiency. Inadequate cleaning methods can leave fine dust behind and hinder airflow, so use manufacturer-approved techniques. When in doubt, replace with a new filter to maintain peak suction and air quality. Remember: the goal of how to clean vacuum cleaner filter is to preserve filtering capacity without damaging the filter material.
How to dry filters properly and reassemble safely
Drying is critical after any wash, especially for foam and fabric filters. Lay non-absorbent surfaces underneath to prevent moisture transfer to surrounding parts. Allow filters to air-dry completely—this can take several hours and sometimes overnight, depending on humidity. Do not use a hair dryer or direct heat, which can shrink or warp filter media. Once dry, reinsert the filter in the correct orientation, seal the housing, and give the vacuum a quick visual check for any cracks or gaps. Finally, power on at a low setting to test airflow and listen for unusual noises. Proper drying minimizes mold risk and ensures your next cleaning session goes smoothly. The nuance here is to respect the drying times indicated by your model’s guidelines.
When to replace versus clean: a practical decision guide
If a filter shows persistent odor, visible mold, tears, or persistent loss of suction after cleaning, replacement is recommended. Even if a filter appears clean, a clogged or compromised seal can reduce filtration efficiency. HEPA or sealed filters, in particular, may degrade over time and require replacement at intervals recommended by the manufacturer. Creating a simple maintenance log helps you track service dates and plan replacements, ensuring you always operate with an effective filter. Following a consistent approach to how to clean vacuum cleaner filter—adjusted to your model—helps sustain performance and indoor air quality.
Cleaning frequency and how usage patterns affect schedule
Pet households, families with small children, and allergy-conscious homes tend to accumulate more dust and dander, necessitating more frequent filter maintenance. If you vacuum daily, plan to inspect and clean or replace filters every 4–6 weeks. For light use with hard floors, every 2–3 months might suffice. Factors like filter type, cleaning environment, and whether you have a pre-filter or a secondary layer influence timing. Establish a routine aligned with your home’s realities, and adjust as needed to maintain optimal suction and air quality. This proactive approach—part of any solid how to clean vacuum cleaner filter practice—helps protect both your vacuum and your lungs.
Maintenance best practices: housing, seals, and surrounding components
Don’t forget to clean the filter housing and surrounding seals during every maintenance cycle. Wipe away dust from the interior, inspect gaskets for wear, and ensure there’s no debris obstructing airflow paths. A clean seal prevents air leaks that can fool you into thinking a filter is dirty. If you notice a drop in suction but the filter looks clean, check the housing for cracks or misalignment and reseat the filter properly. These supplementary steps are essential to a thorough how to clean vacuum cleaner filter routine and help you achieve lasting performance.
Tools & Materials
- Soft-bristle brush(Use for gentle debris removal from pleated surfaces)
- Microfiber cloth(Wipe housing exterior and seals)
- Warm water(For washing washable foam/fabric filters)
- Mild dish soap(Optional for oily build-up; use sparingly)
- Bowl or sink(Contain rinse water)
- Towel or drying rack(Air-dry filters completely)
- Replacement filter (optional)(Keep on hand for non-washable or worn filters)
- Screwdriver set (Phillips/flathead)(Some models require housing removal)
- Isopropyl alcohol (optional)(Sanitize hard housing surfaces)
Steps
Estimated time: 60-90 minutes
- 1
Power off and unplug the vacuum
Ensure safety by disconnecting from power and removing any canister or dustbin. This prevents accidental operation during filter handling and gives you unobstructed access to the filter housing.
Tip: If your model has a quick-release latch, use it gently to avoid damaging clips. - 2
Remove the filter housing cover
Open the housing as directed by your manual. In some models you’ll lift a latch; others require a small screwdriver to remove screws. Keep track of screws for reassembly.
Tip: Take a quick photo of the setup before removal to reference during reassembly. - 3
Extract the filter(s) carefully
Gently lift out the filter or filters. Some models have multiple layers (pre-filter and main filter). Inspect each for tears, mold, or heavy discoloration that indicates replacement is due.
Tip: Handle with clean hands to avoid transferring oils to the filter material. - 4
Rinse washable filters with cool water
Rinse under cool running water, moving in one direction to remove debris. Avoid hot water and do not wring. If necessary, use a soft brush to loosen stubborn dust.
Tip: If water runs clear quickly, you’re near completion; repeat rinse if needed. - 5
Wash with mild soap if needed
For oily residues, a small amount of mild dish soap can help. Rinse thoroughly to remove all soap and prevent residue from clogging fibers.
Tip: Only use soap on filters labeled ‘washable’; otherwise, skip to avoid damage. - 6
Clean non-washable filters by brushing
Use a soft brush to remove loose dust from pleated paper or sealed HEPA elements. Do not apply water; moisture can ruin these filters.
Tip: Lightly tap the filter to remove loose dust without tearing delicate fibers. - 7
Dry filters completely
Place filters on a clean surface or drying rack in a well-ventilated area. Ensure no moisture remains before reassembly to prevent mold growth and odor.
Tip: Position filters in a way that air can circulate around all sides. - 8
Reassemble the filter housing
Return filters to their correct orientation, reseal the housing, and reattach any screws or latches. Double-check that there are no gaps where air could escape.
Tip: Do a quick visual check for any misalignment before powering on. - 9
Test airflow and suction on a small area
Plug in the vacuum and run it on a low setting to listen for unusual sounds and to verify that airflow is restored. A sudden loss of suction may indicate a mis-seated filter or housing.
Tip: If suction remains weak, power off and re-check filter seating. - 10
Decide if replacement is needed
If the filter shows tears, persistent odor, or significant discoloration after cleaning, replace it. Non-washable older filters are frequently best replaced for optimal performance.
Tip: Keep track of replacement dates to maintain consistent protection. - 11
Document your maintenance schedule
Record when you cleaned or replaced filters to establish a routine. This helps you adjust frequency based on real-world usage and keeps you aligned with best practices for how to clean vacuum cleaner filter.
Tip: A simple calendar reminder works wonders for consistency.
FAQ
Do all vacuum filters need washing or replacement?
No. Some filters are washable (foam and fabric types) while others (paper and many HEPA filters) are non-washable and should be replaced when dirty. Always check your model’s manual for specific care instructions.
Some filters can be washed, but many need replacement when dirty. Check your manual for exact care guidelines.
Can I use hot water to clean filters?
Hot water can damage certain filter materials, causing warping or reduced effectiveness. Use cool or lukewarm water unless the manual specifies otherwise.
Avoid hot water unless your manual says it’s safe.
How long should filters dry before reinserting?
Most washable filters need several hours to overnight, depending on humidity. Ensure no moisture remains before reassembly to prevent mold.
Let filters dry completely, usually a few hours up to overnight.
How often should I clean my vacuum filter?
Frequency depends on usage and environment. Pet homes or allergies may require every 4–6 weeks; lighter use can be every 2–3 months.
Clean or replace on a regular schedule based on use.
What should I do if a filter is torn or moldy?
If damaged or moldy, replace the filter rather than attempting repair. Damaged filters can fail filtration and release contaminants.
Replace a torn or moldy filter rather than repairing it.
Is it necessary to clean the filter housing too?
Yes. Wipe the housing and seals to remove dust and prevent recontamination. A clean housing supports better airflow and filter life.
Wipe the housing to keep the whole system clean.
Watch Video
The Essentials
- Identify filter type before cleaning
- Washable filters: cool water, air-dry completely
- Non-washable filters: brush or replace
- Drying and correct reassembly are essential
- Maintain a filter-cleaning schedule for best suction