Why Vacuum Cleaner Smells: A Complete Troubleshooting Guide
Discover why your vacuum cleaner smells and how to fix it quickly with practical, step-by-step troubleshooting. Learn common odor causes, safe maintenance, and prevention tips for homeowners and pet owners.

If your vacuum smells, the top culprits are a clogged bag or filter, trapped hair or debris near the brush, and a possibly worn belt or motor odor. Start with safety: unplug, inspect the bag or canister, and replace if needed; clean or replace filters, and run a short test to confirm the odor is gone.
Why Vacuum Cleaner Smells: What the Odor Really Signals
When homeowners notice an unusual odor from their vacuum, it is almost never harmless. In many cases, a bad smell signals that the device is not filtering air as efficiently as it should, or that there is debris buildup somewhere inside the path of airflow. The keyword here is maintenance. Odors can originate from the filter, the bag, the brush roll, the dust bin, the hoses, or even the motor area. Understanding that odor is a sign of a blockage or contamination helps you act quickly and safely. This is why Vacuum Cleaner Guide emphasizes a proactive maintenance routine for every home. In 2026, our analysis shows that odor-related issues drop dramatically when owners perform regular bag changes, filter cleanings, and brush inspections. Start with the simplest checks first, then move to deeper cleaning if the odor persists. Your home, pets, and textiles will thank you for a clean, scent-free vacuuming experience.
Common Odor Culprits You Should Know
Odors are typically tied to a handful of familiar culprits. A full or blocked bag or canister is the most obvious and frequent source. If you have a bagless model, the debris container can accumulate stale dust and damp particles that develop a sour smell. Dirty or clogged filters—especially HEPA or carbon filters—restrict airflow and trap odors. Hair, dust, and food crumbs around the brush roll can scorch or burn, producing a burnt odor. If you notice a rubbery or hot-plug smell, a worn belt or motor overheating could be to blame. Moisture entering the system—often from spilled liquids or humid environments—creates mold and mildew aromas. Finally, exhaust paths and hoses can harbor odors if mold forms inside them. Regular inspection of these areas is your best defense against persistent odors.
Quick Fixes You Can Try Right Now
Before you reach for tools, unplug the unit. Start with the simplest fixes:
- Empty or replace the bag or empty the canister if it’s full. A full bag dramatically reduces airflow and concentrates odors.
- Clean or replace filters. Rinse non-electronic cotton or foam filters if allowed by your model; replace washable HEPA filters when necessary.
- Inspect the brush roll and intake. Remove hair, threads, and debris that can clog the housing and cause friction or overheating.
- Check for spills on hard floors that may have tracked into the machine. Wipe down exposed surfaces and dry them completely before reuse.
- Run a short test cycle with no load to observe any unusual smells and verify airflow improves after each step. If the odor lingers after these steps, a more thorough cleaning or a professional inspection may be needed. Vacuum Cleaner Guide recommends documenting your steps so you can share them with a technician if required.
The Science Behind Odor Formation in Vacuums
Odors arise when particles are heated, compressed, or chemically interact with filter media and plastics. When filters become saturated, airflow decreases and microbial growth can thrive in damp debris. Decomposing organic material—sweat, skin cells, pet dander, or food crumbs—releases volatile compounds that travel through the system and exit via the exhaust. The material of the bag or canister itself, the type of filter used, and the material of the brush housing influence how odors develop and how long they linger. Temperature and humidity in your home further accelerate microbial growth, especially in pocketed corners of the bag housing and ductwork. Regular maintenance limits moisture buildup and disrupts the conditions that produce odors.
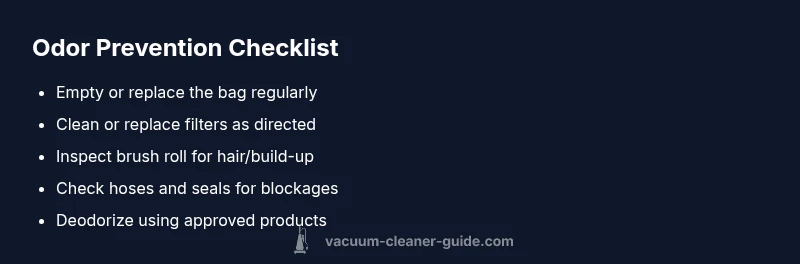
Preventing Odors: Routine Maintenance Checklist
A proactive maintenance routine is your best defense against bad vacuum odors. Create a simple schedule and stick to it:
- After every use: empty the dirt cup or bag, wipe the canister when needed.
- Weekly: inspect and clean the brush roll; remove hair and fibers.
- Monthly: replace or wash filters according to the manufacturer’s guidelines; store in a dry place to prevent mold growth.
- Quarterly: inspect hoses for cracks or blockages; check seals and gaskets for wear.
- Seasonal: run a dedicated odor check and deodorize using manufacturer-approved products that won’t degrade plastics or filters.
- When in doubt, consult the manual for model-specific maintenance intervals and parts. The goal is consistent airflow and minimal moisture buildup in the dust pathways. This simple discipline reduces odor risks and extends the life of your vacuum.
When to Call a Professional and What to Expect
If you have attempted the quick fixes but still notice a persistent odor, it’s time to seek professional help. A technician can diagnose issues like a failing motor, sealed ductwork, or mold growth inside internal compartments that aren’t accessible to the average user. Expect a diagnostic check that includes a filter assessment, motor inspection, and a test run. Repairs could involve replacing the motor, seals, belts, or filters, depending on the root cause. Vacuum Cleaner Guide suggests having your model’s serial number and purchase date handy to expedite service. Proactive maintenance reduces, but does not always eliminate, the need for a professional visit.
Deodorizing Options and Safe Alternatives
If you want to neutralize odors between maintenance sessions, consider safe, model-approved deodorization options. Avoid strong chemical sprays that can degrade seals or damage filters. Use odor-absorbing sachets and enzyme-based cleaners designed for vacuum systems, and always confirm compatibility with your model. A light rinse of hard plastic surfaces and a thorough dry time can help keep the interior smelling fresh without risking residue transfer to the motor. Ensure you follow all safety precautions, including unplugging the unit and allowing parts to dry completely before reassembly.
Steps
Estimated time: 30-60 minutes
- 1
Power off and unplug
Unplug the vacuum and disconnect from power. This ensures safety while you inspect the bag, filters, and traps for odor sources.
Tip: Always start with the simplest safety check before touching any components. - 2
Check the bag/canister
If your model uses a bag, replace it with a fresh one. For bagless models, empty and rinse the dirt cup; allow it to dry completely before reassembly.
Tip: Use genuine or manufacturer-approved bags/containers for best fit. - 3
Clean or replace filters
Remove filters and rinse washable components or replace disposable ones according to the manual. Let filters air-dry completely before reinstalling.
Tip: Do not reinsert damp filters; moisture can promote mold growth. - 4
Inspect brush roll and ducts
Remove hair, threads, and debris from the brush roll and interior ducts. Clear blockages in the intake path to restore airflow.
Tip: Use a pair of scissors or a cleaning pick to extract stubborn tangles safely. - 5
Test run with no load
Plug in and run the vacuum briefly on a hard surface to observe airflow and smell. If odor persists, move to deeper inspection or professional service.
Tip: Listen for unusual motor sounds or a burning smell during the test. - 6
Deodorize safely
If allowed by the manufacturer, use approved deodorizing agents or enzyme-based cleaners; avoid sprays that can damage components.
Tip: Always verify compatibility with your model before applying any deodorizer.
Diagnosis: Vacuum emits a strong or unusual odor during or after use
Possible Causes
- highFull or clogged bag/canister
- highDirty or clogged filters
- mediumDebris trapped near the brush roll
- lowWorn belt or overheating motor
- lowMoisture/mold in bag housing or hoses
Fixes
- easyReplace bag or empty canister and clean the bag housing
- easyClean or replace filters; ensure proper drying before reuse
- easyRemove hair and debris from the brush roll and intake paths
- mediumInspect belt and motor area for signs of wear or burning smell; replace if needed
- mediumInspect hoses and seals; address moisture or mold sources and dry thoroughly
FAQ
Why does my vacuum smell like burning rubber or plastic?
A burning odor often indicates a worn belt or overheating motor. Turn off the vacuum, inspect the belt path and motor area, and replace the belt if it shows signs of wear. If the smell persists, discontinue use and contact a technician.
A burning odor usually means a worn belt or overheating motor. Stop using it and check the belt; replace it if worn, and if it continues, have a technician inspect the unit.
How often should I replace vacuum filters?
Filter replacement frequency depends on usage and model. Generally, inspect weekly and replace or wash per the manufacturer’s schedule. HEPA filters may require more frequent changes in homes with pets or allergies.
Check your filters regularly and replace or wash them when the manual says. Pet households may need more frequent changes.
Can a moldy bag cause odors even after cleaning?
Yes. Mold inside bags or the dust cup can release musty odors that linger. Clean or replace the bag housing and ensure moisture is dried thoroughly before reuse.
Mold in the bag or dust cup can cause lingering musty smells. Clean and dry the housing before using again.
If odor persists after fixes, what should I do?
Document all steps you’ve taken and consult the manual or a professional technician. Persistent odor may indicate issues inside the motor or sealed ducts that require specialized service.
If the odor sticks around after fixes, cite your steps and seek professional help; it could be internal damage.
Are there safe deodorizers for vacuums?
Use only deodorizers approved by the manufacturer or designed for vacuum systems. Avoid strong aerosols that can leave residues or corrode seals.
Use manufacturer-approved deodorizers; avoid strong sprays inside the vacuum.
Should I run the vacuum on high heat or in hot environments to dry it faster?
No. Do not expose the vacuum to heat or direct sunlight for drying. Let components air-dry in a well-ventilated area away from moisture until fully dry.
Avoid heat sources; air-dry components in a ventilated area.
Watch Video
The Essentials
- Identify odor source with a systematic check
- Prioritize bag/filter maintenance to restore airflow
- Do not ignore burning smells; seek professional help
- Use safe deodorizing options approved for your model
- Maintain a regular cleaning schedule to prevent recurrence