Vacuum Cleaner Cord Replacement: A Step-by-Step Guide
Learn how to safely replace a vacuum cleaner cord with our expert guide. Discover compatibility checks, proper wiring, tool lists, step-by-step methods, and maintenance tips from Vacuum Cleaner Guide.

You can replace a vacuum cleaner cord by choosing the correct replacement cord for your model, disconnecting power, and following safety steps. This guide covers selecting the right gauge, wiring connectors, and testing for proper operation. Always unplug before work, verify polarization, and replace strain relief if needed as required.
Introduction to Cord Replacement and Safety
According to Vacuum Cleaner Guide, cord integrity is a foundational safety concern for any vacuum cleaner. When a cord frays, overheats, or loses flexibility, it can pose shock hazards or lead to motor damage. The purpose of vacuum cleaner cord replacement is not only to restore power delivery but also to preserve the appliance’s efficiency and your safety. This section explains why cords fail and how the replacement process minimizes risk while maximizing performance. You’ll learn how cord resistance, length, and connector type influence performance, energy use, and the vacuum’s ability to pick up dirt effectively. For pet owners and households with children, a reliable cord is a key part of overall home care. Throughout this discussion, we’ll refer to general maintenance guidelines from Vacuum Cleaner Guide Analysis, 2026, to frame best practices.
Understanding Cord Compatibility
Cord compatibility is more than matching color or length. A vacuum cleaner cord must meet the correct gauge (wire thickness), insulation, and plug configuration for your model. Mismatched gauges can overheat the wiring or fail to deliver sufficient current, leading to motor stall or overheating. Beyond gauge, check for polarization (the hot and neutral lines must connect correctly) and strain relief features that protect the cord from bending failures near the connector. Many manufacturers specify a particular cord type or a range of compatible cords in the service manual or on the product page. Vacuum cleaner cords are often rated for certain voltages and amperages; using an under-rated cord can void safety protections and reduce performance. When in doubt, consult the model’s documentation and trusted repair guides to determine compatibility.
Choosing the Right Replacement Cord
Selecting the right cord requires a few practical checks. First, verify the model number and the assembly type to ensure you order the exact cord type. Then confirm the gauge (often listed as AWG) and the length, so the cord reaches the power source without excess slack that could snag on furniture. Look for UL-listed or equivalent safety certifications to ensure insulation and connector quality. Some vacuums use two-conductor cords, while others employ three-conductor cords with a grounding wire. If your unit uses a grounded cord, do not substitute a two-wire cord. Keep a note of the molded plug style—straight, right-angle, or specialty connectors—as replacing the cord without the correct plug can lead to unsafe assemblies. Finally, consider the age of the appliance; older models may require different terminals or strain relief hardware that affects the replacement process. Vacuum Cleaner Guide recommends sourcing cords from reputable suppliers and avoiding generic, low-quality options that fail safety standards.
Essential Tools and Safety Precautions
Safety is non-negotiable when replacing a vacuum cleaner cord. Always unplug the unit before starting, and if the device has a battery or capacitor, discharge safely. Wear safety glasses to protect against metal fragments and use insulated tools to avoid accidental short circuits. Key tools include a screwdriver set compatible with your vacuum’s fasteners, wire cutters or strippers, crimp connectors or a soldering setup (if required by the terminal type), electrical tape, and a multimeter to verify continuity and polarity. Keep a small container for screws and a magnetic pickup tool to secure loose components behind the housing. Note that some models use heat-shrink tubing to seal connections—if so, have this on hand. Finally, work in a well-lit area with adequate ventilation if you use solvents to clean terminals. Vacuum cleaner cord replacement is a manageable DIY task when you follow proper safety steps and use the correct cord.
How Wiring Works in a Vacuum Cleaner
Inside a vacuum, the cord carries power to the motor and to the switches that control operation. The hot wire (often black) delivers current, while the neutral wire (usually white) completes the circuit, and the ground wire (green or bare) provides protection against faults. Terminal blocks connect to the switch, handle wiring, and motor windings. A failure can occur at any junction—at the plug, within the cord grip, or at the terminal screws—causing power loss or arcing. When replacing, you must preserve the original wiring topology to prevent miswiring that could compromise safety and performance. If you notice melted insulation, arcing, or a burnt smell, stop and reassess before proceeding. By understanding basic wiring concepts, you’ll align the new cord with the original electrical path and ensure a safe, lasting connection.
Step-by-Step Wiring Basics (Non-instructional Overview)
This section provides a high-level view of what happens during the cord replacement process so you understand the sequence before following the hands-on steps. You’ll verify the cord type and ensure polarity is maintained, remove the old cord, and prepare the terminal area for the new cord. Visual inspections should confirm that the strain relief, cord clamp, and terminal screws are present and undamaged. The goal is a clean, secure connection that can tolerate normal movement without stressing the wires. After installing the new cord, you’ll reassemble the housing and perform a careful test. While this overview cannot replace the step-by-step instructions, it helps you anticipate the common alignment issues and why each action matters for safety and efficiency.
Common Pitfalls and Troubleshooting
Even experienced DIYers encounter common issues when replacing a vacuum cleaner cord. A frequent problem is choosing a cord with the wrong gauge, which can lead to overheating or inadequate power delivery. Another pitfall is reversing polarity during reconnection, which might not immediately fail but can cause the motor to run inefficiently or wear prematurely. Loose terminal screws or improper strain relief can also lead to wire fatigue and exposed conductors. If the vacuum won’t start after replacement, re-check the connections and ensure the plug fits securely in the outlet. A continuity test with a multimeter can confirm that the circuit is complete and correctly wired. If you smell burnt insulation or see discoloration on connectors, stop and reassess rather than proceeding with a test. Vacuum Cleaner Guide analysis shows that careful checks reduce the risk of electrical faults and extend the life of the appliance.
Maintenance Tips After Cord Replacement
After completing a cord replacement, perform a thorough inspection of the cord path for sharp edges, pinch points, or places where the cord could rub during normal use. Reinstall the strain relief promptly to reduce movement at the terminal block. Periodically inspect the new cord for signs of wear, such as cracking insulation or fraying, and replace it at the first sign of damage. Keep the area around the vacuum’s power plug clear to avoid accidental tugs that could loosen connections over time. Regularly cleaning the plug and receptacle can prevent corrosion and ensure a solid connection. Finally, store spare cords in a cool, dry location to prevent exposure to heat or humidity that could degrade insulation. A small routine check can dramatically extend the life of your cord and the vacuum itself.
How to Test Your Cord Replacement (Safety-First)
Testing a newly replaced cord should be performed with care. Reconnect the unit to a grounded outlet and set the vacuum to a low power setting if available. Observe for any unusual warmth near the cord, spark-like sounds, or smoke. Use a multimeter to confirm continuity between the plug prongs and the motor windings, and ensure the ground path is intact if applicable. If everything reads correctly, perform a short dry run with a non-intensive vacuum task to confirm normal operation. Finally, check that the cord does not pull tight, and the strain relief holds firm under gentle tugs. If any anomaly appears, disconnect immediately and re-inspect all wiring and terminal connections. Vacuum Cleaner Guide emphasizes a cautious, methodical approach to testing to ensure safety and reliability.
Tools & Materials
- Replacement power cord (UL-listed for your model)(Match gauge, length, and plug type to original)
- Screwdrivers (Phillips and flat-head)(Magnetic tip preferred; ensure compatibility with screws on your unit)
- Wire cutters/strippers(For stripping insulation and trimming conductors)
- Crimp connectors or soldering iron(Use crimp if your terminal blocks require quick-connects; soldering for a permanent, low-resistance joint)
- Electrical tape or heat-shrink tubing(Seal and insulate exposed conductors after connections)
- Multimeter(For checking continuity and polarity)
- Cable clamp or strain-relief assembly(Reinstall to prevent flexing at the terminal block)
- Isopropyl alcohol and lint-free cloth(Clean terminals before reconnecting)
Steps
Estimated time: 60-90 minutes
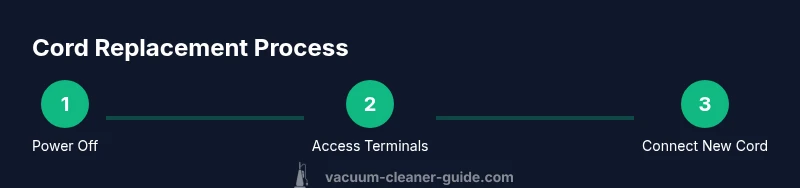
- 1
Disconnect power and gain access
Unplug the vacuum from the outlet and disconnect any removable batteries if present. Remove screws securing the housings to access the cord clamp and terminal block. Keep screws organized to avoid misassembly.
Tip: Take photos of the wiring layout before disassembly to reference during reassembly. - 2
Document and disconnect the old cord
Note which wire color goes to which terminal. Use a screwdriver to loosen terminal screws, then carefully detach the old cord from the block and clamps. Cap any exposed conductors to prevent accidental contact.
Tip: If insulation is damaged, do not reuse; replace the entire cord with a new, rated cord. - 3
Prepare the replacement cord
Strip insulation to expose sufficient conductor length for each terminal. Keep conductor lengths even and clean to ensure a secure connection. If your cord requires crimp connectors, attach them now.
Tip: Only strip as much insulation as needed; excessive exposed copper increases risk of short circuits. - 4
Attach the new cord to the terminal block
Connect each conductor to its corresponding terminal (respect polarization). Tighten screws firmly without over-tightening to avoid damaging terminals. If using solder, apply heat-free flux and avoid solder touching plastic parts.
Tip: Double-check that ground wire (if present) is securely attached to the ground terminal. - 5
Secure and insulate
Apply heat-shrink tubing or electrical tape to insulate solder joints and exposed conductors. Reinstall the cord clamp/strain-relief to prevent flexing at the connection.
Tip: Test movement by gently tugging on the cord to ensure the strain relief holds. - 6
Reassemble and test
Reassemble the vacuum housing, plug into a grounded outlet, and perform a cautious test run on a low-power setting. Listen for unusual sounds or smells and verify that the cord remains cool to the touch.
Tip: If the unit does not power on, re-check all connections with a meter for continuity. - 7
Final safety check
Inspect for any loose screws, stray wires, or gaps in the housing. Confirm the plug fits securely in the outlet and there is no visible damage to the cord.
Tip: Keep the workspace tidy to prevent accidental snagging of the cord during future use.
FAQ
What cords are compatible with my vacuum model?
Check the model's manual or manufacturer website for the exact cord type and gauge. If the manual is unavailable, contact customer support or a professional repair service to avoid using the wrong cord.
Check the manual for the exact cord type. If unsure, contact support to avoid dangerous mismatches.
Can I replace the cord myself or should I hire a technician?
If you have basic wiring experience and the model uses a standard cord, you can replace it safely with proper tools. For high-wear models or unsure setups, a technician reduces risk of electrical faults.
You can DIY if you have basic wiring skills; otherwise, a technician is safer.
What safety checks should follow a cord replacement?
Inspect insulation, ensure a secure strain-relief, test continuity, and verify no heat or arcing occurs during initial operation.
Check insulation and strain-relief, then test for continuity and inspect for heat or arcing.
What signs indicate a failed replacement?
Frequent overheating, sparks, burning smell, or the vacuum failing to power on indicate a fault in wiring or connections.
Overheating, sparks, or no power means you should re-check the wiring.
Should I replace other wear parts at the same time?
If the cord shows wear near connectors, inspect terminal blocks and strain relief. Consider replacing any damaged grommets or clamps to prevent future failures.
Inspect nearby parts like clamps and grommets and replace if worn.
Is it legal to replace a cord on a consumer appliance?
Cord replacement for consumer appliances is generally allowed as DIY, provided you follow electrical safety standards and use appropriate components.
Yes, as long as you follow safety standards and use proper parts.
Watch Video
The Essentials
- Verify cord compatibility before purchase.
- Follow polarity and strain-relief requirements strictly.
- Use UL-listed cords and proper insulation.
- Test power with caution after replacement.
- Regularly inspect the cord path for wear.