Steps Carpet Cleaner: The Complete How-To Guide
Learn the step-by-step method for using a carpet cleaner. Prep, choose the right solution, apply technique, and dry effectively for pet-friendly, stain-free carpets.

Learn how to use a steps carpet cleaner to lift embedded dirt and stains safely and effectively. This quick guide outlines the essential prep, the right cleaning solution, and a proven technique to maximize extraction and minimize drying time. Perfect for homeowners and pet owners who want clean carpets with less hassle.
Why a systematic approach matters for cleaning carpets
A steps carpet cleaner yields the best results when you follow a clear, repeatable process rather than ad-hoc cleaning. A methodical workflow helps you remove deep soil, prevent overwetting, and shorten drying times. This is especially important for homes with pets or high-traffic areas, where dirt can build up quickly. According to Vacuum Cleaner Guide, using a structured method reduces residual residue and improves overall carpet lifespan. The Vacuum Cleaner Guide team found that homeowners who stick to a plan achieve more consistent results across rooms and seasons. With the right prep, tool selection, and technique, you can tackle common issues like coffee spills, pet urine, and ground-in soil without leaving sticky soap films behind. The steps carpet cleaner approach also promotes safer chemical use, limiting exposure to kids and animals. In this block, we'll outline the key phases: prep, cleaning, extraction, and drying, plus maintenance afterward. By basing your routine on evidence-based guidance, you’ll reduce call-backs and re-cleaning sessions.
Prep work and room setup
Before you reach for the machine, clear the battlefield: remove small furniture, lift rugs, and place a plastic sheet or drop cloth to catch splashes. Vacuum thoroughly to remove loose dirt and grit that could scour the carpet during cleaning; this initial pass makes the cleaner work more efficiently. Mark off entrances so pets and kids don’t walk through damp areas. Check the carpet's colorfastness in a hidden corner by applying a small amount of cleaner solution; if there’s any color transfer, do not proceed with aggressive cleaning in larger areas.
Keep your cleaning solution, water temperature, and spray bottles within arm's reach. Note the make/model-specific instructions in your carpet cleaner manual, especially any limits on water temperature or maximum wear time. This preparation saves you time and protects carpet fibers.
Understanding cleaners and solutions
Carpet cleaners come in different forms: pre-mixed formulas and concentrate-based formulas that you blend with water. Upright machines may have larger tanks for deeper extraction, while portable models are handy for stairs or tight spots. Always follow the manufacturer’s recommended dilution ratio; using too much cleaner can leave residues and attract more soil. Vacuum Cleaner Guide analysis shows that matching the cleaner to your carpet fiber and stain type yields better stain removal with less risk of damage. For most homes, a low-foaming, enzyme-based formula works well on organic stains from pets and food. Store any leftover solution in a cool, dark place and label it clearly.
Pre-treatments for tough stains and pet messes
Heavily soiled areas or pet accidents benefit from targeted pre-treatment. Apply a stain remover or enzyme-based pretreat product to the stain, then blot gently with a clean cloth to lift as much liquid as possible before you begin cleaning with the carpet cleaner. Avoid scrubbing with abrasive materials, which can fray fibers. Let the pretreatment dwell for the recommended time, typically 5–10 minutes, to penetrate the soil. If you’re dealing with protein-based stains, cold water pretreatment is often more effective than hot water, which can set some stains.
The step-by-step technique in practice
Executing the cleaning itself requires disciplined technique. Start by filling the machine's clean water tank with the recommended amount of water and cleaner, then attach the appropriate nozzle. Begin at the farthest corner of the room to avoid walking over damp carpet. Operate the cleaner with slow, even passes, moving forward and backward about 1–2 feet per second. Overlap slightly on each pass to avoid missed spots. Repeat the process, pressing the trigger only when moving forward to apply cleaning solution, then release while you pull back. Continue until you’ve covered all high-traffic zones. After finishing, go over the area with clean water to rinse and extract remaining solution. This minimises residue that can attract new dirt.
Pro-tip: keep the nozzle at about 1 inch above the carpet surface to maximize extraction without soaking the fibers.
Rinsing, extraction, and drying tips
Rinsing is as important as soap lifting. Use clean water in the tank and go over the carpet again to flush out remaining cleaning solution. The extraction setting should be adjusted to the carpet’s fiber type and humidity; avoid over-wetting by limiting the number of passes in a given area. When you’re finished, remove excess moisture with the machine’s suction, then lay a few fans or open windows to accelerate drying. Wet carpet can develop musty odors or mold if not dried properly. If you can, place a clean, absorbent towel under doors or heavy traffic paths to wick away moisture.
Drying time depends on fibers, room temperature, and air movement; in most homes, expect 4–12 hours, but faster drying is possible with strong airflow and dehumidification.
Maintenance and storage after cleaning
Empty and rinse the clean water tank and the recovery tank, then run a short rinse cycle to remove any residue. Clean the brush rolls, hose, and nozzle to prevent mildew growth and odors; ensure all parts are completely dry before storing. Check filters and replace if needed. Store cleaning solutions in their original containers and away from children or pets. Keep the cords untangled and store the machine in a dry, ventilated area. Regular maintenance reduces breakdowns and extends the machine’s life.
Troubleshooting common issues
If the carpet cleaner loses suction, check for clogs in the hose and filters, and ensure the recovery tank isn’t full. For heavy foaming, switch to a low-foam formula and reduce the amount of solution used. If stains persist after cleaning, pre-treat again and run a fresh pass with the machine, ensuring not to over-wet. For stubborn odors, sprinkle baking soda after drying and vacuum it up later. If the spray nozzle drips, check the trigger assembly for wear and replace if necessary.
AUTHORITY SOURCES
- EPA: Indoor air quality and carpet care guidelines: https://www.epa.gov/iaq
- University Extension: Carpet cleaning tips and fiber care: https://extension.illinois.edu
- University Extension: Carpet care and stain removal: https://extension.umn.edu/cleaning-and-stain-removal/carpets
Tools & Materials
- Carpet cleaner machine (upright or portable)(Ensure it is clean and functioning before use)
- Cleaning solution compatible with your carpet type(Check fiber safety and odor level)
- Water (cold or as recommended by manufacturer)(Use cold water for protein stains)
- Measuring cup or bottle for dilution(Accurate ratios prevent residue)
- Spray bottle for pretreatment(Optional for targeted spots)
- Microfiber cloths(For blotting and test patches)
- Vacuum cleaner(Initial dry soil removal)
- Protective gloves(Chemicals may irritate skin)
- Drop cloths or old towels(Catch spills and protect floors)
- Fans or portable air mover(Speeds up drying)
- Carpet stain pretreatment product(Enzyme-based works well on organic stains)
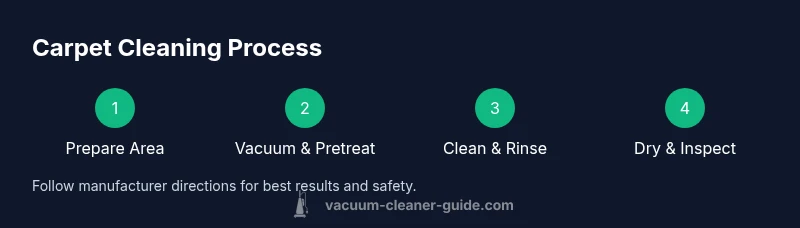
Steps
Estimated time: 60-90 minutes
- 1
Prepare the area
Move furniture, remove rugs, and lay down drop cloths. This keeps the cleanup contained and protects furnishings. Clear a path to avoid tripping hazards while you work.
Tip: Do a quick room walk-through to identify potential wet zones and plan your route. - 2
Vacuum thoroughly
Run the vacuum in multiple directions to lift embedded soil. This first pass reduces deep soil load and improves extraction efficiency.
Tip: Vary the vacuum direction to lift hidden grit from nap fibers. - 3
Pretreat stains
Apply pretreatment to set-in stains and odors. Let dwell for 5–10 minutes before cleaning to maximize soil suspension.
Tip: Test a small hidden patch first to ensure colorfastness. - 4
Fill and mix cleaning solution
Dilute the cleaning solution according to the manufacturer’s instructions. Use cold water for protein stains to prevent setting.
Tip: Accurate measurement prevents excessive suds and residue. - 5
Clean with machine
Proceed with slow, overlapping passes. Trigger cleaning solution only when moving forward, then pull back without solution to extract soil.
Tip: Keep the nozzle about 1 inch above the carpet surface. - 6
Rinse and extract
Rinse areas with clean water and run the extractor again to remove residue. Repeat if necessary on particularly dirty zones.
Tip: Avoid over-wetting; fewer, thorough passes work better than many light passes. - 7
Dry and verify
Use fans or dehumidifiers to accelerate drying. Check for damp patches and odors before returning furniture.
Tip: Test carpet moisture with the back of your hand; if it feels damp, keep drying.
FAQ
Do I need to pre-vacuum before using a carpet cleaner?
Yes. Pre-vacuuming removes loose dirt that can resettle during cleaning, improving extraction efficiency and reducing the chance of staining reappearing.
Yes. Pre-vacuuming removes loose dirt before cleaning, which helps extraction and reduces re-staining.
What cleaning solution should I use with my carpet cleaner?
Always use a solution compatible with your carpet and machine. Follow the manufacturer’s recommended dilution to avoid residues and excessive foaming.
Use a solution recommended by the manufacturer and dilute it as directed to avoid residue and foaming.
Can I clean wool or delicate carpets with a carpet cleaner?
Some cleaners are safe for delicate fibers, but always check the fiber label and test on a hidden area first. If in doubt, use a low-moisture method or a professional service.
Check the carpet fiber label and test a hidden spot first. If unsure, consider a gentler method.
How long does it take for carpets to dry after cleaning?
Drying times vary with carpet type and room conditions, but most rooms dry within 4–12 hours with good air movement.
Drying usually takes 4 to 12 hours depending on humidity and airflow.
Is it safe to use a carpet cleaner on pet stains?
Yes, with proper pretreatment and thorough rinsing. Ensure cleaning products are pet-safe and allow adequate drying time.
Yes, with proper pretreatment and drying time, pet stains are safely cleaned.
Should I water down cleaning solution or use it straight?
Follow the product’s instructions. Over-diluting can reduce effectiveness, while over-concentrating can leave residue.
Follow the product’s instructions for dilution to avoid residue and poor cleaning.
Watch Video
The Essentials
- Plan your cleaning area and route before starting
- Vacuum thoroughly to reduce soil load
- Pre-treat tough stains for better results
- Use manufacturer-recommended solutions and dilution
- Dry promptly to prevent odors and mold