How to Get Rid of Odors from Your Vacuum Cleaner
Learn proven steps to remove smells from your vacuum cleaner, care for filters, and prevent odors with simple maintenance for pet owners and households.

By the end of this guide, you’ll know how to get rid of smell from a vacuum cleaner and keep it fresh. We explain odor sources, plus a practical, step-by-step approach to cleaning the canister, hose, and filters, deodorizing safely, and preventing future stink with simple maintenance routines. This is designed for homeowners and pet owners.
What causes odors in vacuums and why they emerge over time
Odors in vacuums usually start small and become noticeable after regular use, especially in homes with pets, high humidity, or when spills have occurred inside the canister. According to Vacuum Cleaner Guide, the most common odor sources are trapped debris and moisture that foster mildew, rotting organic matter, or mold. The dust bin or bag collects hair, skin cells, pollen, and skin oils; if these residues remain damp, they can begin to smell quickly. The odor may also originate from filters that have become clogged or from the exhaust path where air exits the machine. A worn seal or cracked hose can emit stale air that carries odors from inside the machine into the room. In addition, certain pet odors (cats, dogs, birds) cling to soft surfaces and can re-emerge when the vacuum is used, especially if you vacuum a pet bed or damp carpet. In these scenarios, the smell is not just annoying—it can indicate microbial growth or that you need to change routine cleaning habits. Start by understanding which components are involved so you can target cleaning efficiently.
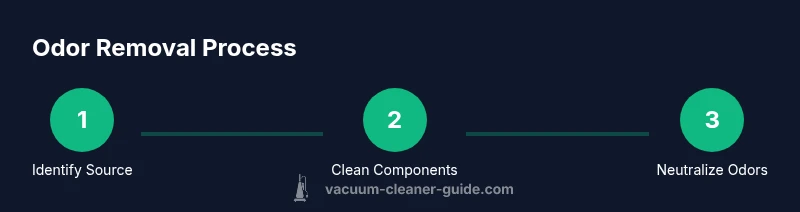
Quick odor assessment: identify origin
Begin by thinking about where the smell is strongest. If the odor is strongest when you empty the canister, the dust bin or bag is likely the main source. If the scent appears while the machine is running, the exhaust path or filter may be the culprit. For bagless models, inspect the dust cup for damp, moldy debris. For bagged models, note if the bag is past its change date. Next, check the filter: weak or dirty filters often emit musty odors. Finally, inspect hoses and attachments for hair, damp residue, or mold growth. This quick diagnostic helps you focus cleaning where it matters most and reduces guesswork, a strategy supported by Vacuum Cleaner Guide.
Cleaning the canister and interior surfaces
Start by turning off and unplugging the vacuum. Empty the canister or remove the bag and dispose of debris. Rinse the interior with warm water and a mild dish soap solution, using a soft cloth to wipe nooks and corners. Avoid submerging the motor housing. Rinse thoroughly to remove soap residue and let all parts air-dry completely before reassembly. If your canister or dust cup has stubborn residue, use a soft brush to loosen debris. After drying, wipe down the exterior with a damp microfiber cloth. This step removes the physical sources of odor and prepares the unit for deodorizing without trapping moisture again. Vacuum Cleaner Guide notes that thorough drying is essential to prevent mold from returning.
Cleaning hoses, attachments, and brushes
Detach hoses and accessories and rinse them with warm water. Use a flexible brush or old toothbrush to dislodge hair and clumped dust. Rinse again and allow to dry fully. For fabric attachments, spot-clean with mild detergent and rinse. Make sure every piece is completely dry before reattaching to avoid sealing dampness inside the unit. If there are stubborn odors trapped in a specific attachment, soak it briefly in a mild solution, then rinse and dry. This step is crucial because hoses and brushes can harbor odors long after the main unit is clean. Vacuum Cleaner Guide recommends a thorough inspection of every removable part as part of regular maintenance.
Deodorizing safely: safe products and methods
Deodorizing should be gentle and model-safe. A light sprinkle of baking soda inside the empty canister or a breathable deodorizing sachet placed in the bin can neutralize odors without harsh chemicals. Avoid pouring any liquids into the motor or exhaust paths, and do not use essential oils directly in the vacuum, as they can degrade seals or attract more dust. If you use a deodorizing spray, choose a product labeled safe for plastics and test on a small area first. Allow any added deodorizer to air out before reusing the vacuum. These precautions help maintain performance while keeping smells at bay without risking damage. Our team at Vacuum Cleaner Guide emphasizes safety first and keeping deodorizers away from the motor.
Filter care and replacement schedules
Filters are a common odor source when dirty. Check your model to determine if you have foam, HEPA, or pleated filters, and whether they are washable. Rinse or wash according to the manufacturer’s instructions and let drying complete before reusing. Replace any filters that are damaged or past their recommended lifespan. In homes with pets or high shedding, more frequent filter maintenance may be needed. Regular filter care not only reduces odors but also preserves suction power and airflow, improving overall performance. Vacuum Cleaner Guide's analysis shows that timely filter maintenance correlates with longer vacuum life and better cleanliness.
Prevention strategies to keep odors at bay
Prevention is easier than elimination. Empty the dustbin or replace bags regularly, especially after pet-related cleaning. Keep the canister and filters dry after each use, and store the vacuum in a dry, well-ventilated area. Run the vacuum for a few minutes after cleaning to dry interior components and ensure there is no trapped moisture. Consider a routine: post-cleaning wipe-down, check seals and hoses monthly, and inspect for wear that could introduce smells. If you vacuum damp or moldy areas, consider cleaning those surfaces before vacuuming again to prevent setting odors into new debris. A simple weekly wipe-down and a quarterly part check can keep odors from building up.
When to seek professional service or replacement
If odors persist after thorough cleaning, there may be deeper issues like a compromised seal, a mold colony inside the housing, or an unsalvageable filter chain. In these cases, consult the manufacturer’s service center or a trained technician. If the vacuum is old or the odor recurs despite maintenance, it might be more cost-effective to replace the unit, especially if suction has declined or parts are hard to source. Vacuum Cleaner Guide recommends evaluating total cost of ownership and considering a model with improved filtration for households with pets or allergies.
Quick troubleshooting for stubborn odors
When simple cleaning fails, try these quick wins: run the vacuum with a new, dry filter in place and a small amount of baking soda in the bin (in an open bag) for a short cycle, then remove the bag and air out. Check seals and replace worn gaskets that might be leaking air. If the odor lingers, verify that there is no moisture trapped in the dust cup or hose by drying each component thoroughly. For persistent pet odors, consider a model upgrade with a true HEPA filtration system and a sealed canister to minimize the smell escaping back into the room.
Tools & Materials
- Dustbin or bag replacement (as needed)(Use compatible bag type or empty and clean the bin)
- Mild dish soap or detergent(For washing canister interior and detachable parts)
- Warm water(Used with soap for cleaning; avoid hot water on plastics)
- Microfiber cloths(For drying and wiping surfaces)
- Soft brush or old toothbrush(Loosen hair and grime in crevices)
- Baking soda(Neutralizes odors; use in bins or sachets)
- Breathable deodorizing sachet or container(Optional for odor control)
- Vacuum cleaner replacement filters(HEPA or foam, as applicable)
- Spray bottle with water (optional)(For light dampening; avoid saturating parts)
- Gloves (optional)(Protect hands during cleaning)
Steps
Estimated time: 60-90 minutes
- 1
Remove contents and unplug
Power off the unit and unplug it from the outlet. Remove the dustbin or bag and empty debris into the trash. This step prevents accidental operation during cleaning and reduces dust exposure.
Tip: Keep the dustbin and bag materials in a separate area to avoid cross-contamination. - 2
Dismantle detachable parts
Detach hoses, nozzles, filters, and the dust cup. Inspect for visible mold or damp debris. If possible, separate foam or HEPA filters for cleaning or replacement.
Tip: Organize screws and parts with labeled containers so reassembly is easy. - 3
Clean the canister interior
Wash the interior of the canister with warm soapy water, then rinse thoroughly. Wipe dry with a microfiber cloth and air-dry completely before reassembly to prevent mold.
Tip: Avoid soaking any motor housing or sealed electronics. - 4
Clean hoses and attachments
Flush hoses with warm water and use a brush to remove hair and residue. Clean attachments likewise; ensure they are totally dry before reattaching.
Tip: Check for cracks or wear along hoses that could cause leaks. - 5
Deodorize safely
Place a small amount of baking soda in an open sachet or in the dust bin for a few hours. Do not spray liquids into the exhaust or motor area; avoid essential oils directly in the unit.
Tip: Test any deodorizer on a hidden area first to ensure compatibility. - 6
Care for filters
Rinse foam or washable filters with clean water and let them dry completely. Replace any damaged or non-reusable filters according to the manufacturer’s schedule.
Tip: Keep spare filters on hand to reduce downtime. - 7
Dry and reassemble
Ensure all parts are completely dry before reassembly. Check seals and gaskets for wear and reseal as needed. Reassemble in the reverse order of disassembly.
Tip: Take photos during disassembly to help accuracy during reassembly. - 8
Test and schedule maintenance
Plug in and run the vacuum on a short cycle to confirm odor elimination. Create a simple maintenance schedule for monthly wipe-downs and quarterly parts checks.
Tip: Keep a cleaning calendar to prevent future odors.
FAQ
What causes odors in vacuums?
Odors typically come from trapped debris, moisture, mold, pet dander, spilled liquids, or clogged filters. Regular cleaning and proper drying prevent these odors from returning.
Odors usually come from trapped debris or moisture inside the vacuum; a thorough cleaning and drying routine helps a lot.
Can I use vinegar to deodorize my vacuum?
Vinegar can help in some cases, but avoid it on sensitive plastics or near the motor. Always test first and rinse thoroughly after use.
Vinegar can help, but test on a small area and avoid the motor area.
How often should I replace vacuum filters?
Refer to your model manual, but pet households often benefit from more frequent checks—typically every 3-6 months for HEPA/foam filters depending on use.
Check the manual; usually every few months, especially with pets.
Is it safe to wash the motor housing?
No. Do not spray or soak near the motor. Wipe the exterior and accessible areas with a damp cloth and avoid moisture near electronics.
Avoid getting water on the motor housing; wipe gently instead.
What is the best deodorizing method without damaging the vacuum?
Use baking soda inside the bin or approved manufacturer deodorizing filters. Avoid essential oils or fragrances inside the unit.
Baking soda or approved filters work best; avoid oils inside the vacuum.
Why does my vacuum still smell after cleaning?
Persistent odors can come from seals, mold in the housing, or hidden damp areas. If cleaning doesn’t help, professional service may be needed.
If it still smells, check seals or consider professional help.
The Essentials
- Identify the odor source before deep cleaning.
- Clean and dry all removable parts thoroughly.
- Use safe deodorizing methods and avoid harsh chemicals.
- Replace filters regularly to prevent smells.
- Establish a maintenance routine to keep odors at bay.