How to Do a Vacuum Test: A Practical Guide for Homeowners
Learn how to perform a vacuum test to verify suction, airflow, and seal integrity. This comprehensive guide covers prep, readings, interpretation, and maintenance tips for homeowners and pet owners.

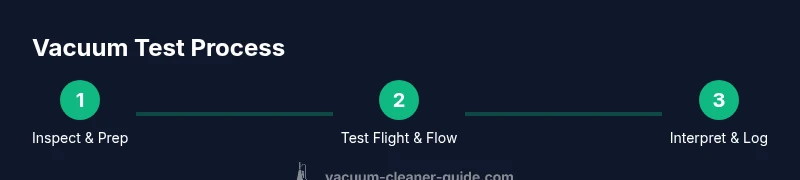
To do a vacuum test, you verify suction, airflow, and seal integrity to ensure peak cleaning performance. Gather the vacuum, replacement filters, and a simple gauge if available. Run the unit on low and high settings, test suction at the wand and nozzle, check hoses for leaks, and compare results to your model’s specs. This confirms your vacuum is performing as designed.
What a vacuum test assesses
A vacuum test evaluates several core performance aspects: suction strength at various attachments, airflow through the hose, the integrity of seals and hoses, and the condition of filters. A healthy unit should maintain steady suction at the wand, respond quickly when switching from carpet to hard floor attachments, and not draw excessive motor heat or noise. By documenting these factors, you can distinguish between a simple clog and a deeper issue like a degraded seal or a worn belt. According to Vacuum Cleaner Guide, understanding these elements helps homeowners target repairs rather than replacing the entire unit. This section explains each component and why it matters for effective cleaning.
Why tests matter for different surfaces
Different floor types require different airflow and wand positioning. Carpets demand more agitation and consistent suction to lift fibers, while hard floors rely on smooth airflow and minimal scattering. Pet owners often notice rapid clogging from hair and dander, which can skew readings if not accounted for. A proper vacuum test helps you determine whether attachments are sealing properly on all surfaces and whether the cleaning head maintains contact with the floor. By knowing how your unit behaves on each surface, you can tailor nozzle choices and maintenance routines for optimal results.
Preparations: tools, safety, and setup
Before you start, power down and unplug the vacuum to avoid any accidental activation. Inspect and, if needed, replace filters to ensure airflow is not restricted by a dirty element. Gather a few simple tools: a flashlight to inspect hoses, a notebook to log readings, and an optional suction gauge or simple DIY manometer if you have one. Clear the testing area of loose debris so readings reflect the vacuum and not external clutter. If your model comes with a manual, keep it handy to reference expected performance ranges and maintenance intervals.
Understanding readings and what they mean
A successful test shows stable suction at the wand, predictable changes when switching attachments, and no audible air leaks. If you notice sharp drops in suction or inconsistency across attachments, inspect for blockages, damaged seals, or worn belts. Leaks often manifest as whistling sounds or a faint draft around joints. If you have a gauge, compare readings to the manufacturer’s specifications; if not, use qualitative cues like how easily dirt is picked up and how the nozzle maintains contact with the surface.
How to interpret results and decide on next steps
If readings fall within the expected range and the vacuum cleans effectively, the unit passes the test and simply needs routine maintenance. If readings are marginal or readings vary widely between attachments, address visible issues first—clean filters, clear blockages, and reseal joints. For persistent problems, plan targeted maintenance or replacement parts rather than a full unit. Document the results so you can monitor changes over time and detect gradual performance losses.
Maintenance tips to keep a vacuum performing well
Regular maintenance extends suction, airflow, and overall lifespan. Clean or replace filters as recommended, inspect hoses for cracks or loose connections, and wipe away dust from internal paths. A simple monthly check of seals and belts can prevent larger performance drops. For pet owners, routine removal of hair from the brush and attachments helps maintain consistent suction across surfaces. A small, consistent maintenance routine is often more effective than infrequent, intensive repairs.
Tools & Materials
- Vacuum cleaner(Ensure it's unplugged during all inspections.)
- Replacement filters(Have extras on hand for quick swap during testing.)
- Digital manometer or DIY suction gauge(Optional; use for objective readings if available.)
- Flashlight(Helpful for inspecting hoses and seals.)
- Cloth towels or paper towels(Wipe dust and keep testing area clean.)
- Notebook and pen(Record readings and observations for trends.)
Steps
Estimated time: 25-40 minutes
- 1
Power down and unplug
Ensure the unit is completely disconnected from power. This prevents accidental activation while you inspect filters, seals, and hoses. If you must work near water or liquids, remove them and dry the area before proceeding.
Tip: Always unplug first, even if you think the switch is off; residual power can remain in the cord. - 2
Inspect and, if needed, replace filters
Check each filter for dirt buildup and clogging. If they look dirty or discolored, replace or rinse according to the manufacturer’s guidance. Allow any rinsed components to dry fully before reassembling.
Tip: Never operate with a visibly clogged filter; it throttles airflow and reduces suction. - 3
Check hoses and seals for leaks
Visually inspect all hoses and joints for cracks, holes, or loose connections. Lightly tug on hoses to ensure fittings are secure. If you hear whistling or feel air escaping around joints, address the leak before testing.
Tip: A flashlight helps reveal tiny cracks that aren’t obvious in normal lighting. - 4
Test suction at wand and nozzle
With the vacuum powered on, test suction at the wand and at various attachments. Note any noticeable drops when switching to carpet vs hard floor heads. If you observe inconsistent suction, it may indicate a blockage or a loose seal.
Tip: Test both low and high settings if your model supports them to gauge performance across modes. - 5
Use a gauge or DIY method to measure airflow
If you have a gauge, connect it according to the manual and take readings at multiple points. If not, perform a qualitative test by observing dirt pickup and noise levels. Record what you observe for future comparisons.
Tip: Even a basic DIY column of water can provide a rough pressure estimate if you don’t have a gauge. - 6
Document results and plan next steps
Write down readings or qualitative judgments, include the date, model, and environment. Use this log to track trends and decide whether professional service, parts replacement, or a belt change is needed.
Tip: Keeping a simple maintenance log makes it easy to spot gradual declines in performance.
FAQ
What is a vacuum test?
A vacuum test checks suction, airflow, and seal integrity to confirm your cleaner is performing as designed. It helps distinguish between simple clogs and more serious issues.
A vacuum test checks suction, airflow, and seals to confirm your cleaner is performing as designed.
Need special tools?
No fancy equipment is required for a basic test. A clean unit, fresh filters, and a handheld gauge or DIY method can provide clear indications.
No fancy equipment is required for a basic test. A gauge or simple DIY method works well.
How often should I perform a vacuum test?
Perform a vacuum test as part of routine maintenance or whenever you notice a drop in suction, longer cleaning times, or new changes in performance.
Do a vacuum test as part of routine maintenance, especially if you notice changes in suction.
What readings indicate a problem?
Lower suction than expected, inconsistent readings across attachments, unusual noises, or visible leaks point to potential issues needing maintenance or repair.
Lower suction, inconsistencies, or unusual noises suggest a problem may exist.
Can I test by eye?
Yes, you can rely on qualitative cues like dirt pickup efficiency and noise. However, objective readings from a gauge provide more reliable comparisons over time.
You can test by eye, but a gauge gives more reliable measurements.
The Essentials
- Verify suction, airflow, and seals to assess performance.
- Follow a consistent test protocol for reliable results.
- Document readings to monitor changes over time.
- Address simple issues (filters, leaks) before replacing the unit.