Vacuum Cleaner Service: A Practical How-To Guide
A comprehensive, step-by-step guide to maintaining and servicing your vacuum cleaner at home, from diagnosis to parts replacement, with safety tips and maintenance schedules.

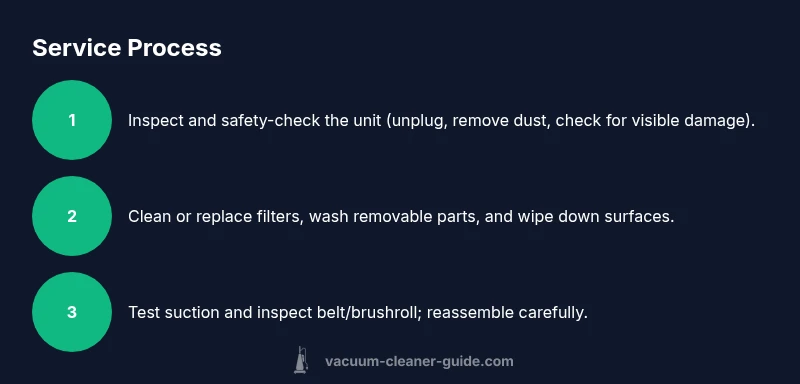
You're about to learn how to perform basic vacuum cleaner service at home: inspect and clear clogs, clean or replace filters, check belts and brushroll, lubricate moving parts if specified, and test suction and airflow. Gather basic tools, unplug before starting, protect electronics, and know when to seek professional service for motor issues or heavy repairs.
What is vacuum cleaner service and why it matters
Vacuum cleaner service is the routine maintenance performed to keep your machine operating at peak efficiency. It includes cleaning or replacing filters, clearing clogs, inspecting the belt and brushroll, and testing suction while ensuring all moving parts are properly lubricated where the manufacturer recommends it. Regular service is especially important for households with pets, children, and high-traffic floors, since dust, dander, and hair can quickly accumulate and reduce effectiveness. According to Vacuum Cleaner Guide, regular vacuum cleaner service helps extend lifespan and maintain suction, which translates to better indoor air quality and fewer headaches for pet owners and allergy sufferers. This proactive approach also helps you catch worn parts before they fail, saving you money and downtime. Proper maintenance is not a one-off task; it’s a recurring habit that pays off over months and years.
In this guide you’ll learn how to perform basic service safely, identify issues that you can fix at home, and recognize signals that indicate when professional service is warranted. We’ll cover DIY steps alongside model-specific caveats so you can decide what to handle yourself and when to call in a technician. The goal is to empower homeowners to keep their vacuum cleaner performing well without unnecessary downtime or guesswork.
Assessing your vacuum: diagnosis and prep
Before you touch any components, you must establish a safe starting point. Begin by unplugging the unit and removing the dust canister or bag to inspect for clogs or blockages. Listen for unusual noises, and observe whether the motor runs hot or if suction drops gradually over time. Check the user manual for any diagnostic codes or model-specific checks—this is particularly important for premium models with computerized features. Prep your workspace by laying out a clean surface to place screws and small parts, and have a soft cloth handy to wipe surfaces and prevent dust from resettling into the system. A clear, organized baseline makes the service smoother and reduces the risk of misplacing parts.
During diagnosis, distinguish between surface dirt and deeper issues. For example, a clogged hose is a common DIY fix, while a damaged motor windings or a worn belt may require professional attention. If you encounter hazardous situations such as exposed wires or unusual smells, stop and escalate to a pro. Vacuum cleaner service is about incremental improvements—tackle easy wins first to build confidence before moving on to more involved steps.
For homeowners, this phase sets expectations: you will identify what can be fixed at home and what needs specialized tools or expertise. The goal is to restore airflow, reduce energy waste, and prevent overheating, which ultimately protects your investment and your home environment.
Core tools and consumables you’ll need
Having the right toolkit and consumables on hand makes the service process faster and more accurate. Start with a basic set of screwdrivers (Phillips and flathead), a small pair of pliers, and a microfiber cloth for dusting. Replacement filters, belts, and brush rolls tailored to your model are essential, so you don’t risk compatibility issues. A soft brush, a pair of scissors or clippers for trimming hair or threads, and a can of compressed air (optional) can help remove stubborn dust from internal passages. Also have your model manual close by to confirm service steps and torque specs.
Organization matters: dedicate a tray or magnetic mat for screws and small parts, photograph steps during disassembly to ease reassembly, and label components by location. If you own a pet-friendly home, consider upgrading to allergen-friendly or HEPA-type filters that meet your unit’s specifications. By preparing these tools and materials in advance, you’ll reduce the risk of losing small parts and speed up the process significantly. This preparation is the bridge between theory and hands-on maintenance, turning a daunting task into a manageable routine.
Step-by-step DIY service routine
The DIY service routine balances safety with thoroughness. Each step is designed to be a standalone action you can perform, yet they fit together for a complete maintenance cycle. The sequence starts with safety and access, then moves to cleaning components, followed by testing performance and reassembly. Refer to your manual for model-specific steps and torque specs, and use manufacturer-approved parts whenever possible. If your model requires battery disconnection or specialized lubricant, follow the exact guidance in the user manual to prevent damage.
Step-by-step actions ensure you cover the most common service tasks: unplug and disassemble the housing, clean filters, clear the hose and nozzle, inspect belts and brushroll, clean the interior, reassemble, and test the unit. Each action should be performed deliberately, with a quick check to confirm you’ve returned every screw to its original position. By adhering to a consistent sequence, you reduce the chance of misplacing parts and ensure reliable performance after service.
In this section you’ll find a clear, professional flow you can adapt to most consumer vacuums, whether you own a corded model, cordless stick, or canister. Always respect the cautions on the machine’s label—if a component is fragile or difficult to access, stop and consult a professional rather than forcing it. The focus is on restoring suction, optimizing airflow, and keeping noise and overheating in check, so you enjoy a cleaner home with minimal downtime.
Step-by-step summary of the core actions:
- Unplug and access internal components
- Clean or replace filters and washing components (if applicable)
- Clear hoses and the nozzle of obstructions
- Inspect and replace belt and brushroll as needed
- Clean the interior housing and reassemble
- Test suction and airflow, listen for abnormal sounds
- Document the service for warranty and future reference
Estimated total time: 60-90 minutes if no major repairs are needed.
Common issues and fixes
Even with routine service, you’ll encounter common issues that can degrade performance. The symptoms—loss of suction, unusual noises, odors, or overheating—often point to specific culprits. Hair and lint frequently clog brushrolls and hoses, reducing airflow; filters clogged with dust also choke the system and lower filtration efficiency. A worn or broken belt is another frequent problem, resulting in a slower or stalled brush movement. A corroded or dirty motor within the housing can cause overheating, triggering thermal cutoffs and energy inefficiency. For pet owners, embedded hair can wrap around the brush and motor shaft, increasing resistance and friction.
Fixes are typically straightforward if you have the right parts. Replace clogged or damaged filters, swap out worn belts or brushrolls, and ensure hoses are free of kinks or debris. Lubricate only those components specified by the manufacturer; most consumer vacuums do not require lubrication, and the wrong lubricant can damage seals. If odor persists after cleaning, inspect the dust canister or bag for residue and wash or replace accordingly. In many cases, a persistent issue is a signal that internal components or electronics require professional attention.
Document recurring issues with dates and findings. This helps you recognize patterns and improves the accuracy of future service calls. If you notice reduced suction after a cleaning that previously worked, re-check the air pathway and the seals around doors and gaskets. By addressing root causes, you ensure your vacuum’s efficiency and energy use stay aligned with original performance specifications.
When to seek professional service
Not every problem is DIY-friendly. If you encounter signs of motor overheating, burning smells, persistent error codes, or if you find a broken belt that requires specialized tools to replace, professional service is recommended. Electrical components, seals, and seals around the canister require a technician’s expertise to avoid safety hazards. If your model has a sealed motor or a complex electronic control board, attempting to service it without appropriate training may void warranties. For many high-end models, a professional service preserves warranty terms and ensures calibration is correct for optimal performance.
Scheduling a professional service also makes sense if you’ve tried routine maintenance without visible improvements. A technician can diagnose issues such as motor windings, capacitor faults, or airflow leaks that aren’t easily visible. Even for do-it-yourself enthusiasts, a periodic professional check can help validate your maintenance routine and catch issues early, preventing more expensive repairs later. Regular professional checkups, combined with DIY upkeep, offer a balanced approach to preserving performance and lifespan.
When selecting a service provider, verify credentials and parts availability. Request a written estimate that breaks down labor, parts, and any diagnostic charges. A reputable shop should provide warranty coverage for replaced components and a clear timeline for return.
Maintenance schedule and best practices
A predictable maintenance schedule keeps your vacuum performing well and reduces long-term wear. Create a routine that fits your household, especially if you have pets or a high-dust environment. Quick weekly checks might include emptying the dust canister, inspecting brushes, and removing visible hair or threads. Monthly maintenance can involve cleaning filters (washable types), inspecting hoses for cracks, and checking brush height and belt tension. Quarterly reviews should include a more thorough clean of internal surfaces, deeper dusting of the motor housing, and reseating gaskets if you notice any airflow loss. For many households, a semi-annual professional service helps catch wear and performance issues before they slow you down.
Keep a simple log of service activities, noting the date, parts replaced, and any performance changes. This record can be invaluable for warranty claims and resale value. Additionally, align your maintenance with your climate and cleaning frequency. Homes with heavy pet hair or frequent carpet cleaning require more frequent filter changes and belt inspections. A consistent approach will protect your investment, improve indoor air quality, and ensure your home stays free of dust and allergens.
Safety reminders and handling delicate components
Safety is the top priority when servicing any electrical appliance. Always unplug the unit before disassembly, and avoid contact with exposed wiring or the motor directly. Use protective gloves or a wipe to prevent cuts and skin irritation from sharp edges or dust that may contain allergens. Handle belts and brushrolls with care to avoid snapping or misalignment that can affect performance. If you’re uncertain about reassembly torque or wiring connections, consult the manual or a professional. Avoid lubricants unless the manufacturer specifies a recommended lubricant type and quantity, as improper lubrication can attract dust and hamper performance. Finally, store small parts in a labeled container to prevent loss and confusion during reassembly.
These precautions are not just for the DIY enthusiast; they protect your home environment, especially if you’ve got children or pets around. A careful approach reduces the risk of injuries and ensures your vacuum continues to operate safely and effectively for years. If you feel unsure at any point, pause and seek professional assistance to avoid costly damage or safety hazards.
Documentation and warranty considerations
Maintenance records are more than just a checklist; they support warranty claims and can influence resale value. Keep a digital or physical log of service dates, parts replaced, and test results. When you contact customer service for issues, include this history to help technicians diagnose faster. Some warranties require professional servicing at set intervals, so knowing your manufacturer’s policy is essential. If you’re using third-party parts, ensure they are compatible and documented in your maintenance log.
Finally, familiarize yourself with any model-specific cautions, such as avoiding water exposure on certain internal components or using only approved cleaners. A well-documented service history makes it easier to prove that you’ve handled routine maintenance properly, and the right parts ensure continued performance. Regular service, in combination with proactive care, helps you maintain peak suction and prolong the life of your vacuum cleaner. The Vacuum Cleaner Guide team notes that staying on top of service is the best way to protect your investment and keep your home clean and healthy.
Tools & Materials
- Replacement filters(Purchase exact model-compatible filters (HEPA if available))
- Replacement belts and brush rolls(Use manufacturer-specified belt type and brush height)
- Screwdriver set (Phillips #2, flathead)(For access panels and screws (keep track of all fasteners))
- Soft microfiber cloth(Wipe dust and avoid lint transfer to internal components)
- Soft brush or old toothbrush(Clean hard-to-reach areas and detangle hair from brushes)
- Compressed air can (optional)(For dislodging dust from inaccessible channels)
Steps
Estimated time: 60-90 minutes
- 1
Prepare and safety-check
Unplug the vacuum and remove any attached canisters, bags, or cages. Put the unit on a stable surface and gather all tools and replacement parts. Review the manual for any model-specific cautions before disassembly.
Tip: Always verify the model number and match parts to avoid incorrect replacements. - 2
Clear blockages and access panels
Inspect the intake, hoses, and wand for clogs. Use a gentle straightened wire or brush to remove obstructions without puncturing seals. If the hose is stubborn, detach it and rinse with water only if the manual permits.
Tip: Avoid forcing parts; you can use a flexible tool to dislodge stubborn debris. - 3
Clean or replace filters
Remove filters and clean washable types with warm water until clear. If the filter is disposable, replace it with a new one. Let dry completely before reinstalling to prevent mold growth.
Tip: Drying time varies by filter material; ensure full dryness to avoid water damage. - 4
Inspect belt and brushroll
Check belt tension and inspect the brushroll for signs of wear, fraying, or hair entanglement. Replace the belt if it shows wear and remove hair from the brush with a comb or scissors.
Tip: A worn belt can slip and reduce suction efficiently. - 5
Clean interior and housing
Wipe the interior housing with a damp cloth and remove any dust buildup around seals and gaskets. Avoid moisture near electrical components and let all parts air-dry before reassembly.
Tip: Dry surfaces thoroughly to prevent mold and corrosion. - 6
Reassemble and secure
Put the components back in their original locations and tighten screws to manufacturer torque specs. Reconnect hoses and canister, ensuring a snug fit to prevent air leaks.
Tip: Restore parts exactly as you removed them to avoid misalignment. - 7
Test performance
Plug in the unit and run it on a low setting to verify airflow and suction. Listen for abnormal noises and check for any air leaks around gaskets or seals. If everything looks good, run a full test on your floors.
Tip: Document the test results for maintenance history.
FAQ
How often should I service my vacuum cleaner?
A general rule is to perform a quick weekly check (empty canister, inspect brushes) and a more thorough monthly maintenance (filters, hoses). A full professional service every 6-12 months is wise for high-use households or pet owners.
Check filters monthly and consider professional service every 6 to 12 months depending on usage and pets.
Can I service at home or should I hire a pro?
Many routine tasks—like cleaning filters, clearing clogs, and inspecting belts—can be done at home. Signs you should hire a pro include persistent loss of suction, odor, overheating, or visible motor damage.
DIY works for easy tasks, but call a pro for persistent issues or potential motor problems.
What signs indicate my vacuum needs service?
If suction weakens, floors aren’t fully clean, you hear unusual noises, smells, or you notice overheating, it’s time to service. Regular checks can prevent bigger problems.
Watch for weak suction, strange noises, or heat buildup to know when to service.
Should I replace belts and filters at the same time?
Replacing belts and filters together ensures consistent performance. If belts show wear, replace; if filters are dirty, replace or clean per the manufacturer’s instructions.
Replace belts and filters together when needed for best results.
What maintenance can extend my vacuum’s life?
Regular cleaning, timely replacement of filters and belts, and proper storage can greatly extend a vacuum’s life and protect indoor air quality.
Keep it clean and replace parts on schedule to extend life.
Watch Video
The Essentials
- Inspect regularly to catch wear early
- Replace filters and belts promptly to maintain suction
- Schedule professional service if motor issues arise
- Keep a maintenance log for warranties and resale value