How to Clean a Robot Vacuum Cleaner: Step-by-Step Guide
Learn how to clean your robot vacuum cleaner effectively—dustbin, brushes, filters, sensors, and docking contacts. Expert tips from Vacuum Cleaner Guide to extend performance and battery life.

To clean a robot vacuum cleaner, perform a quick routine that covers the dustbin, brushes, filters, sensors, and charging contacts. Gather basic tools, a soft brush, microfiber cloth, isopropyl alcohol, and a small screwdriver. This 5-step routine reduces clogs, preserves suction, and extends battery life, keeping your device performing at its best.
Why Regular Cleaning Prolongs Your Robot Vacuum's Life
Regularly cleaning the robot vacuum cleaner prevents hair and dust buildup that can clog suction paths, sensors, and wheels. When debris accumulates, the machine has to work harder, which can shorten battery life and reduce cleaning performance. The Vacuum Cleaner Guide team emphasizes that a simple, routine clean can extend the device’s productive life and keep navigation precise. By removing hair from brushes and clearing the dustbin, you maintain strong suction and avoid costly repairs. Consistency matters: a compact weekly check beats a monthly deep-clean in preventing wear. In addition, keeping the dustbin and filters clear helps the robot avoid overheating during longer cleaning sessions. According to Vacuum Cleaner Guide, maintaining clean filters and a clear chassis contributes to more predictable battery drain and better obstacle avoidance, especially for pet owners dealing with shedding. A few minutes now save hours later.
Tools and Materials You'll Want on Hand
Having the right tools makes the cleaning process faster and safer. Gather a microfiber cloth, a soft brush, a small Phillips screwdriver, isopropyl alcohol, and cotton swabs. A can of compressed air is optional but helpful for stubborn dust in tight spaces. Keep a tray or small organizer for screws if you ever open a cover. Gloves are optional but can keep hands clean. The goal is a clean chassis, clear sensors, and ready-to-clean brushes without introducing moisture to electronics.
Step-by-Step Cleaning Plan
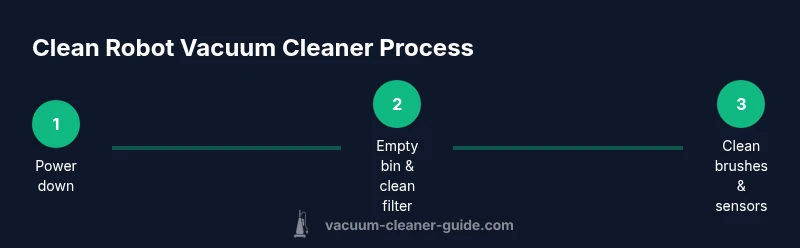
This section walks through a practical, repeatable routine you can perform in one sitting. Start with power-down, then tackle the dustbin, filters, brushes, sensors, and docking contacts. End with a quick test and a plan for your next maintenance.
- Power down and prepare the workspace, ensuring the robot is off and not docked. This prevents accidental start-ups and protects internal components.
- Empty the dustbin and remove the filter. Clean the housing and filter with a microfiber cloth; use isopropyl alcohol on the housing if needed. Let everything dry before reassembly.
- Clean the brushes, beater bar, and wheels. Remove hair and debris, detangle fibers, and inspect for wear. Reinstall firmly.
- Wipe sensors and docking contacts with a lightly damp cloth. Do not saturate electronics; allow to air-dry fully before reassembly.
- Reassemble, return to the dock, and run a short test cycle to verify suction and navigation. If something seems off, recheck brushes and sensors.
Pro tip: keep your cleaning area well-lit so you can spot tiny hairs and dust bunnies hiding in corners.
How to Clean Sensors, Docking Contacts, and LEDs
Sensors and docking contacts are critical for precise navigation and reliable charging. Use a microfiber cloth lightly dampened with isopropyl alcohol to wipe sensor faces and the charging pins. Avoid liquids near battery compartments, and never spray directly onto the electronics. Clean LEDs gently to ensure visibility and avoid glare that could mask dirt. After cleaning, give the components time to dry completely before powering the device back on.
Drying, Reassembly, and Testing
Air-dry all components completely—this usually takes a short while but is essential to prevent moisture from damaging electronics. Once dry, reassemble the dustbin, filter, and any removed covers. Place the robot back on the dock and run a brief test cleaning cycle. Listen for abnormal sounds or changes in suction, and watch for erratic navigation. A quick check now helps avert bigger issues later.
Maintenance Schedule and When to Replace Parts
Set a simple maintenance cadence to keep your robot vacuum performing well. A quick weekly dust-out of the dustbin, a monthly brush check, and a quarterly filter change work well for most homes. If you notice reduced suction, louder operation, or wandering paths, inspect brushes and wheels for wear and consider replacements. Vacuum Cleaner Guide analysis shows that proactive planning reduces downtime and keeps cleanup consistent for pets and high-traffic floors.
Tools & Materials
- Microfiber cloth(Lint-free for wiping dust and sensors)
- Soft brush(Gently dislodge hair from brushes and crevices)
- Small Phillips screwdriver(For removing covers or screws if needed)
- Isopropyl alcohol (70–90%)(Disinfecting wipe; avoid soaking electronics)
- Cotton swabs(Detail cleaning around sensors and tight spots)
- Compressed air can (optional)(Blows dust from tight gaps; use short bursts)
- Replacement brushes/filters (optional)(Have spares on hand for convenient replacements)
Steps
Estimated time: 30-45 minutes
- 1
Power down and prepare
Turn off the robot vacuum and detach it from the dock if possible. Clear a clean workspace so you can see all components and prevent accidental starts during disassembly.
Tip: Disconnect from power or remove from docking station before handling. - 2
Empty dustbin and remove the filter
Open the dustbin, empty contents into a trash can, and tap to remove loose dust. Take out the filter and wipe both parts with a microfiber cloth; if needed, a light alcohol wipe helps remove oily buildup.
Tip: Let the dustbin and filter dry completely before reassembling. - 3
Clean brushes and wheels
Detach the beater brush and main brush, removing hair and fibers wrapped around axles. Clean wheels with the soft brush and cloth; check for stuck debris that could hinder rotation.
Tip: If brushes are worn, replace them to maintain suction efficiency. - 4
Clean sensors and docking contacts
Wipe sensor faces and docking pins with a microfiber cloth lightly dampened with isopropyl alcohol. Avoid touching camera lenses or exposing electronics to moisture.
Tip: Drying time is essential—don’t rush reassembly. - 5
Dry, reassemble, and test
Allow all parts to air dry for a short while, then reassemble. Place the unit back on the dock and run a short cleaning cycle to verify performance.
Tip: If performance is off, recheck brushes and sensor areas for missed debris. - 6
Schedule ongoing maintenance
Set a routine: quick weekly dust-out, brush checks monthly, and filter changes quarterly. Track wear and replace parts as needed to prevent downtime.
Tip: Record your maintenance dates to stay consistent.
FAQ
How often should I clean my robot vacuum cleaner?
Ideally after every few uses or at least once a week. Frequency depends on household dust levels and pet shedding.
Clean it weekly or after several uses, especially if you have pets or lots of dust.
Can I wash the dustbin or filter with water?
You can empty and wipe the dustbin with a damp microfiber cloth, but avoid soaking the filter. Let filters air-dry completely before reinstalling.
You can wipe the dustbin, but don’t soak the filter and let everything dry before using again.
What parts wear out the most?
Beater brushes, side brushes, and filters wear quickest. Replace them when you notice reduced suction or odd noises.
Watch for worn brushes and filters; replace as needed for best performance.
Is it safe to use alcohol near electronics?
Yes, but use it sparingly and avoid soaking. Wipe with a damp cloth or cotton swab and allow to dry completely.
Alcohol is fine in small amounts—just don’t soak parts and let everything dry.
Should I clean sensors with water?
No water. Use a dry or alcohol-damped microfiber cloth to avoid moisture near sensors.
Don’t use water on sensors; use a dry cloth or a little alcohol.
What if my robot won’t turn on after cleaning?
Check the charging contacts, battery, and docking station. If it still won’t power, consult the manufacturer’s support.
If it won’t turn on, inspect the dock and battery, then contact support if needed.
Watch Video
The Essentials
- Regular cleaning preserves suction and navigation
- Use the right tools to prevent damage
- Dry components fully before reassembly
- Follow a simple maintenance cadence