How to Remove Dirt From Vacuum Cleaner: A Practical Guide
Discover practical, safe steps to remove dirt from your vacuum cleaner, clean filters, brushes, and hoses, and prevent clogs for better suction and longer life.

Goal: learn how to remove dirt from a vacuum cleaner safely and effectively. This guide covers disconnecting power, accessing the dustbin or bag, cleaning or replacing filters, brushes, hoses, and seals, plus resealing and testing suction after reassembly. You'll also find simple maintenance tips to prevent future buildup and maintain peak performance.
Why Dirt Accumulation Harms Suction and Longevity
Dirt isn’t merely unsightly; it actively reduces your vacuum’s ability to move air. When dust, hair, and debris collect in the motor intake, dustbin, or filter housing, airflow becomes restricted. The result is weaker suction, longer run times, and more energy use. Over time, clogged filters and a dirty brush roll can cause the motor to work harder, potentially shortening the vacuum’s life. The Vacuum Cleaner Guide team notes that maintaining a clean air path is essential for both performance and longevity. Regular attention to dirt-prone areas also reduces the chance of overheating and motor stress. By addressing dirt early, you can avoid costly repairs or premature replacement. This section lays the groundwork for successful dirt removal by explaining exactly where dirt tends to hide and why clogging matters for daily use, especially in homes with pets and multiple floor types. According to Vacuum Cleaner Guide insights, proactive maintenance pays off in consistent suction and quieter operation.
Where Dirt Comes From in Everyday Use
Everyday vacuuming stirs up tiny particles and deposits them in the device. Hair from pets, human skin cells, fabric fibers, pollen, and dust are common culprits. Carpets shed, upholstery traps lint, and hard floors scatter fine grit that can lodge in crevices. As dirt accumulates, the path from intake to exhaust narrows, reducing airflow and causing the motor to strain to maintain suction. For pet owners, hair tangles easily in brushes and hoses, forming compact clogs that hamper performance. The goal is not only to remove visible dirt but also to clear these subtler blocks before they become larger problems. A systematic approach to dirt identification helps you target the right components and avoid unnecessary disassembly. Recognizing the primary dirt sources allows you to tailor your cleaning routine to your household, flooring, and models. Vacuum Cleaner Guide analysis shows that targeted cleaning reduces downtime and extends life of seals and gaskets.
Safety and Preparation: Get Ready to Work
Before touching the internals of your vacuum, unplug it from the wall and switch it off completely. If you use a cordless model, remove the battery following the manufacturer’s instructions. Wear eye protection to guard against dust, and consider a mask if you’re sensitive to particles. Gather a tray for screws and small parts to avoid losing components. Water and electricity do not mix, so never apply liquids to motor housings or electrical connections. Reading your model’s manual for disassembly cautions helps prevent damage. Safety-first maintenance minimizes risk and ensures you protect both yourself and your investment. The Vacuum Cleaner Guide Team stresses that a cautious start leads to cleaner internals and better performance.
Tools and Materials: What You’ll Need
Having the right tools makes dirt removal faster and safer. A Phillips screwdriver is often needed for opening dust bins or brush housings; a soft-bristle brush helps loosen grime from crevices; microfiber cloths wipe surfaces without leaving lint. Warm water with a mild dish soap solution cleans removable plastic parts—never soak the motor or sealed electronics. If your model uses a HEPA filter or bag, have replacement parts on hand. Optional, but helpful: a small amount of isopropyl alcohol for sanitizing plastic components and connectors. Keeping parts organized in a tray helps you reassemble with confidence. These material choices minimize damage and accelerate the process. According to Vacuum Cleaner Guide’s recommendations, organize parts to speed up the reassembly phase.
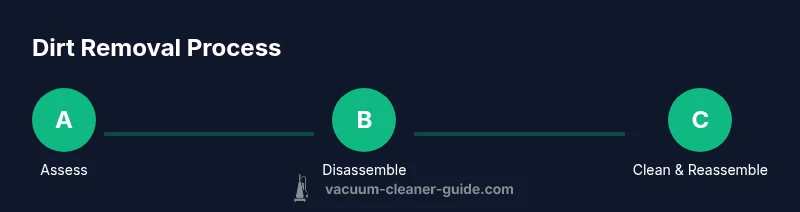
Step-by-Step Overview: What You’ll Do
This overview summarizes the approach; you’ll see the detailed steps later in the dedicated STEP-BY-STEP section. Start by safely powering down and detaching external components, then access the dustbin or bag. Inspect filters, bags, and the brush roll path for dirt accumulation, then clean or replace as needed. Wipe interior surfaces and rinse removable parts with warm soapy water, ensuring everything dries thoroughly. Finally, reassemble with the correct orientation and test suction on a small area before regular use. This holistic view helps you plan your actions and ensures nothing is overlooked during the hands-on portion. Remember, methodical cleaning preserves suction and reduces the likelihood of clog-related performance drops.
Cleaning the Dustbin, Bag, and Filters
The dustbin and bag area collects most of the visible dirt. Empty the dustbin into a trash can and rinse under lukewarm water if the design allows; avoid high-pressure streams that push debris into seals. If the bag is reusable, wash according to manufacturer directions; if it appears worn, replace it. Filters should be cleaned or replaced depending on type: foam or felt should be washed and air-dried; HEPA filters typically require replacement on shorter cycles. After cleaning, let all components dry completely before reassembly to prevent mold and odors. A clean dust path improves suction and reduces the chance of pushing dirt back into the room. Vacuum Cleaner Guide analyses note that consistent dustbin hygiene directly correlates with long-term motor health.
Cleaning the Brush Roll, Beater Bar, and Intake Path
Hair and fibers easily wrap around the brush roll, which slows rotation and can wear bristles. Remove the brush assembly if possible, cut away hair with scissors, and clear lint from the bearings. Wipe the housing and intake paths with a damp cloth; use a soft-bristle brush to remove stubborn debris. Avoid metal tools that can nick plastic parts. Dry thoroughly before reinstalling. Regular attention to the brush roll reduces stray particles and improves carpet cleaning performance. This step is especially important for pet owners, whose fur quickly clogs rollers and reduces efficiency.
Cleaning Hoses, Attachments, and Seals
Hoses and attachments can harbor dust that escapes back into the air if not fully cleared. Detach hoses and inspect for cracks or holes; if found, replace rather than attempting quick fixes. Flush shorter hoses with a gentle stream of water if the design allows; otherwise wipe clean. Inspect seals and gaskets for wear and tear, replacing as needed to maintain airtight connections. After cleaning, dry all parts completely. Reinsert into the main body carefully to ensure there are no air leaks that would degrade suction. Following these steps helps maintain a robust seal and long-lasting performance.
Reassembly, Testing, and Routine Maintenance
Reassemble in the reverse order of disassembly, ensuring each component fits crisply. Run a test cycle on a low-pile rug or smooth hard floor, listening for normal operation and verifying strong suction. If you notice unusual noises, smells, or reduced performance, stop and recheck parts. Establish a simple maintenance routine: inspect bags/filters monthly, wipe interiors periodically, and wash reusable parts as needed. Record the date of the last clean to track when the next maintenance should occur. Consistent upkeep preserves suction and extends the device’s life. The Vacuum Cleaner Guide Team recommends turning maintenance into a habit rather than a chore.
Authoritative Sources
- United States Environmental Protection Agency (EPA): https://www.epa.gov/iaq
- Occupational Safety and Health Administration (OSHA): https://www.osha.gov
- University Extension Service (Edu): https://extension.illinois.edu
Common Mistakes to Avoid
Avoid soaking electrical parts or using high-pressure water on internal components. Do not force parts together or skip drying times, as moisture can cause mold or electrical shorts. Never operate a vacuum with damaged cords, cracked housings, or missing seals. Skipping pre-clean checks, using improper cleaning agents, or ignoring the model’s disassembly instructions can lead to worse performance or void warranties. Finally, avoid over-cleaning parts that don’t require it; premature replacement can be costly and unnecessary.
Quick Reference: Maintenance Checklist
- Inspect and empty dustbin and bags regularly
- Clean filters and brush roll every few uses, replace as needed
- Dry all removable parts completely before reassembly
- Check hoses and seals for cracks or wear on a semiannual basis
- Review your model’s manual for model-specific maintenance tips
Tools & Materials
- Screwdriver (Phillips head)(Used to remove screws securing the dust bin or brush housing)
- Soft-bristle brush(Loosen grime from crevices and filters)
- Microfiber cloths(Wipe parts dry; remove loose dirt)
- Warm water with mild dish soap(Clean removable plastic parts; avoid motor housings)
- Isopropyl alcohol (70%)(Sanitize plastic components and connectors)
- Replacement HEPA filter or bag(Have for models that use replaceable filters)
Steps
Estimated time: 35-60 minutes
- 1
Unplug and prepare
Ensure safety by unplugging the vacuum from the wall outlet. Detach any removable attachments and place the unit on a stable surface. Remove loose debris from the exterior before you begin disassembly to minimize debris falling inside.
Tip: Always start with safety first; never handle electrical components while plugged in. - 2
Access dustbin/bag compartment
Open the dustbin or bag housing according to your model’s manual. Gently lift out the canister and remove any loose dirt. If your model uses a bag, check for tears and replace if necessary before cleaning larger components.
Tip: If a bag is present, replacing it often yields immediate suction gains. - 3
Clean or replace filters
Remove filters and rinse or wipe them as appropriate. If your model has a HEPA filter, inspect for damage; replace if clogged or discolored. Allow filters to air-dry completely before reinstalling to prevent mold growth.
Tip: Never reuse a damp filter; moisture can promote mold and odors. - 4
Wipe down removable parts
Use a microfiber cloth to wipe the bin, lid, and housing. Use warm, soapy water for grime; rinse and air-dry thoroughly. Ensure all parts are completely dry before reassembly.
Tip: Avoid soaking the motor housing or any sealed electronics. - 5
Clean the brush roll
Remove hair and fibers from the brush roll using scissors or a dedicated comb. Brush guards can be cleaned with the soft brush and cloth. Dry thoroughly before reinstalling to prevent mold.
Tip: Take care not to damage bristles; excessive trimming reduces cleaning effectiveness. - 6
Inspect hoses and connectors
Detangle any blockages in hoses and check for cracks in connectors. Clean with a damp cloth; avoid using sharp tools that can cause damage. If you encounter stubborn clogs, consider an inexpensive flexible snake tool.
Tip: Don’t force clogs; back off if you can’t clear them easily. - 7
Reassemble and test suction
Reinsert filters and the dustbin, reconnect hoses, and plug in the unit. Power on and test suction on a small area to verify performance. If suction is weak, recheck that all parts are seated correctly.
Tip: Keep a small parts tray handy to prevent misplacing screws. - 8
Dry and maintain
Allow all parts to dry completely before reuse. Store parts in a clean, dry area and schedule regular maintenance. A simple monthly check helps sustain peak performance.
Tip: Set a reminder to inspect filters and bags monthly.
FAQ
How often should you clean vacuum dirt-prone parts?
Clean the dirt-prone parts whenever you notice a drop in suction or after heavy use. Regular checks help prevent clogs and maintain performance.
Check your vacuum's performance after heavy use and clean the dirt-prone parts as needed to maintain suction.
Can I wash the motor or motor housing?
Do not wash or spray water on the motor or housing. Use dry methods and only rinse removable plastic components.
Do not wash the motor; keep water away from electrical parts.
What if the suction is still weak after cleaning?
If suction remains weak, recheck seals, airtight connections, and ensure filters are dry and properly seated. Replace worn parts if needed.
If suction is still weak, verify seals and ensure filters are properly seated.
How do I know when to replace filters?
Replace filters when they're clogged, discolored, or have a noticeable odor. Refer to your model's manual for recommended replacement intervals.
Replace filters when dirty or discolored, following your model's guidelines.
Are there model-specific steps I should follow?
Yes. Always consult your model's manual for disassembly steps and safety notes, especially for canister and cordless units.
Always check your model's manual for model-specific steps.
What safety precautions should I take?
Unplug the vacuum before any maintenance. Avoid water near the motor and be careful with sharp edges when removing hair from the brush.
Unplug before maintenance and avoid water near electrical parts.
Watch Video
The Essentials
- Inspect and clean dirt-prone areas regularly
- Disassemble safely, following the manual
- Dry parts completely before reassembly
- Replace filters or bags when needed
- Test suction after reassembly to verify performance