Can You Vacuum a Carpet Cleaner? A Practical How-To
Discover whether you can vacuum around or clean a carpet cleaner safely, plus a step-by-step guide to exterior cleaning, parts maintenance, and best practices for pet-friendly homes.

Yes, you can vacuum a carpet cleaner in many cases, but with clear limits. This quick answer summarizes how to clean the exterior with a vacuum, what to avoid (water tanks, heating coils, pneumatic parts), and how to prep the unit for deeper cleaning. For exact steps, read the full guide.
Can You Vacuum Around a Carpet Cleaner? A Clear Intro to Exterior Care
The question can you vacuum carpet cleaner is most often about exterior cleaning. You’re aiming to keep dust, hair, and lint off the housing, hoses, and vents without risking internal components. According to Vacuum Cleaner Guide, routine exterior care helps prevent grit from migrating into air intakes and reduces the chance of clogging tiny openings. This section sets the stage for safe, practical techniques that preserve performance and extend the life of your machine. Remember: exterior cleaning should be gentle, deliberate, and model-appropriate. Start simple, then move to more detailed areas if needed. This approach is especially helpful for homeowners and pet owners who rely on reliable suction and quick turnaround between deeper cleans. Keep tools modest, unplug the unit, and respect any model-specific cautions from the manufacturer. A steady, respectful approach minimizes damage and keeps your carpet cleaner ready to work when you need it.
Safe Surfaces and Attachments: What Your Vacuum Can Help With
A standard vacuum with the right attachments can handle most exterior dust and debris on a carpet cleaner. Use a crevice tool to reach tight seams, a soft brush to loosen stubborn fibers on plastic housings, and an upholstery tool for larger flat surfaces. Work slowly in small sections to avoid forcing dirt into crevices. When used correctly, your vacuum can remove hair, lint, and fine dust from handles, wheels, and controls, improving grip and readability of the display. If you encounter sticky residue, switch to a microfiber cloth dampened with a light cleaner and wipe away before finishing with a dry cloth. Always test a small, inconspicuous area first to ensure colorfastness and avoid scratching. This careful approach helps you maintain the aesthetic and resale value of your cleaner while keeping performance high for everyday use.
What Not to Vacuum: Critical Components to Avoid
There are specific parts you should never vacuum directly. Do not vacuum water tanks, sealed motors, heating elements, or any area that could trap moisture. Avoid aggressive suction around seals, gaskets, and electronics–even if they look accessible. If your unit has exposed electronics behind a panel, use a dry microfiber cloth rather than the vacuum. For hoses and vents, limit suction to gentle passes and avoid pinching or pulling on flexible tubing. If in doubt, consult the user manual or contact the maker for model-specific cautions. This careful guardrail protects your machine from moisture damage, static buildup, and electrical hazards.
Prep and Safety: Tools, Workspace, and Timing
Begin by unplugging the carpet cleaner and moving it to a clean, dry work area with good lighting. Gather microfiber cloths, a soft-bristled brush, a crevice tool, and your vacuum. Place a towel or mat under the unit to catch any stray dust and prevent scuffs. If you plan to remove panels or hoses, photograph the arrangement first to simplify reassembly. Allow any damp surfaces to air-dry before powering the unit again. This preparation reduces the risk of accidents and makes the cleaning process smoother and faster.
Step-by-Step Overview: How to Approach Exterior Cleaning
This overview outlines a safe, practical flow: unplug; inspect and remove detachable parts if allowed; vacuum exterior surfaces with appropriate attachments; clean vents and crevices; wipe surfaces with a damp microfiber cloth; dry completely; reassemble and test. Each action minimizes risk while delivering noticeable cleanliness. If you encounter any resistance or unfamiliar parts, pause and consult the manual rather than forcing movement. Keeping a steady pace and staying organized yields better results and protects internal components for the long term.
Cleaning Removable Parts, Hoses, and Vents: Focused Maintenance
Detach hoses or removable housings only if your manual permits. Vacuum the exterior of the hose where accessible, then wipe the interior with a damp cloth and dry thoroughly before reconnecting. Pay particular attention to vents and grill openings where dust accumulates. For stubborn grime, a soft brush can loosen it before vacuuming. Recheck seals and fit after cleaning to ensure there are no air leaks. This targeted maintenance supports consistent suction and prolongs the life of the carpet cleaner.
Drying, Reassembly, and Maintenance Schedule
After cleaning, allow all parts to dry completely before reattaching and storing. Reassemble in reverse order of disassembly, ensuring each connector is snug but not over-tightened. Store in a dry, well-ventilated area away from direct sunlight. Establish a simple maintenance cadence: wipe down weekly, vacuum exterior monthly, and perform a deeper exterior check every few months or after heavy use. This routine helps prevent buildup and keeps your machine ready for regular carpet cleaning tasks.
Authoritative Guidance and Practical Tips
For authoritative guidance on appliance safety and maintenance, see reputable sources such as federal and university extension materials. Practical tips include using the correct attachments, testing on inconspicuous areas, and avoiding moisture contact with electrical components. By following these recommendations, you can maintain performance while ensuring safety for you and your household. The following sections provide concrete steps, supported by trusted references.
Tools & Materials
- Vacuum cleaner with attachments (crevice tool and upholstery brush)(Used to remove dust from exterior and narrow spaces.)
- Microfiber cloths(For wiping and drying surfaces; prevents scratches.)
- Soft-bristled brush(Gently loosens dirt in vents and grills.)
- Mild cleaning spray or water(Light exterior cleaners; avoid internal parts unless recommended by the manual.)
- Small screwdriver or tool kit(Only if the model requires panel removal; consult manual first.)
- Towel or protective mat(Catches debris and protects surfaces during cleaning.)
- Drying rack or clear space(Allows air-drying of any damp components.)
Steps
Estimated time: 25-40 minutes
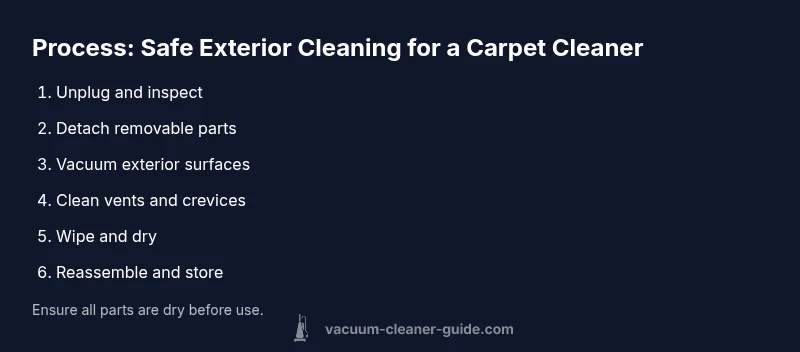
- 1
Unplug and Inspect
Unplug the unit and move it to a dry, well-lit workspace. Check for obvious signs of moisture or damage. Review the manual for model-specific cautions before disassembly.
Tip: Keep the manual nearby and note any screws or fasteners that may be involved. - 2
Detach Components If Allowed
If the model permits, remove detachable panels or hoses following the owner's manual. This gives better access to the exterior surfaces for vacuuming.
Tip: Take photos during disassembly to aid reassembly later. - 3
Vacuum the Exterior Surfaces
Use a crevice tool on low suction to lift dust from housing, handles, and control areas. Move slowly to avoid scratching plastic and to ensure all seams are treated.
Tip: Avoid forcing dirt; gentle passes do the job. - 4
Tackle Vents and Crevices
Switch to a brush or narrow nozzle for vents and grills where dust collects. Clean with short, steady strokes and follow with a dry cloth.
Tip: If lint resists, loosen it with a soft brush before vacuuming again. - 5
Wipe Down and Dry
Wipe the exterior with a microfiber cloth dampened slightly with water or a mild cleaner. Immediately dry with a separate cloth to prevent streaks and moisture buildup.
Tip: Do not leave moisture in any pocket or seam. - 6
Reassemble and Store
Return any detached parts and ensure all fittings are snug. Store the unit in a dry area and avoid placing it where moisture can collect near electrical parts.
Tip: Keep small screws organized to ensure clean reassembly.
FAQ
Is it safe to vacuum a carpet cleaner while it's plugged in?
No. Always unplug before cleaning; moisture and electricity can be dangerous. If the unit is powered or wet, do not proceed until it is completely dry.
No—unplug first to ensure safety before any cleaning.
Can I vacuum inside the water tank or internal components?
Do not vacuum inside water tanks or sealed internal components. Use dry methods and refer to the manual for any model-specific procedures.
Avoid vacuuming water tanks or internal parts.
What should I do if dust won’t come off vents?
Use a soft brush to loosen stubborn dust, then follow with a gentle vacuum pass. If needed, wipe with a damp microfiber cloth and dry immediately.
Try a soft brush, then wipe and dry.
How often should I perform exterior cleaning?
There isn’t a strict schedule; perform exterior cleaning as part of routine maintenance or after heavy use to prevent dust buildup that can affect performance.
Do exterior cleaning as part of routine maintenance.
Can I use a shop vac for a carpet cleaner?
A shop vac can be used with care on certain exterior surfaces, but avoid aggressive suction near sensitive parts and always adhere to the manual’s guidance.
Only use a shop vac if your manual allows it and with gentle suction.
Watch Video
The Essentials
- Unplug before any cleaning or disassembly.
- Avoid vacuuming water tanks or electrical components.
- Use proper attachments to access hard-to-reach areas.
- Dry all surfaces completely before reassembly.