Robot Vacuum Cleaner Maintenance: A Practical Guide
A practical, step-by-step guide to robot vacuum cleaner maintenance, with weekly routines, component care, battery longevity tips, and safety notes for pet households. Learn how to keep suction strong, extension battery life, and navigation reliability.

You can keep a robot vacuum cleaner performing at peak efficiency with a simple, regular maintenance routine. Core tasks include emptying the dustbin, cleaning brushes and wheels, checking filters, and inspecting sensors and charging contacts. No specialized tools are required, and a 10–15 minute weekly check helps prevent issues.
Why maintenance matters for robot vacuum cleaners
Regular maintenance keeps robot vacuums performing at their best and extends their lifespan. When you practice a consistent routine, you reduce the risk of clogs, sensor errors, and battery strain. As you read, you’ll learn practical steps you can apply weekly, monthly, and seasonally. According to Vacuum Cleaner Guide, a disciplined maintenance approach pays off with fewer breakdowns and steadier suction over time. The Vacuum Cleaner Guide analysis shows that neglecting cleaning tasks can lead to reduced runtime and more frequent filter replacements, especially for households with pets and heavy debris.
Weekly maintenance routine you can perform in 10–15 minutes
Set aside a dedicated window each week to perform a quick check, cleaning, and reassembly. Start by turning off the robot and removing it from the charger. Empty the dustbin and wipe the interior with a microfiber cloth. Inspect the main brush, remove hair tangles, and rotate the brush to check for wear. Finally, wipe any visible dust from sensors or the bumper. This routine helps prevent buildup that can degrade suction and navigation.
How to clean the main components: dustbin, brushes, wheels
These are the core components that collect debris and that most users neglect. First, remove the dustbin and empty it. Rinse (or wipe) the bin as your model allows and let it dry completely before reassembly. Next, remove the main brush and comb hair off the bristles with your fingers or a brush tool. Check the end caps and remove any debris. Finally, inspect the wheels for hair wrapping and clear it. Rotate wheels by hand to ensure smooth movement and note any resistance that could indicate axle wear.
Filter care and replacement intervals
Filters capture fine dust and allergens, so keeping them clean is essential for air quality and suction performance. Hair and dust on the filter reduce airflow and efficiency. Depending on your model, you may be able to wash certain filters; otherwise replace them as recommended in the user manual. After washing, allow filters to air-dry completely before reinstalling. Homes with pets will often notice a bigger impact after cleaning filters, as a clogged filter is a common culprit behind suction drop.
Battery care and charging habits
Battery longevity is a major factor in overall performance. Avoid leaving the robot on the dock continuously if you won’t use it for extended periods; let it rest every few weeks. Charge to completion before a scheduled cleaning session, but avoid letting it sit at full charge for long stretches. If your model supports charging on the dock with software controls, enable energy-saving modes and low-power charging when possible. Outdoor exposure, extreme heat, and direct sun should be avoided as they can accelerate battery wear.
Cleaning sensors and cameras for better navigation
The optical and infrared sensors are the robot’s eyes. Dust, fingerprints, and smudges reduce obstacle detection and cliff avoidance. Use a microfiber cloth lightly dampened with water or isopropyl alcohol to wipe sensor ports, cameras, and bumper sensors. Do not apply liquids directly to electronics. Allow any cleaned surfaces to dry before using the robot again.
Maintenance for different surface types
Carpets and hard floors present different challenges for suction power and brush wear. For carpets, use a higher suction setting if your model offers it and ensure the brush is free of hair. On hard floors, check the edge cleaning and wipe the side brushes as needed to prevent scattering. Some models have wheels with adjustable height; make sure they contact the floor evenly for best results.
Seasonal deep clean and maintenance schedule
At the change of seasons, perform a deeper maintenance pass. Inspect the bearings, check the suction path, and clean inside the intake ports more thoroughly. Rotate or replace brushes if they show signs of wear. Recalibrate sensors if your model supports it and review software updates for improved navigation. Long-term storage should include cleaning, drying, and a cool, dry place away from direct heat.
Common mistakes to avoid
Skipping routine maintenance is the most common mistake and can lead to reduced suction, more frequent clogging, and erratic navigation. Hair and debris should be removed from brushes and wheels weekly or as soon as you notice buildup. Do not wash or soak the main electronics or sensors; moisture can damage internal components. Never use harsh chemicals on seals or gaskets, and avoid exposing the robot to extreme temperatures. Another mistake is leaving the dustbin full for extended periods, which can cause the unit to overheat or trigger error codes. Finally, always consult your model’s manual for specific maintenance intervals, compatibility rules for filters, and disposal instructions for the dustbin.
Tools & Materials
- Soft cleaning brush(Used to dislodge hair from brushes and wheels)
- Microfiber cloth(For dust inlets, sensors, and casings)
- Small screwdriver (Phillips #0)(Useful for models with screw-secured panels)
- Replacement vacuum filters(Check model specs; replace when performance drops)
- Isopropyl alcohol (70%) or disinfectant wipes(For cleaning sensor housings; avoid liquids near electronics)
Steps
Estimated time: 30-45 minutes
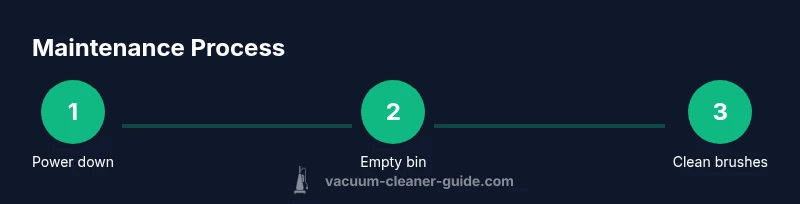
- 1
Power down and remove from dock
Turn off the robot and remove it from the charging dock. If your model has a physical on-off switch, use it to ensure the unit cannot start accidentally while you work.
Tip: Always cut power before touching moving parts to prevent injury or damage. - 2
Empty the dustbin and inspect for buildup
Open the dustbin and empty it into a trash receptacle. Check the interior for clogs or compacted debris; remove any stuck material with the cleaning tool.
Tip: Do this over a trash can to avoid spills and ensure all debris is removed. - 3
Clean and check the main brush
Remove the main brush, cut away hair, and wipe the bristles clean. Inspect end caps for wear or entangled fibers that could limit rotation.
Tip: Use the included cleaning tool to separate tangled hair without bending the brush shaft. - 4
Clean wheels and axles
Remove loose hair from the wheels and axles. Manually rotate the wheel to feel for resistance; note any wobble or drag that could indicate a damaged bearing.
Tip: A clear wheel spin helps prevent future navigation errors. - 5
Clean or replace filters
Locate the filter and decide whether it can be washed (per your model’s guidance) or needs replacement. Allow any washed parts to air-dry completely before reinstalling.
Tip: A clogged filter is a common reason for reduced suction. - 6
Wipe sensors and bumper
Gently wipe sensor ports, cameras, and bumper sensors with a dry or lightly damp microfiber cloth. Avoid soaking any electronics.
Tip: Let surfaces dry fully before powering the robot back on. - 7
Check charging contacts and dock alignment
Wipe charging contacts on both the robot and dock to remove dust. Re-seat the robot on the dock to confirm proper alignment for charging.
Tip: If charging seems slow, inspect for corrosion or debris along the contact surfaces. - 8
Run a quick test
Power on and run a short cleaning cycle to verify everything sounds normal and navigates correctly after maintenance.
Tip: Observe for unusual noises, resistance, or unexpected stops.
FAQ
How often should I perform robot vacuum maintenance?
Most users benefit from a weekly quick check and a deeper monthly clean. Regular maintenance prevents buildup that can degrade suction and navigation and reduces the chance of unexpected errors.
Most people should do a weekly quick check and a deeper monthly clean to prevent buildup and navigation problems.
Can I wash the filters?
Some filters are washable; others must be replaced. Always follow the model’s manual, allow washed filters to dry fully before reinstalling, and avoid exposing electronics to moisture.
Some filters can be washed, but always dry them completely and follow your model’s manual.
What are signs a filter needs replacement?
Noticeable symptoms include reduced suction, longer cleaning times, and visible wear or tears on the filter material. If you see these signs, replace the filter as recommended.
If suction drops or you see wear on the filter, it’s time to replace it.
Is it safe to clean sensors with water?
Water should not be applied to sensors. Use a dry or lightly damp cloth to wipe sensor surfaces and allow them to dry before use.
Avoid water on sensors; use a dry cloth instead.
Should I store the robot on the dock?
Storing on the dock is fine if it doesn’t overheat or sit in a hot or humid area. If you won’t use it for long periods, you can store it off the dock in a cool, dry place.
Storing on the dock is okay if temperatures are stable; otherwise, keep it in a cool, dry place.
What if the robot won’t turn on after maintenance?
Check the power switch, charging dock, and battery status. If no lights or sounds appear, consult the manual or contact support for your model.
If it won’t turn on after maintenance, check power and charging, then consult the manual if needed.
Watch Video
The Essentials
- Establish a regular maintenance routine.
- Keep brushes, filters, and sensors clean.
- Regular checks extend suction and battery life.
- Follow model-specific replacement parts guidelines.
- Power off before any maintenance tasks.