How to Use a Robot Vacuum Cleaner: A Complete Guide
Learn how to use robot vacuum cleaner effectively with setup, mapping, scheduling, maintenance, and tips for homes with pets. Vacuum Cleaner Guide delivers practical, step-by-step guidance for hands-off cleaning.

Learn how to use a robot vacuum cleaner effectively in minutes: set up the dock, connect the app, choose cleaning modes, and schedule regular runs. Place boundary mats if needed, empty the dustbin, and perform periodic maintenance for optimal suction. Vacuum Cleaner Guide's guidance helps homeowners and pet owners get consistent, hands-off cleaning.
Why mastering a robot vacuum matters
A well-run robot vacuum cleaner can cut daily chores and keep pet hair under control, but only if you know the basics of setup, cleaning, and maintenance. This is where the keyword how to use robot vacuum cleaner comes into play, guiding homeowners through the essentials. According to Vacuum Cleaner Guide, the best results come from a deliberate start: choosing a good dock location, pairing the device with its app, and setting sensible expectations about cleaning zones and battery life.
For most homes, the goal is reliability and hands-off convenience. When you know how to use robot vacuum cleaner effectively, you minimize repeats, reduce run times, and maximize floor coverage. Start by placing the dock on a hard surface near an outlet, with clear access to open floor space. Avoid tight corners and thick rugs that can impede charging. Next, connect the robot to Wi-Fi and launch the companion app to verify that maps and room designations are accurate. This creates a foundation you will build on with zoning, scheduling, and maintenance routines.
Pet owners especially benefit from consistent routines. Regular brushing of fur and symptom checks of the filter prevent unexpected clogs and performance drops. Vacuum Cleaner Guide's analysis shows that users who schedule routine cleaning and perform monthly maintenance see the most dependable results. By following a simple framework—setup, map, schedule, maintain—you achieve steadier suction and fewer mid-clean surprises.
How robot vacuums map and clean your space
Robots use sensors, lidar, and SLAM to map rooms and plan efficient paths. Knowing how these systems work helps you optimize performance. When you learn how to use robot vacuum cleaner effectively, you should understand map creation, boundary setting, and zone prioritization. Most modern models create a home map after a few runs; you can refine with room labels, restricted zones, and virtual walls. A clean map ensures the robot prioritizes high-traffic zones and avoids obstacles.
In practical terms, feed the robot accurate floor plans: remove clutter, secure cables, and close doors to areas you don't want cleaned. If your model supports no-go zones, draw them in the app to block stairs or delicate rugs. Some devices offer carpet boost or edge-cleaning modes; enable these in the app when you need deeper cleaning on rug fibers or along baseboards. Regularly reviewing the map helps catch drift or misrecognition; recalibration or a fresh map may be required after remodeling or moving furniture.
According to the Vacuum Cleaner Guide analysis, consistent map updates correlate with more complete coverage and fewer missed spots. A well-kept map reduces time on the dock and extends battery life because the robot travels the most efficient routes.
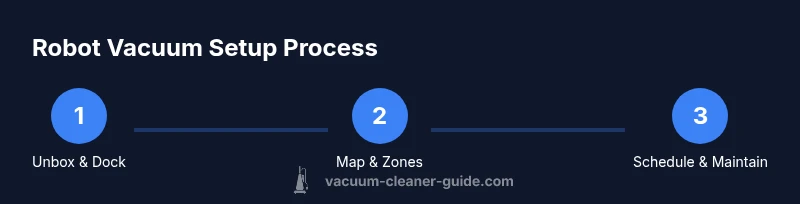
Step-by-step setup and daily operation
To use robot vacuum cleaner effectively on a daily basis, the setup needs to be straightforward and repeatable. Begin by unboxing, charging the robot, and placing the dock in a central location. This initial setup lays the foundation for reliable cleaning. Then install and pair the app, connect to Wi-Fi, and create a user profile if available. The daily operation should focus on scheduling, choosing modes for different floor types, and enabling targeted cleaning for bedrooms or pet zones.
After the initial setup, schedule a routine that aligns with your home rhythm. Most owners find success with a morning or evening clean when rooms are empty. For homes with mixed flooring, choose a mode that alternates between carpet and hard floor settings automatically. If your model supports room-by-room cleaning, assign rooms to specific times or days. Keep the bin empty and the brushes clean between cycles. Finally, use the app's maintenance reminders to check filters and brushes every 1-2 weeks, ensuring sustained suction.
The cornerstone is patience; it may take a few weeks to optimize mapping and scheduling to your home layout. When done, you will enjoy consistent, hands-off cleaning with minimal human intervention. The feedback loop—maps, schedules, and routine maintenance—creates the best outcomes for households with kids, pets, and busy schedules.
Maintenance cadence for consistent suction and longevity
Regular maintenance is part of how to use robot vacuum cleaner effectively. Basic upkeep includes emptying the dustbin, cleaning the brushrolls, and rinsing the filters as recommended by the manufacturer. A clean sensor and brush system prevents decreased suction and improves overall performance. Schedule a monthly deep-clean of the brushes, wheels, and charging contacts to avoid buildup that can interfere with docking.
Choose a replacement cycle that matches usage: genuine or compatible filters, brush replacements, and edge brushes should be refreshed every 2-6 months depending on pet hair and floor type. Keep a small maintenance kit on hand with a microfibre cloth, a screwdriver, and a spare filter. If your robot has a HEPA or high-efficiency filter, replace it on schedule to protect air quality, especially in homes with allergy-prone residents. Store the robot with the brushes unplugged and the dock clear of clutter; the last thing you want is a clogged charging port or a damaged sensor.
Vacuum Cleaner Guide analysis shows that homes with a proactive maintenance habit tend to see fewer breakdowns and longer run times per charge, even with frequent daily use.
Troubleshooting common issues and advanced tips
Even with the best setup, you may encounter common issues that require quick fixes. If your robot struggles with carpet transitions or stairs, check for alignment drift, ensure the map is up-to-date, and verify the airflow path is clear. If the robot misses areas or covers the same spaces repeatedly, retrain the map or reset the cleaning schedule. For better results, use boundary mats or no-go zones to protect fragile floors and avoid high-risk areas.
Advanced tips include enabling virtual walls for doorways, setting preferred cleaning times for certain rooms, and adjusting suction levels for pet hair. Some models support voice control and integration with home assistants; linking these features can streamline your routine. If you notice a significant drop in suction, check for a clogged brush, full dustbin, or a dirty filter, and perform the recommended maintenance.
The bottom line: a well-maintained robot vacuum cleaner is less prone to errors, works more efficiently, and yields cleaner floors with less manual effort. Vacuum Cleaner Guide recommends a regular review of maps, boundary zones, and maintenance tasks to keep performance consistent.
Tools & Materials
- Robot vacuum cleaner(Model supports app control and mapping)
- Charging dock(Place on a hard surface with 3-6 feet of clearance)
- Smartphone with the robot's app(Ensure you can connect to Wi-Fi)
- Boundary mats or virtual wall accessories(Optional for blocking stairs or delicate areas)
- Replacement brushes and filters(Stock up based on usage and pet hair)
- Basic cleaning kit (microfibre cloth, screwdriver)(Useful for routine maintenance)
Steps
Estimated time: 25-40 minutes
- 1
Unbox, charge, and place the dock
Unbox the robot, connect the charging dock to a power outlet, and place the dock on a flat, open area. Ensure there is at least 0.5–1 meter of clearance on all sides so the robot can dock smoothly. Let the robot charge fully before its first use.
Tip: Keep the dock away from stairs and clutter to prevent mis-docking. - 2
Install the app and pair your device
Download the manufacturer app, create or sign in to your account, and pair the robot to your Wi-Fi. Follow on-screen prompts to grant permissions for maps, notifications, and cleaning schedules. Confirm that the robot appears in the app and that basic controls respond.
Tip: Have your Wi‑Fi password handy and ensure a stable network during setup. - 3
Create a map and set room zones
Run an initial cleaning pass so the device can map your home. In the app, label rooms, assign zones for high-traffic areas, and set no-go zones for stairs or fragile surfaces. Review the map to verify accuracy and adjust as needed.
Tip: Label frequently used rooms first to improve future scheduling. - 4
Schedule cleaning and choose modes
Set cleaning times that align with your routine and select modes for different floors (carpet vs. hard floor). If available, enable edge-cleaning and boost modes for pet hair removal. Start with a test run in a single room to validate behavior.
Tip: Start with daytime cleaning in a low-traffic area to observe how it navigates. - 5
Perform routine maintenance
After several clean cycles, empty the dustbin, wipe sensors, and inspect brushes. Clean brushrolls and replace filters as recommended by the manufacturer. Keep charging contacts free of dust.
Tip: Set a reminder for monthly maintenance to sustain performance. - 6
Troubleshoot common issues
If cleaning coverage is uneven or the map drifts, retrain the map or reset the cleaning schedule. Ensure there are no trapped cables or low battery during operation. Re-run a mapping session after furniture changes.
Tip: When in doubt, re-map the space to correct any navigation drift.
FAQ
What is the best way to start using a new robot vacuum?
Unbox the unit, charge it fully, install the app, pair the device to Wi‑Fi, and run a map-building cleaning pass. Label rooms and set basic zones before engaging in daily schedules.
Unbox, charge, install the app, and map the space before you start scheduling.
Can I use boundaries to block stairs or areas?
Yes. Use boundary mats or in-app no-go zones to protect stairs, cords, and delicate surfaces. Update boundaries as your floor plan changes.
Yes, boundary mats or in-app zones help keep the robot away from stairs and sensitive areas.
How long does a typical charging cycle take?
Charging time varies by model. Most robots top up during regular cycles and benefit from staying near the dock for efficient recharging.
Charging time varies by model; keep the robot on the dock to recharge between runs.
How often should I clean the maintenance parts?
Check brushes, filters, and sensors every few weeks and perform a deeper clean monthly. Replace wear parts as recommended by the manufacturer.
Inspect brushes and filters every few weeks and replace worn parts as advised.
What should I do if the robot gets stuck or misses areas?
Re-map or reset a cleaning schedule, clear the path of obstacles, and run a test clean to verify coverage. Use zones to direct cleaning efficiently.
If stuck or missing spots, re-map and try a test run with zones.
Are there safety considerations for pets and children?
Keep small objects away and supervise initial runs. Use no-go zones to limit access to fragile areas and set appropriate suction modes when necessary.
Supervise initial runs and create no-go zones for safety.
Watch Video
The Essentials
- Set up the dock and map for accurate cleaning
- Schedule and customize zones for pet homes
- Maintain brushes and filters for best suction
- Regular maintenance extends the robot's life