How to Clean a Dyson Animal Vacuum Cleaner: Step-by-Step
A comprehensive, step-by-step guide for cleaning a Dyson Animal vacuum. Learn how to empty the bin, clean the brush bar, wash filters, inspect seals, and maintain performance for pet owners and homes with pets.

In this quick guide, you will learn to clean a Dyson Animal vacuum to restore suction and extend life. From accessible steps like emptying the bin and cleaning the brushbar to deeper maintenance of filters and seals, this answer outlines the essential actions. According to Vacuum Cleaner Guide, following these steps reduces clogging and keeps pet-hair performance consistent.
Why Dyson Animal vacuum cleaner maintenance matters
Maintaining a Dyson Animal vacuum cleaner is essential for keeping pet-related messes under control and preserving strong suction over time. Pets shed year-round, and hair can quickly cling to the brush bar, filters, and cyclone, reducing cleaning efficiency. A little routine maintenance goes a long way toward avoiding performance drops, costly repairs, and unnecessary downtime. According to Vacuum Cleaner Guide, regular upkeep also helps you get more life out of your investment and reduces the likelihood of odor buildup from trapped debris. By treating your Dyson like a precision tool and scheduling periodic checks, you’ll notice easier pickups on carpets and hard floors, fewer clog-related pauses, and less strain on the motor during peak shedding seasons.
In this guide, we’ll outline practical actions you can perform with minimal tools, plus tips to tailor the routine to your home and pet population. The goal is to keep your vacuum delivering consistent power, quiet operation, and reliable maintenance intervals that fit a busy household. Fans of Vacuum Cleaner Guide will recognize the emphasis on consistent cleaning cycles and quick checks as part of a durable care plan.
Assessing your Dyson model and parts
Dyson Animal vacuums share core components such as the motorized brush bar, cyclone assembly, bin, filter, and hose connections, but some models feature variations in attachment tools, filter placement, and bin access. Before you begin, identify the general layout of your unit and locate removable parts according to your model’s manual. A quick check helps you avoid forcing parts or missing crucial pieces during cleaning.
Understanding the basics also helps you decide which parts can be washed and which should be gently brushed or air-dried. For pet owners, the brush bar and filters tend to collect more hair and dander, so they require more frequent attention. Vacuum Cleaner Guide analysis shows that sticking to model-specific guidelines while performing routine checks translates to more consistent suction and better overall hygiene in homes with furry companions.
Tools and materials you’ll need
Before you start, gather the essentials to streamline the process and avoid mid-task runs to the closet. Having the right tools on hand minimizes downtime and protects fragile components.
- Soft brush or microfiber cloth for delicate surfaces
- Small flathead or Phillips screwdriver (if your model requires disassembly)
- Cleanwater and a bowl for rinsing (cold water only; avoid hot water)
- Mild detergent (optional and only if the user manual approves)
- Clean towels or drying rack to air-dry components
- Replacement or spare filters (as needed by your model)
- A trash bag for bin contents
Keep the workspace protected with a towel or mat to catch any spills and debris. Knowing what you’ll need helps you complete the process efficiently and safely.
Step-by-step overview (high-level) you’ll perform in detail below
This section gives a quick map of the cleaning journey. You’ll tackle the bin, cyclone, brush bar, filters, hoses, and attachments in logical order. By following a consistent routine, you’ll minimize repetition and ensure you don’t miss critical parts that affect performance. Each subsequent section dives into the exact actions, safety notes, and tips for a flawless clean.
Cleaning the bin, cyclone, and exit paths
Begin with the bin to remove loose debris, then inspect the cyclone for clogs that can impede airflow. Gently rotate or lift components as needed, taking care not to pull on delicate seals. Hair, dust, and pet hair can accumulate around the cyclone housing and the debris path; clear these areas with a soft brush. When finished, wipe down the interior with a dry cloth to remove fine dust before reassembling.
This step clears the primary obstruction routes and ensures the vacuum can draw air efficiently. It also provides an opportunity to inspect for cracks or wear at the cyclone junctions. Regular attention here helps prevent performance dips and keeps your vacuum operating smoothly through peak shedding periods.
Cleaning the filter and motor housing
Dyson Animal models often include a washable filter that traps fine dust and allergens. If your manual allows washing, rinse the filter under cold running water until the water runs clear. Do not use detergents unless explicitly approved by Dyson for your model. After rinsing, shake gently to remove excess water and air-dry completely on a clean surface before reinstalling. While the filter dries, wipe the exterior and motor housing with a damp cloth to remove surface dust.
Proper filter maintenance improves air quality and suction efficiency. Dry filters completely to avoid moisture entering the motor, which can cause odors or mold growth in humid environments.
Cleaning the brush bar and attachments
Hair and fibers accumulate on the brush bar, reducing effectiveness on carpets and increasing wear. Use a pair of scissors or a comb to cut and remove hair tangled around the bar, then wipe with a soft cloth. Check the belt condition if your model prompts belt inspections and replace if necessary. Clean the attachments by rinsing with cold water or wiping with a damp cloth, and dry thoroughly before use.
Keeping the brush bar and tools clean ensures the vacuum can pick up pet hair efficiently and reduces the need for frequent maintenance calls. This step also helps maintain pet-hair performance across different floor types.
Inspecting seals, hoses, and connections
Check all seals, hoses, and connection points for cracks, tears, or looseness. A small crack can allow air leaks, reducing suction and increasing motor load. If you notice damage, consult the manual for repair options or consider professional service. Wipe all connection points with a dry cloth after inspecting and ensure every hose is firmly seated during reassembly.
This inspection catches issues early and prevents bigger problems later. A well-sealed system preserves suction power and energy efficiency, which is especially important for homes with multiple pets or heavy shedding.
Reassembling, testing, and setting a maintenance rhythm
Reassemble all parts in the reverse order of disassembly, ensuring each clip or fastener clicks into place. Perform a quick test run on a small area of carpet or hard floor to verify that suction is restored and there are no unusual noises. If you hear grinding or rattling, stop and recheck the brush bar, belt, and attachments. Create a simple maintenance schedule based on shedding cycles and household use so you don’t overlook future cleanings.
A predictable rhythm makes upkeep feel manageable rather than daunting. Regular checks help you sustain peak performance and maintain a healthier home environment for you and your pets.
Common mistakes and safety reminders
Avoid using hot water on filters or motor housings, which can damage parts and void warranties. Do not force parts if they don’t fit easily—consult the manual and Dyson support if needed. Unplug the unit before any disassembly and let the components dry completely before reassembly. Keeping the work area organized reduces the risk of losing small parts and helps you stay focused on each step.
Maintenance schedule, storage, and longer-term care
Set a cadence that matches your home’s shedding pattern and your vacuum’s usage. A quick monthly check for hair buildup and a more thorough quarterly refresh can keep your Dyson Animal performing like new. Store the vacuum in a dry area away from direct sunlight and avoid storing damp components to prevent mold and odor.
Quick-start recap and next steps
With the above steps, you’ve established a reliable cleaning routine for your Dyson Animal vacuum cleaner. Now that you’re equipped with the right tools and know-how, you can maintain strong suction and prolong the vacuum’s life. Review your model’s manual for any model-specific caveats and keep this guide handy for future maintenance sessions.
Tools & Materials
- Soft brush or microfiber cloth(For delicate surfaces and exterior wipe-down)
- Small screwdriver (if needed)(Only if your model requires disassembly)
- Clean water (cold)(Rinse filters only with cold water)
- Mild detergent (optional)(Only if model manual allows cleaning with soap)
- Drying rack or clean towels(Air-dry filters and parts completely)
- Replacement filters (if needed)(Keep on hand for easy replacement)
- Hair-cutting scissors or comb(Use for brush bar hair removal)
Steps
Estimated time: Estimated total time: 30-45 minutes
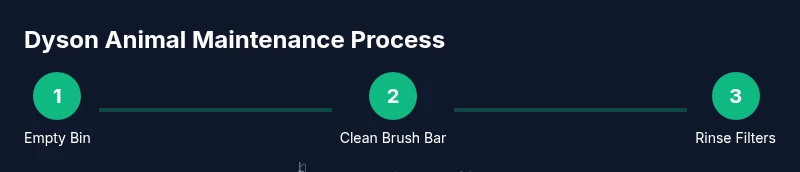
- 1
Unplug and prepare
Power off the unit and unplug from the outlet. Remove the canister or bin if your model allows, and set aside dirt and debris to prevent spills during cleaning.
Tip: Always start with safety: unplug before touching any moving parts. - 2
Empty the bin
Open the bin and empty contents into a trash bag. Wipe the interior with a dry cloth to remove residual dust before reinserting.
Tip: Clear the bin into a lined bag to minimize dust exposure. - 3
Clean the brush bar
Remove hair and fibers from the brush bar using scissors or a comb. Rotate by hand to check for stiffness or belt wear.
Tip: Cut hair in small sections to avoid wrapping it around the brush bar core. - 4
Rinse or replace filters
Rinse washable filters under cold water until clear. Allow to air dry completely before reinstalling to avoid moisture near the motor.
Tip: Do not use heat sources to speed drying. - 5
Inspect cyclone and housing
Check the cyclone for clogs and wipe down the housing. Ensure no debris blocks the airflow path.
Tip: A clogged cyclone is a common suction killer; clean it thoroughly. - 6
Clean attachments
Wash or wipe all attachments with cold water and dry completely.
Tip: Dry thoroughly before reconnecting to avoid moisture entering the vacuum. - 7
Check seals and hoses
Look for cracks, tears, or loose connections. Replace or seal as needed to maintain suction integrity.
Tip: A minor crack can cause noticeable suction loss—address early. - 8
Reassemble and test
Reassemble components and perform a short test on a carpet or rug to verify performance.
Tip: Listen for unusual sounds; stop and recheck if anything seems off. - 9
Set a maintenance rhythm
Create a simple schedule based on shedding cycles and usage to keep the unit performing well.
Tip: Consistency beats intensity; quick monthly checks prevent bigger issues.
FAQ
Can I wash Dyson filters, and how often should I clean them?
Most Dyson Animal models use washable filters. Rinse in cold water until clear and let them dry completely before reinstalling. Always consult your model’s manual for exact guidance.
Yes, many Dyson Animal vacuums have washable filters. Rinse with cold water until clear and dry completely before reinstalling. Check your manual for model-specific instructions.
How often should I clean the brush bar and remove hair?
Clean the brush bar during every major clean and especially during heavy shedding seasons. Remove hair with scissors or a comb to restore bristle visibility and suction efficiency.
Clean the brush bar whenever you clean the vacuum, especially during shedding seasons. Remove hair with scissors or a comb to keep performance high.
What should I do if the vacuum loses suction after cleaning?
Check the bin, cyclone, and filters for clogs, ensure all seals are intact, and confirm attachments are seated properly. A minor blockage or loose connection often causes reduced suction.
If suction drops, inspect for clogs, seals, and loose connections. Re-seat attachments and clear any blockages.
Is it safe to use detergents on filters or housing?
Only use cleaning methods approved by Dyson for your model. In most cases, cold water rinse is sufficient; avoid detergents that could leave residues in the motor area.
Avoid detergents on filters or housing unless your manual approves it. Cold water rinse is usually enough.
How should I store my Dyson Animal vacuum when not in use?
Store the unit in a dry, cool place away from direct sunlight. Ensure all parts are dry before storing and keep attachments organized to prevent loss.
Store in a dry, cool place and ensure everything is dry before putting it away.
Do all Dyson Animal models require the same maintenance?
Maintenance principles are similar across Dyson Animal models, but check your specific model's manual for variations in filter type, bin access, and attachment compatibility.
Maintenance is similar across Dyson Animal models, but verify your exact manual for any model-specific steps.
Watch Video
The Essentials
- Unplug before any maintenance to stay safe.
- Regularly clean the bin, cyclone, and filters for best suction.
- Air-dry all components before reassembly.
- Establish a simple maintenance schedule to protect performance.