Why Your Vacuum Isn’t Picking Up Dirt: Troubleshooting
Urgent guide helping homeowners diagnose why their vacuum won’t pick up dirt and restore suction fast with practical steps, safety tips, and maintenance for pet owners.

Most often, a vacuum fails to pick up dirt because a clog or a full bag is blocking suction. Start by unplugging, emptying the dirt cup or replacing the bag, and clearing visible debris from the brush and nozzle. If suction returns, proceed with further checks for filters, belts, and seals.
What commonly causes suction loss in household vacuums
According to Vacuum Cleaner Guide, the most common culprits are a full bag, a clogged hose, a blocked nozzle, dirty filters, worn belt, and air leaks. If you’re asking, “why is my vacuum cleaner not picking up dirt,” the short answer is that suction is being blocked somewhere along the airflow path. Pet hair, lint, and dust can wrap around the brush roll, locking debris in place and reducing airflow. Even tiny leaks around the seals or misaligned parts can sap suction power. The good news: most causes are inexpensive and fixable with basic maintenance in a single session. In 2026, the typical homeowner can diagnose and resolve many issues by methodically testing airflow, checking the dirt collection system, and refreshing worn components.
A systematic approach reduces guesswork and saves money. Start with the simplest problems first, then move to components that wear over time. If you feel uncertain or encounter electrical issues, stop and seek professional help. Vacuum Cleaner Guide’s guidance emphasizes safety and prevention, ensuring you protect your floors, your vacuum, and your family while restoring cleaning performance.
Quick checks you can do before taking it apart
Before you disassemble anything, run through a rapid triage: confirm the bag or dust cup isn’t full, inspect the power switch and outlet, and verify the vacuum is assembled correctly with all hoses and attachments securely connected. A surprising number of suction problems come from a simple misassembly or a loose hose, which creates an air leak and reduces suction. If you have a corded model, test on a different outlet to rule out a tripped circuit. For bagless units, empty the cup and shake out the filter housing if accessible. For pets and heavy traffic, debris can accumulate quickly; set a reminder to check for clogs every 1–2 weeks during heavy shedding seasons.
If the basic checks don’t restore power, proceed to targeted component checks. Keep safety in mind: unplug the unit, remove the bag, and never work near moving parts or the motor while it’s energized.
Deep-dive: filters, belts, and dirt cups
The airflow path includes the suction motor, filters, dirt cup or bag, belt drive (if applicable), and the brush roll. A dirty or clogged HEPA or foam filter can dramatically reduce suction even when debris is present in the cup. Replace or clean filters according to the manufacturer’s guidelines; this is particularly important for homes with pets or allergy concerns. A stretched or worn belt can slip, causing the brush to spin slowly or not at all, which reduces agitation and suction. If the belt looks frayed or is slipping, replace it. The dirt cup or bag should be emptied regularly; a full container creates a vacuum with nowhere to store dirt and increases strain on the motor. Finally, inspect for air leaks around seals, gaskets, and the door hinges. A simple airtight seal can restore a surprising amount of suction power.
How to clear clogs safely
Clogs are the most frequent culprit behind poor suction. Start by removing the hose and wand sections to inspect for blockages. Use a long, flexible rod or a broom handle to gently push out obstructions, and never force debris through the hose, which can cause damage. For tight pathways, a wet wipe or compressed air can help dislodge compacted dirt, but avoid liquids inside electric components. When reassembling, test for air leaks by sealing joints with a small amount of soapy water and running the vacuum over a paper towel—look for bubbles that indicate leaks. If you discover a serious clog in the wand or motor housing, this is a sign to seek professional service to prevent motor damage.
When to call a professional
If you’ve checked basics, cleared obvious clogs, replaced filters, and confirmed belts are intact, but suction remains weak, it’s time to contact a technician. Electrical motor issues, a damaged wand, or a misfiring suction chamber can require specialized equipment and safety procedures. A professional service can diagnose internal leaks, test the blower, and verify electrical integrity without risking injury or further damage. Regular maintenance plans from reputable shops can prolong your vacuum’s life and keep it performing at peak efficiency.
Pro tip: if your vacuum is under warranty, check coverage before paying for service to avoid voiding the warranty.
Maintenance habits to prevent future suction loss
Proactive maintenance is the best prevention. Schedule quick monthly checks: empty the dust cup or bag, inspect the brush roll for hair, clean or replace filters, and test suction on a controlled surface. Consider keeping spare belts, replacement filters, and a basic cleaning tool kit on hand for fast fixes. In homes with pets, more frequent belt and filter changes may be necessary. Document replacement dates so you don’t miss routine care, and store the unit in a dust-free area to protect seals and sensors. A tiny, regular investment in upkeep pays large dividends in suction longevity.
Pet hair, carpet, and hard-floor strategies
Pet owners face extra challenges: pet hair clings to brushes, and carpet fibers trap fine dust in the nap. For carpets, ensure the brush roll is free of hair and that the height setting matches carpet thickness; a too-tightly packed hose creates resistance. On hard floors, set to the correct floor type and use a wide nozzle to maximize airflow. In all cases, a clean filter and a fresh bag or empty cup are essential to restore strong suction. If your vacuum has mode options, choose the setting that aligns with your floor type to prevent overloading the motor.
After repair: testing suction and routine care
Once you’ve completed fixes, reassemble the vacuum and perform a controlled test on a known dirty patch. Listen for changes in the motor sound and check for consistent suction across the nozzle and brush. If suction improves, monitor for several cycles of use to ensure stability. Establish a quick routine: check the dust cup or bag every week during peak shedding, replace filters monthly or as indicated, and inspect the belt every 3–6 months. A consistent maintenance routine reduces future disruptions and extends the life of your vacuum.
Steps
Estimated time: 45-75 minutes
- 1
Power off and inspect basics
Unplug the vacuum, remove the bag or dump the cup, and check the dust path for obvious clogs. Confirm all attachments are seated properly and the brush roll turns freely by hand.
Tip: A quick visual check can save you from taking apart more than needed. - 2
Clear hoses and nozzles
Detach hoses and wands to inspect for blockages. Use a long, flexible tool to push out debris; avoid forcing; stop if you encounter resistance near a joint.
Tip: Keep a small can of compressed air on hand for stubborn debris. - 3
Check and clean filters
Remove filters and rinse if allowed; let them dry completely before reinstalling. If the filter is torn or discolored, replace it.
Tip: Never operate the vacuum with a wet filter. - 4
Inspect the belt and brush
Look for wear, cracks, or slack in the belt. Replace if frayed or stretched and ensure the brush spins smoothly.
Tip: A bright flashlight helps you spot a stretched belt quickly. - 5
Seal and reassemble
Check door seals, gaskets, and compartments for gaps. Reassemble firmly to restore airtight airflow.
Tip: A small amount of soapy water can reveal air leaks—watch for bubbles. - 6
Test suction and plan maintenance
Power on and test on dirty patches on the floor. If suction is still weak, log maintenance dates and consider professional service.
Tip: Set a reminder to perform monthly checks during shedding season.
Diagnosis: Vacuum suction is weak or non-existent
Possible Causes
- highFull bag or dust cup
- highClogged hose or nozzle
- highDirty or blocked filters
- mediumWorn or broken belt
- lowAir leaks around seals
- lowMotor or blower issue
Fixes
- easyEmpty dust cup and replace bag; reset dirt collection path
- easyClear blockages in hose, wand, and nozzle
- easyClean or replace filters (HEPA/foam)
- mediumInspect and replace worn belt
- easySeal leaks and reseat doors and hinges
- hardIf motor/blower issue is suspected, consult a professional
FAQ
Why does my vacuum not pick up dirt even after emptying the bag?
Even with an empty bag, suction can be compromised by clogged hoses, dirty filters, or a blocked nozzle. Start by inspecting the intake path and replacing or cleaning filters. If suction remains weak, check the belt and seals for wear.
If the bag is empty but suction is weak, inspect hoses and filters first, then check the belt and seals. Clean or replace components as needed.
How often should I replace vacuum filters for best suction?
Most vacuums benefit from filter replacement every 3–6 months, or sooner in homes with pets or high dust. Always follow the manufacturer’s guidelines and ensure filters are completely dry before reinstalling.
Replace filters every few months, especially with pets, and let them dry fully before putting them back.
Can a worn belt cause suction loss?
Yes. A stretched or damaged belt can reduce brush action and airflow, lowering suction. Inspect the belt for wear and replace if needed.
A worn belt lowers suction by reducing brush motion; replace it to restore performance.
When should I consider professional repair?
If basic maintenance doesn’t restore suction, professional service can diagnose motor, blower, or internal airflow issues safely and accurately.
If you can’t fix it with simple steps, a pro should diagnose motor or blower problems.
Why does suction vary between carpet and hard floors?
Suction can appear different due to brush height, floor setting, and airflow. Ensure the setting matches the surface and that the brush roll is clean.
Carpet or hard floor, check the setting and clean the brush to maintain consistent suction.
Watch Video
The Essentials
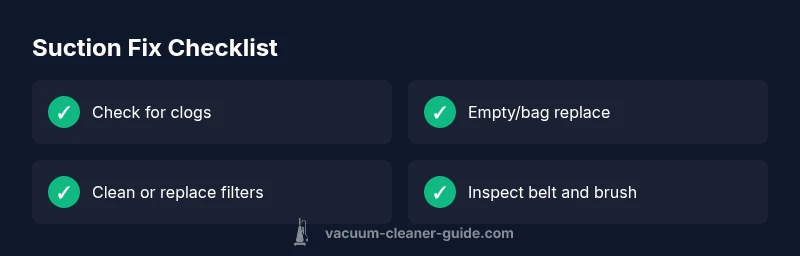
- Check the dirt collection and airflow path first
- Clean filters and replace worn parts promptly
- Clogs and leaks are the most common causes
- Call a professional if you suspect motor issues