Shark Vacuum Cleaner Instructions: Step-by-Step Guide
A comprehensive, expert-backed guide to operating and maintaining Shark vacuum cleaners. Learn setup, attachments, modes, safety, troubleshooting, and maintenance to maximize suction and extend lifespan for homes with pets and busy routines.

Mastering shark vacuum cleaner instructions helps you safely operate your unit, optimize suction, and extend its lifespan for homes with pets and kids. According to Vacuum Cleaner Guide, focus on setup, routine maintenance, and proper attachment use. This quick answer outlines the key steps and safety tips to get started.
Understanding Shark Vacuum Design and Safety
Shark vacuums share a common architecture that makes them popular for homes with pet hair and busy families. A typical Shark unit consists of a motorized head, wand, hose, dust cup or bin, filters, and a motorized brush roll. Understanding these parts helps you select the right attachment and avoid common issues. According to Vacuum Cleaner Guide analysis, most Shark models rely on a quick-release mechanism for attachments and an accessible bin for debris, which speeds up daily cleaning. Safety is the first concern: unplug the unit before performing any maintenance, never spray liquid into the body, and avoid using the vacuum on wet floors. Regular inspection of the brush roll for hair tangles prevents clogs and preserves suction. If your model includes a cord rewind, exercise care to prevent the cord from snapping. By knowing where the parts live and how they interact, you’ll troubleshoot problems faster and keep your Shark vacuum cleaner instructions consistent across tasks.
Preparing Your Shark Vacuum for Use
Before you start cleaning, prepare the vacuum by inspecting key components and ensuring proper assembly. Remove any packaging, attach the appropriate cleaning head for the surface you’ll treat (motorized for carpets, hard floor head for smooth surfaces), and verify that the dust cup is empty. If you own a cordless model, ensure the battery is fully charged and the charger is in good condition. Check that all filters are clean and correctly seated, and verify there are no blockages in the wand or hose. A quick wipe down of exterior surfaces with a dry microfiber cloth helps remove dust that could enter the motor housing. Vacuum Cleaner Guide emphasizes that a well-prepared machine performs better from the first stroke and reduces the chance of overheating or clogging during the session.
Basic Operating Modes and Suction Settings
Many Shark models offer basic modes to optimize performance on different floors. Use a carpet setting with the brush roll engaged for deep-pile rugs, and switch to a hard floor mode with the brush roll off when cleaning bare floors to prevent scattering debris. Suction adjustments are often available via a dial or switch; set higher suction for dense debris and pet hair, and lower suction for delicate surfaces. The hose and wand enable above-floor cleaning, so choose a nozzle that matches the task, whether it’s curtains, stairs, or upholstery. Familiarize yourself with the power switch and any indicators that show brush roll status or filter cleanliness. Following these guidelines helps maintain consistent suction and avoids unnecessary wear on the motor.
Cleaning Attachments and Their Uses
Attach the right tool for the job to maximize efficiency. The crevice tool excels at tight corners and along baseboards, while the upholstery tool handles furniture and drapes. The dusting brush is useful for delicate surfaces and lampshades. The motorized brush head tackles carpeted areas and cat or dog hair, but may collect hair rapidly on high-pile rugs, requiring more frequent maintenance. When swapping tools, ensure the unit is off and the wand/universal connection is securely clicked into place. Regularly inspect attachments for wear and tear, and store them in a designated bin to prevent loss.
Maintenance, Cleaning, and Troubleshooting Common Issues
Regular maintenance keeps suction strong and prevents downtime. Empty the dust cup or bin before it becomes full; a clogged canister is a common cause of reduced performance. Clean or replace filters as directed by your model’s manual, and rinse washable filters only when allowed by the manufacturer and let them dry completely before reuse. Periodically check the brush roll for hair and fiber tangles, removing any obstructions with scissors or a compatible tool. If you notice decreased suction, inspect for clogs in hoses or the wand, and verify the brush head spins freely. For electrical issues or unusual noises, power down, unplug, and consult the manufacturer’s troubleshooting guide.
Battery Care and Corded vs Cordless Considerations
Cordless Shark vacuums rely on rechargeable batteries, so battery care is essential for maintaining runtime. Avoid exposing batteries to extreme temperatures and follow manufacturer guidelines for charging cycles. If you have a corded model, manage the cord safely to prevent tangling and tripping hazards, and use the cord reel if available. In either case, regular maintenance—like cleaning filters, keeping vents clear, and ensuring the brush head is not blocked—helps preserve battery and motor life over time. Vacuum Cleaner Guide’s recommendations emphasize consistent charging habits and careful storage to extend performance lifespan.
Safety Considerations and Pet-Proof Tips
Safety should always come first, especially in homes with pets. Keep the vacuum away from stair edges and avoid exposing electrical cords to pets that may chew. Use a lower setting on delicate floors and around fragile items, and always unplug before performing any internal maintenance. When dealing with pet hair, clean attachments frequently to prevent hair buildup that reduces suction. Consider using a HEPA-filter compatible model or add-on filters if allergies are present. These practices reduce risk and improve overall air quality in pet-friendly households.
Common Pitfalls and How to Avoid Them
Common mistakes include running the vacuum on a full clog, neglecting filter maintenance, and using incorrect attachments for a given surface. To avoid these, empty the bin regularly, wash or replace filters as recommended, and always select the appropriate head for the surface you’re cleaning. Don’t rush through a pass; let the nozzle and brush do the work. Remember to unplug before any disassembly and never rinse electrical components with water. By anticipating these issues, you’ll sustain strong performance and minimize downtime.
How to Store and Extend Lifespan
After finishing a cleaning session, store the Shark vacuum upright in a dry location away from direct sunlight. Empty the bin and clean out any debris from the brush head and attachments. Let filters dry completely before reinstalling if they were washed, and replace them on a schedule that aligns with use frequency. Regular inspections of wheels, seals, and gaskets help catch wear early, preventing larger failures. A simple, consistent maintenance routine translates to better performance and longer device life over years of use.
Tools & Materials
- Phillips head screwdriver(For minor disassembly or brush roll cleaning)
- Microfiber cloth(Wipe surfaces and exterior parts to remove dust)
- Replacement filters (as applicable)(Check model to ensure compatibility)
- Washable filter container or bowl(Allow fully dry before reinstalling)
- Scissors or a grooming comb(Remove hair/tangles from brush roll)
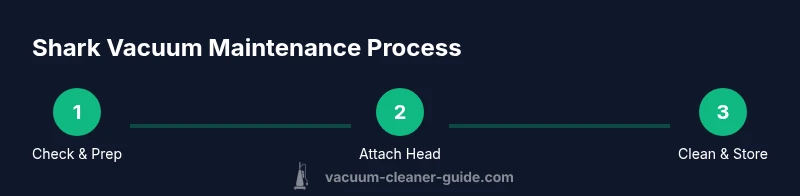
Steps
Estimated time: 20-30 minutes
- 1
Power on and select mode
Turn on the unit and choose the appropriate cleaning mode for your surface (carpet vs hard floor). If your model offers automatic mode, use it to let the vacuum adjust suction dynamically. Ensure the brush roll is engaged only when needed to protect floors. WHY: Correct mode prevents unnecessary wear and ensures effective debris removal.
Tip: Consult the user manual for the exact switch position and indicator lights. - 2
Attach the correct cleaning head
Attach the motorized brush head for carpets or the hard floor head for smooth surfaces. Make sure the connection clicks firmly into place before you start, and verify the attachment is clean and free of tangled hair. WHY: The right head maximizes cleaning efficiency and reduces streaking or hair wrap.
Tip: Always pick the head that matches the surface to avoid pushing debris around. - 3
Begin cleaning with deliberate passes
Start at the farthest corner and work methodically toward the exit, maintaining steady, overlapping passes. Avoid aggressive strokes that can kick debris into vents or damage flooring. WHY: Consistent passes ensure full coverage without missing spots and minimize cleaning time.
Tip: Let the vacuum do the work; don’t rush each pass. - 4
Pause for attachment checks and hair removal
During longer sessions, pause occasionally to detach the brush head and clear hair or fiber tangles. Reattach securely before resuming. WHY: Hair build-up can reduce suction and cause overheating if not addressed.
Tip: Carry scissors or a grooming tool to clean as you go. - 5
Check for clogs and airflow
If suction drops, inspect hoses, wand, and intake for blockages. Remove any obstructions gently and test suction again. WHY: Clogs are a common cause of reduced performance and can indicate a larger issue if ignored.
Tip: Keep a small flashlight handy to spot hidden debris. - 6
Power down and perform post-cleanup care
Turn off the vacuum, unplug, and allow any heated components to cool. Empty the dust cup, clean filters as needed, and store attachments in their designated spots. WHY: Proper shutdown and maintenance prevent mold and prolong motor life.
Tip: Dry filters completely before reinserting to prevent mold.
FAQ
What should I do before first use of a Shark vacuum?
Before first use, unbox and assemble the unit, attach the appropriate head, and perform a quick power-on check. If cordless, ensure the battery is charged. Read the manual for any model-specific setup steps and confirm filters are properly installed.
Before you start, unbox, assemble, charge if needed, and check that filters are installed. A quick power-on test helps confirm everything is ready.
How do I replace or wash the filters on a Shark vacuum?
Remove the filter housing, take out the filter, and rinse it if the manual allows. Let it dry completely before reinstalling. Replace with a manufacturer-approved filter when cleaning performance declines.
Take out the filter, clean it if allowed, let it dry fully, and reinstall. Replace with the right filter if performance drops.
Can I use a Shark vacuum on hardwood floors?
Yes. Use the hard floor setting and appropriate head to minimize suction on bare floors and prevent scattering debris. Avoid using the brush head on sensitive surfaces unless the model specifies it’s safe.
Yes, use the hard floor setting and the right head to protect your floor and keep debris in line.
Why is my Shark vacuum losing suction?
Common causes include a full bin, dirty filters, tangled hair in the brush roll, or a clogged hose. Clear obstructions, empty the bin, and clean filters before testing suction again.
If suction drops, check the bin, clean or replace filters, and remove hair from the brush. Then test again.
How do I troubleshoot a burning smell or overheating?
Turn off and unplug the unit, inspect for clogs and dirty filters, and allow components to cool. If the smell persists, discontinue use and contact support.
If you smell burning, turn it off, unplug, and inspect for clogs or dirty filters. If it continues, contact support.
Is it safe to use attachments for pet hair on furniture?
Yes. Use the upholstery tool or dusting brush on furniture and drapes, and regularly empty the bin to prevent suction loss. Maintain attachments to handle fur efficiently.
Yes—use upholstery tools for furniture and keep things clean so the vacuum maintains suction.
Watch Video
The Essentials
- Start with the correct mode and attachment for your surface
- Regularly clean filters and the brush roll to sustain suction
- Choose the right head for carpets vs hard floors
- Practice safe shutdown and storage to extend life