Robot Vacuum Cleaner Repair: A Practical How-To Guide
Learn how to diagnose and repair common robot vacuum issues with our comprehensive, safe, step-by-step guide. Diagnose suction, charging, sensors, and navigation to extend your device’s life.

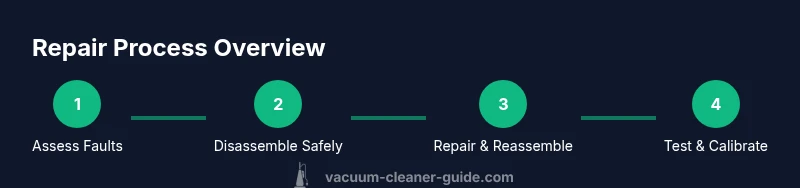
In this guide you will learn how to diagnose, disassemble, repair, and test a robot vacuum cleaner. You’ll cover common faults, essential safety steps, and practical troubleshooting to extend the life of your device. This article includes a step-by-step approach with real-world examples and tips.
Understanding common faults in robot vacuum cleaners
Robot vacuum cleaner repair begins with recognizing the typical failures that homeowners encounter, such as loss of suction, navigation errors, charging problems, noisy brushes, or persistent jams. By identifying patterns—like suction loss on all floor types or repeated detours around obstacles—you can focus diagnostics on the root cause rather than chasing symptoms. According to Vacuum Cleaner Guide, starting with a gentle visual inspection before power removal saves time and reduces risk to sensitive sensors. This section helps you map symptoms to likely subsystems: airflow, motor brushes, battery, sensors, and the charging contacts. With a methodical approach, you minimize guesswork and set up a smoother repair path.
Safety first: powering down and protecting components
Before touching any internals, power down, unplug the device, and remove it from the charging dock. Wear eye protection if there is a risk of loose debris, and avoid touching exposed battery terminals. Static electricity can damage micro-sensors and control boards, so ground yourself with an anti-static wrist strap or by touching a grounded metal surface. Keep a clean, well-lit workspace and organize screws as you go to prevent misplacement. This safety mindset protects you and preserves the device’s electronics during the repair process.
Diagnosing suction, brushes, and wheels
Begin with the basics: empty the dust bin, inspect the filter, and check the main brush for wear or entanglements. Dirty or clogged filters drastically reduce suction, while tangled brushes diminish cleaning efficiency. Check side brushes for wear and ensure wheels roll freely without wobble or resistance. If the vacuum leaves streaks or misses spots, evaluate the brush height and airflow path. A simple suction test (cover the intake briefly and observe the change in power) can reveal airflow restrictions that aren’t obvious at first glance.
Battery and charging issues
Battery problems are a common source of failures. If the charger fails to initiate or the status light remains off, inspect charging contacts for corrosion or debris and clean them with isopropyl alcohol and a lint-free cloth. If the robot won’t hold a charge or discharge rapidly, the battery is a likely culprit and may require replacement. Always verify model-specific battery compatibility and follow proper disconnection procedures to avoid short circuits. Safe handling is crucial when working with Li-ion cells.
Sensor and navigation troubleshooting
Navigation faults often stem from dirty sensors or miscalibrated mapping. Clean light and cliff sensors with a soft cloth; avoid harsh solvents that could leave residues. Re-calibration routines, app-based mapping resets, or factory resets can resolve software glitches that mimic hardware faults. If the robot reports obstacles incorrectly or gets stuck at the same spot, inspect bumper switches and infrared sensors for damage or misalignment. Keep the sensor areas free of dust to maintain reliable wall-following and obstacle avoidance.
Clogged filters, seals, and airflow optimization
Regular maintenance of filters, gaskets, and dust paths keeps airflow at peak efficiency. Replace disposable filters or clean reusable ones according to the model’s guidelines. Inspect seals around the dust bin and around the fan housing for cracks or wear; broken seals can cause suction drops and performance loss. Ensure there are no obstructions inside the vacuum that restrict air flow, such as hair wrap around the fan impeller. A clear airflow path supports longer motor life and steadier performance.
Disassembly basics and static precautions
Plan your teardown with clear labeling and organized storage for screws and parts. Use a plastic opening tool to pry shells gently, avoiding metal tools that can scratch or short internal traces. Take photos at each stage so you can reassemble accurately. Ground yourself to prevent static discharge from damaging circuits. If you encounter a stubborn clip or stubborn cable, stop and reassess rather than forcing components apart. Patience and organization are the repair’s best allies.
Replacing worn parts: brushes, belts, wheels, seals
Identify worn components such as main brushes, side brushes, drive belts, or wheel paddings. When parts show visible wear, replace with model-appropriate kits to ensure proper fit and balance. Reassembly should mirror the disassembly sequence to keep cables and connectors aligned. After installation, double-check that components rotate freely without rubbing and that belts sit correctly on pulleys. This reduces jitter, noise, and motor strain during operation.
Cleaning and reassembly: best practices
Before reassembly, clean all contact surfaces, re-lubricate where recommended by the manufacturer, and reinstall components in the reverse sequence of disassembly. Ensure battery connectors are seated firmly and that no screws are left loose. Reattach the shell snugly, testing each function (power, charging, suction, and sensors) in a controlled test run. A thorough wipe-down helps prevent future jams caused by accumulated dust and debris.
Testing, calibration, and software resets
Power up the device and run a short test cleaning cycle on a familiar surface. Watch for abnormal noises, misnavigation, or sudden stops. If issues persist, perform a soft reset or factory reset as recommended by the user manual, then re-map the cleaning area if needed. Software issues can masquerade as hardware faults; a final test run confirms the repair’s success.
Long-term maintenance to prevent future failures
Schedule regular maintenance: empty the dust bin, clean filters, inspect brushes, and check battery health periodically. Store the device in a dry, cool environment away from direct sunlight and corrosive cleaners. Use a recommended cleaning routine and parts replacement schedule to extend life and avoid unexpected downtime. Keeping expectations realistic about DIY repairs helps ensure safety and effectiveness.
DIY vs professional repair: when to quit
Many minor faults can be addressed with basic tools and careful diagnostics. However, if you encounter a swollen battery, damaged mainboard, or hard-to-access components, professional repair or replacement may be safer and more cost-effective in the long run. Always weigh the value of the device, the cost of parts, and the risk of further damage before proceeding.
Tools & Materials
- Screwdriver set (Phillips and Torx)(Precision set with interchangeable bits; include Torx T6/T8 if available)
- Plastic opening tool / spudger(Non-marring; use to pry shells without breaking clips)
- Replacement brushes, filters, seals(Model-specific kit preferred; keep spare parts organized)
- Isopropyl alcohol (70%+) and lint-free cloths(For contact cleaning and residue removal)
- Soft brushes and cotton swabs(Detail cleaning in tight areas)
- Multi-meter (optional)(For testing continuity on electronics)
- Replacement battery (if applicable)(Only use model-compatible cells; follow safety guidelines)
Steps
Estimated time: 1-2 hours
- 1
Power down and unplug
Ensure the device is powered off and removed from the charger. This prevents short circuits and protects sensitive electronics during any teardown.
Tip: Always unplug and disconnect the battery if accessible. - 2
Open the shell
Using a plastic opening tool, carefully separate the top shell. Keep track of all screws and clips as you go.
Tip: Take photos as you progress to simplify reassembly. - 3
Disconnect the battery safely
If the battery is accessible, disconnect the power connector to avoid accidental shorting. Do not bend or puncture the cell.
Tip: Avoid touching metal contacts with bare skin. - 4
Inspect and clean the dust path
Remove the dust bin, clean filters, and clear any hair or debris from the main intake and brushes.
Tip: Set aside removed parts in labeled containers. - 5
Check brushes and wheels
Examine main brush for wear; replace if frayed or clogged. Ensure wheels rotate freely without wobble.
Tip: Remove hair buildup with tweezers or a pin, not your fingers. - 6
Inspect sensors and charging contacts
Clean optical and bumper sensors; wipe charging contacts with alcohol and a lint-free cloth.
Tip: Avoid leaving lint on contact surfaces after cleaning. - 7
Replace worn parts
Install new brushes, seals, or belts as needed. Verify fit and alignment before reassembly.
Tip: Follow the model’s assembly order to prevent misalignment. - 8
Reassemble with care
Return all components in reverse order of disassembly. Check that cables are routed unobstructed and screws are snug.
Tip: Snug does not mean overtight; overtightening can damage plastic housings. - 9
Power up and test
Reconnect power, boot the unit, and run a short test cycle to observe for any abnormal sounds or behaviors.
Tip: Monitor for steering anomalies or unexpected pauses. - 10
Run a calibration or reset if needed
If navigation is off, perform a calibration or a factory reset per the manual, then re-map the cleaning area.
Tip: Back up any saved maps before resetting. - 11
Document and maintain
Record what you repaired, part numbers, and a maintenance plan for future reference.
Tip: Schedule periodic maintenance to prevent future failures. - 12
Decide on future repair vs replacement
If a major component like the battery or mainboard fails, evaluate the cost and benefits of professional service or replacement.
Tip: Consider total ownership cost and safety concerns.
FAQ
Is it safe to repair a robot vacuum at home?
Yes, basic repairs are safe if you power down, unplug, and follow the manufacturer’s guidance. Avoid opening high-voltage components unless you’re trained.
Yes, basic repairs are safe if you power down and follow safety steps. Avoid high-voltage components if you’re not trained.
Which robot vacuum models are easiest to repair yourself?
Models with user-accessible brushes and batteries, along with clear service manuals, are generally easier to repair. Avoid models with sealed battery packs or proprietary connectors if you’re new to DIY repairs.
Models with accessible parts and good manuals are easier to repair at home; avoid sealed batteries if you’re new to DIY.
What should I check first when a robot won’t charge?
Check the charging contacts for corrosion, ensure the dock is clean and aligned, and verify the battery isn’t swollen. If the device still won’t charge, replacement may be required.
Check contacts and dock cleanliness, ensure the battery isn’t swollen, and consider replacement if needed.
Can firmware updates fix repairable issues?
Firmware updates can resolve software glitches related to navigation and scheduling. If hardware issues persist after updates, proceed with mechanical checks.
Firmware updates can fix glitches; if issues persist, check hardware components.
When should I replace the battery instead of repairing?
If the battery shows rapid discharge, fails to hold charge, or is physically swollen, replacement is safer and often more cost-effective than continued repair.
If the battery discharges quickly or is swollen, replace it instead of repairing.
Where can I find compatible replacement parts?
Check the manufacturer’s official store or authorized parts dealers for model-specific components. Third-party kits can work, but compatibility and safety vary.
Buy parts from official stores or authorized dealers for compatibility and safety.
Watch Video
The Essentials
- Power down before work and follow safety steps
- Diagnose by subsystem, not just symptom
- Use model-appropriate parts for best fit
- Test thoroughly after reassembly
- Know when to seek professional help