How to Use a Vacuum Cleaner Wet and Dry: Step-by-Step Guide
Learn how to safely switch a wet and dry vacuum, pick the right attachments, and maintain it for liquid spills and dry debris. Expert guidance from Vacuum Cleaner Guide to keep your home clean and safe.

You can safely use a wet-dry vacuum for both liquids and dry debris by selecting the right setting, fitting the proper filter, and using dedicated attachments. Before you start, unplug the unit, read the manual, and check liquid compatibility. This guide covers setup, safe operation, and maintenance to prevent clogs or spills.
Understanding wet-dry vacuums and why you use them
A wet-dry vacuum is a versatile cleaning tool designed to tackle both liquid spills and dry debris, making it invaluable for garages, basements, and busy homes. The right model can save you time when surprises happen—think spilled coffee, pet accidents, or a wet toolbox spill after a rainy day. According to Vacuum Cleaner Guide, successful dual-use depends on choosing a unit with a sealed motor, a sturdy intake, and attachments that switch between liquid and dry pickup without cross-contamination. When you use it for liquids, you typically run a different suction level and swap to a wet-friendly filter to prevent clogging. In this section, you’ll learn the core capabilities to look for, how to verify liquid compatibility with your model, and practical signs that your vacuum will perform well on both surfaces. Features like a float shutoff, drain valve, and disposable cartridges can dramatically improve convenience and safety over time.
Safety first: electrical, water, and material safety
Safety should be your first priority whenever operating a wet-dry vacuum. Always unplug the unit before changing attachments or opening the tank to avoid accidental starts. Use a GFCI outlet in damp areas and never pull the cord across water. Keep cords clear of standing liquid, and inspect hoses for cracks or punctures before each use. Wear protective gloves and eye protection when handling dirty liquids, and ensure children and pets are a safe distance away during cleanup. For liquids, avoid substances that could release dangerous fumes or react with plastics, and never suction flammable liquids such as gasoline. Proper wiring, grounded outlets, and a dry workspace help prevent shocks and electrical fires. By maintaining basic electrical hygiene, you reduce risk and extend the life of your vacuum.
Choosing the right wet-dry vacuum for your home
Selecting the best model comes down to capacity, suction power, and filtration that suits your typical messes. Start with the tank size: larger volumes are convenient for big spills, but heavier units may be harder to maneuver. Look for a motor with adequate amperage or wattage for your space, plus a robust hose and a full set of attachments (crevice tool, round brush, wide nozzle) that adapt to floors, stairs, and upholstery. Filters should be easy to wash or replace, and consider a unit that offers both a wet filter and a dry cartridge to prevent cross-contamination. If you have pets or high-traffic areas, prioritize models with higher suction efficiency and a sealed design to maximize pickup on both damp and dry surfaces. Vacuum Cleaner Guide analysis shows that the most reliable dual-use vacuums balance capacity, filtration, and durable build, minimizing downtime between tasks.
Preparing before vacuum: setup, hoses, filters
Before turning on your wet-dry vacuum, assemble the hose and wand securely, attach the correct nozzle for the surface, and ensure the tank is empty if you are switching modes. Check that the wet filter or foam sleeve is in place for liquids, and swap to a dry cartridge for debris. If your model has a drain valve, keep a bucket nearby to empty the tank without splashing. Inspect the electrical cord for wear and ensure the switch settings match the task (wet vs dry). A quick test on a small, inconspicuous area helps confirm suction and airflow. Finally, clear the area of fragile items to prevent damage during powerful suction and movement.
Wet mess clean-up: best practices
When tackling liquids, work slowly with steady passes to avoid splashing. Keep the nozzle flat against the floor or surface to maximize contact and prevent air gaps that reduce suction. For stubborn spills, work from the edge toward the center to minimize spreading. Do not vacuum corrosive liquids, unknown solutions, or hot liquids beyond what your manual recommends. If the tank fills quickly, pause to empty it into a drain or bucket, then resume. After finishing wet cleanup, remove the wet filter and rinse it thoroughly with clean water, allowing it to dry completely before storage.
Dry cleanup and carpet care: using the dry mode effectively
Switch to dry mode for dust, crumbs, pet hair, and light debris. Use the crevice tool for corners, the brush nozzle for upholstery, and the wide nozzle for floor surfaces. For carpets, a slower, deliberate pass helps lift embedded dirt without over-wetting fibers. If you encounter stubborn dirt, use a damp microfiber cloth to pre-dampen the area and then vacuum to pick up loosened material. Always avoid suction on delicate cords and electronics, and clean grout lines and stair treads with appropriate attachments to prevent tip-overs. Regular use of a dry-cleaning filter helps maintain suction and prolongs motor life.
Maintenance, cleaning, and storage after use
After use, empty the tank, rinse out any residual liquid, and let components dry completely before reassembling. Rinse filters or replace them if they show wear or strong odors. Wipe down the exterior with a damp cloth to remove dust and residue. Store attachments in a dedicated bin, coil the power cord loosely, and keep the unit in a dry, elevated space away from direct sunlight. Periodic checks for cracks in hoses, seals, and gaskets help prevent leaks and performance drops. Regular maintenance reduces downtime and keeps your wet-dry vacuum ready for the next spill or cleanup project.
Troubleshooting common issues
If suction drops, check for clogs in the hose, nozzle, or filters and clear them carefully with a flexible tool. A motor that overheats may indicate a clogged filter or overuse on heavy debris; let the unit cool before continuing. If liquids backflow into the outlet, inspect the float valve and ensure the drain valve is functional. If you notice persistent odors, wash or replace filters and run a short dry cycle to dry internal components. Always refer to the user manual for model-specific troubleshooting steps and safety cautions.
Tools & Materials
- Wet-dry vacuum unit(Choose a model rated for liquids and with a sealed motor.)
- Suction hose and wand(Flexible reach for corners and tight spaces.)
- Crevice and brush attachments(For edges, upholstery, and delicate surfaces.)
- Wet filter or foam sleeve(Use for liquids to prevent clogging the motor.)
- Dry filter cartridge(Swap for dry debris tasks.)
- Drain valve bucket(Useful for early tank emptying during heavy spills.)
- Safety gear (gloves, eyewear)(Protect hands and eyes when handling dirty liquids.)
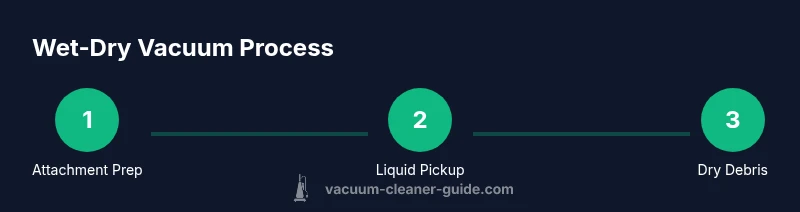
Steps
Estimated time: 45-60 minutes
- 1
Inspect attachments and safety gear
Before you begin, verify the hose, wand, and nozzle are free of cracks. Check that the correct filter is on hand for wet or dry tasks and put on gloves and eye protection to prevent contact with dirty liquids.
Tip: Test attachments on an inconspicuous area to ensure surfaces aren’t scratched. - 2
Unplug and prepare the area
Disconnect from power and move fragile items away. Clear the workspace of obstacles and ensure kids or pets are out of the area before you start cleaning.
Tip: Place a protective mat under spills to catch splashes. - 3
Attach correct wet-dry setup
Attach the appropriate nozzle and switch to the wet or dry filter based on the task. Confirm the drain valve position if your model supports emptying during use.
Tip: For liquids, ensure the filter is fully seated to prevent water from bypassing. - 4
Fill tank to safe level
Do not operate with an overfilled tank; leave headroom to avoid splashing and ensure safe disposal. If you’re cleaning up a large spill, pause to empty and resume.
Tip: Keep a bucket nearby for easy disposal. - 5
Test suction on a small area
Run a short test pass on a hidden spot to verify suction and avoid damaging surfaces. Check for excessive heat or unusual noises.
Tip: Stop if you hear grinding or smell burning insulation. - 6
Vacuum liquids with steady passes
Move slowly and keep the nozzle flat against the surface to minimize splashing. Work edge-to-center to contain the spill across the area.
Tip: Avoid abrupt stops that sling liquid back toward you. - 7
Switch to dry mode after liquids
Once liquids are cleared, switch to dry filter and run a few passes to pick up remaining debris. This helps prevent moisture from lingering inside the vacuum.
Tip: Rinse and dry filters before reinstalling. - 8
Power down and clean up
Turn off and unplug the unit, empty the tank into a proper drain, and rinse out the tank and attachments. Dry all parts completely before storage.
Tip: Store with attachments neatly organized to avoid misplacement.
FAQ
Can I use a wet-dry vacuum to pick up standing water?
Yes, most wet-dry vacuums are designed to pick up standing water. Use the wet filter, avoid overfilling, and ensure the area is safe and free of electrical hazards. Do not use in wet electrical spaces without proper grounding.
Yes, you can use it for standing water. Use the wet filter and keep the area safe and dry around electrical outlets.
Can I use a wet-dry vacuum for liquids other than water?
Many models handle common household liquids, but avoid hazardous chemicals or substances that could react with the plastic or filter. Always check the user manual for liquid compatibility before suction.
Most can handle common liquids, but avoid chemicals and check your manual first.
Is it safe to use a wet-dry vacuum on carpets and upholstery?
Yes, but use the dry filter setting or a low-moisture approach to prevent soaking fibers. For delicate textiles, test on a hidden area and use a gentler attachment.
Yes, with care. Test first and use the right setting to protect fabrics.
What filters should I use for wet vs dry pickups?
Use a wet filter or foam sleeve for liquids and switch to a dry cartridge for dry debris. Never mix filters; switching between tasks prevents cross-contamination and protects the motor.
Use a wet filter for liquids and a dry cartridge for debris. Don’t mix filters.
How do I empty and clean the tank without making a mess?
Place the unit over a drain or bucket, switch off the unit, and carefully open the drain valve if available. Rinse the tank with clean water and air-dry all components before reassembly.
Carefully drain into a sink or bucket, rinse, and air-dry components before storage.
How often should I replace filters or seals?
Check filters regularly for wear or odor and replace when visibly dirty or difficult to rinse. Seals and gaskets should be inspected periodically for cracks and replaced as needed.
Check and replace worn filters and seals as needed.
Watch Video
The Essentials
- Choose a model with dual filtration and easy detachment for wet and dry use.
- Unplug before any adjustment; always protect yourself with PPE.
- Switch filters correctly when changing from liquids to dry debris.
- Regular maintenance prevents clogs and extends life.