How to Use a Vacuum Cleaner for Beginners: 6 Easy Steps
Learn how to use a vacuum cleaner for beginners with safety tips, attachment guidance, and a simple step-by-step process. Perfect for homeowners and pet owners seeking confident, efficient cleaning.

By the end of this guide, you’ll be able to use a vacuum cleaner confidently for everyday cleaning. You’ll learn how to pick the right attachments, prepare rooms, move methodically across carpets and hard floors, and perform quick maintenance. With clear steps and practical tips, beginners will clean efficiently while protecting floors, pets, and your appliance.
Why a Proper Vacuuming Skillset Matters
Knowing how to use a vacuum cleaner properly saves time, protects floors, and reduces allergens in homes with pets. If you’re just getting started, this guide helps you move beyond basic flicking and random passes to intentional cleaning that covers every room efficiently. In short, mastering the right technique makes chores faster and less tiring.
According to Vacuum Cleaner Guide analysis, beginners who understand the core concepts—surface types, attachments, and routine maintenance—gain confidence quickly and achieve better results with less wear on the machine. The phrase how to use a vacuum cleaner for beginners isn’t just about turning it on; it’s about choosing the right tool for the job and following a repeatable process that you can rely on daily. As you practice, you’ll develop a rhythm that reduces re-cleaning and protects carpets and floors.
Types of Vacuums and What They Do
Vacuum cleaners come in several configurations, each with strengths on different surfaces. Upright vacuums are common for large carpeted areas; canister models offer strong suction with flexible hoses for stairs and upholstery; cordless sticks are convenient for quick pickups; handhelds tackle vehicles and tight corners. Robot vacuums handle everyday maintenance but may need manual passes for deep cleaning. When learning how to use a vacuum cleaner for beginners, pick a primary type suited to your home to minimize tool-switching.
For most homes, a versatile canister or upright plus a few attachments covers most tasks. Battery life on cordless models matters if you have large spaces or stairs. Always check the floor types you’ll clean first, then match attachments: a wide floor nozzle for hard floors, a motorized brush for carpets, and a crevice tool for cracks. Vacuum Cleaner Guide analysis shows that using the right attachment for the task can significantly improve efficiency and results.
Before You Start: Safety and Quick Prep
Before you switch on the machine, prepare the space: remove small hazards, close doors to limit dust, and inspect the cord for wear. Read your model’s manual to understand any unique safety features, such as automatic shutoff or overheat protection. Check the vacuum filter and dustbin; empty a full bin to maintain suction. If you have pets, secure their space and keep cords out of high-traffic areas. Place the unit on a stable surface and test the switch in a clear area. Always unplug before changing attachments or performing maintenance. Keep children and pets out of the room while testing unfamiliar settings to prevent accidents.
Learning how to use a vacuum cleaner for beginners starts with safe setup and a quick readiness check.
Choosing Attachments for Surfaces
Attachments are the workhorse of versatile cleaning. Use the combination floor nozzle on hard floors to prevent scratching; switch to a motorized brush for medium-pile carpets; the crevice tool reaches along baseboards; the upholstery tool cleans couches and curtains. For stairs, a wand with a small brush head helps maintain stability and suction control. If your vacuum has a HEPA filter, ensure it’s properly installed to reduce allergens. Selecting and using attachments correctly is part of learning how to use a vacuum cleaner for beginners.
Keep a small bag or container for attachments when moving between rooms to minimize downtime.
Techniques for Surfaces: Carpets, Hard Floors, Upholstery, and Stairs
Technique matters more than raw suction. On carpet, overlap passes in multiple directions to lift fibers; on hard floors, avoid pushing debris into gaps by using a wide, gentle stroke. When cleaning upholstery or draperies, keep the nozzle at a slight angle and use slow, deliberate sweeps. For stairs, work from top to bottom to prevent re-dirt. Move slowly to maximize dirt pickup; quick passes leave soil behind. Maintain consistent speed and pressure to avoid scattering dust. If you encounter stubborn spots, pause and re-treat rather than forcing a single powerful pass.
Maintenance and Care After Vacuuming
After cleaning, unplug the unit and remove the bag or canister to empty, then wash or replace filters as recommended by the manufacturer. Clean brushes and the intake to prevent clogging. Check hoses for cracks and inspect seals to maintain suction. Store the vacuum in a dry, accessible location; avoid leaving it in direct sunlight or damp basements. Regular maintenance reduces breakdowns and extends the life of your vacuum. If you notice reduced suction, diagnose whether it’s a full bag, clogged wand, or dirty filter, and address it promptly.
A routine maintenance mindset helps you preserve suction and performance over time.
Common Mistakes to Avoid
Common beginner mistakes include using a vacuum on wet spills, which can ruin the motor or create mold; failing to empty the bin when full, which reduces suction; neglecting attachments and using the wrong tool for a surface; pressing too hard, which damages carpets and wears the brush. Stay mindful of the floor type and switch attachments as needed. Avoid running the vacuum over cables or cords, which can damage both machine and wiring. Finally, don’t attempt repairs beyond your skill level; consult the manual or a pro when in doubt.
Tools & Materials
- Vacuum cleaner(Ensure it’s suitable for your floor types and has necessary attachments)
- User manual(Keep for safety features and maintenance intervals)
- Extension wand(Useful for stairs and high shelves)
- Motorized brush attachment(Best for medium-pile and low-pile carpets)
- Crevice tool(Cracks, edges, and along baseboards)
- Dustbin bag or filter replacement(Keep extras on hand for quick maintenance)
Steps
Estimated time: 30-45 minutes
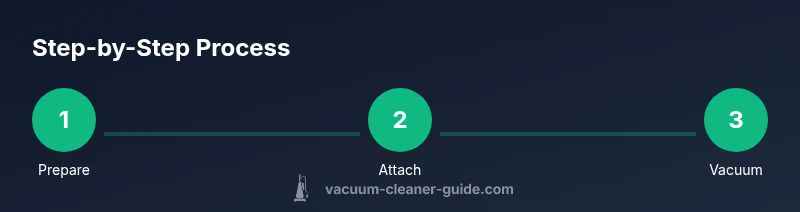
- 1
Prepare the vacuum and space
Unplug the unit, inspect the cord for wear, and clear the area of small hazards. Check the dustbin or bag and remove any debris that could clog the intake. This first step ensures your machine operates safely and efficiently.
Tip: Test the switch in a clear area to confirm power and listen for unusual sounds. - 2
Attach the right head
Choose an attachment appropriate for the surface you plan to clean. For hard floors, use the wide floor nozzle. For carpets, snap on the motorized brush if you have one. Attachments should click firmly in place to prevent slipping during use.
Tip: Keep the nozzle flat against the surface to maximize suction and stability. - 3
Test suction and surface
Turn on the vacuum at a low setting and test on a small, inconspicuous area. Check for immediate suction and listen for changes in sound. This helps you catch a clog or misfit before you clean a larger area.
Tip: If suction seems weak, check for a full bin or a blocked hose and address before proceeding. - 4
Vacuum with overlapping passes
Move the vacuum slowly in straight lines with overlaps to avoid missing dirt. On carpet, include forward and backward passes; on hard floors, use long, steady strokes to push debris toward door thresholds. Maintain consistent speed to maximize pickup.
Tip: Don’t rush; slower passes pick up finer dust and hair more effectively. - 5
Tackle edges, stairs, and corners
Use the crevice tool or an attached wand for edges and baseboards. For stairs, use a hand grip or attach a short wand to maintain control and reduce loss of balance. Carefully clean each step to avoid tripping hazards.
Tip: Always stabilize yourself and avoid leaning over the edge while cleaning stairs. - 6
Power down and perform quick maintenance
Unplug and detach attachments after use. Empty the dustbin or replace the bag if needed, and wash or replace filters per the manufacturer’s guidelines. Wipe down exterior surfaces to remove any dust buildup.
Tip: Store in a dry area and keep attachments together for the next cleaning session.
FAQ
What is the first step before vacuuming?
Begin with safety: unplug the unit, clear the area, and inspect the cord and filters. This prevents accidents and ensures optimal suction. Always read the manual for model-specific guidance.
Start by unplugging the vacuum, clearing debris, and inspecting the cord and filters to ensure safe operation.
Which attachment should I use on hardwood floors?
Use the wide floor nozzle or a soft-bristle brush designed for hard surfaces. This minimizes scratching and maximizes dust pickup without damaging the floor finish.
For hardwood floors, select the wide floor nozzle or a soft-bristle brush for safe cleaning.
How often should I change the vacuum bag or empty the canister?
Empty the canister or replace the bag whenever it reaches the recommended level for your model. A fuller bag reduces suction and can overwork the motor.
Empty the bag or canister when full to maintain suction and protect the motor.
Can I vacuum wet spills with a standard vacuum?
Most standard vacuums should not vacuum liquids unless rated for liquids. For spills, use absorbent towels or a model designed for wet pickup if available.
Only vacuum liquids if your machine is designed for wet pickup.
What’s the best way to maintain a pet-hair vacuum?
Regularly clean brushes and filters to prevent hair buildup. Use a flexible nozzle for tight spaces near pet bedding and furniture.
Clean brushes and filters often and use the right attachment for pet hair.
Watch Video
The Essentials
- Know your vacuum type and attachments.
- Use overlapping passes for thorough cleaning.
- Regular maintenance preserves suction and life.
- Safety first: unplug before changing parts.