8 Steps How to Use a Vacuum Cleaner: A Step-by-Step Guide
Master the 8 steps how to use a vacuum cleaner with expert guidance for carpets, hard floors, and pet hair. Setup, settings, attachments, and maintenance explained for safer, more effective cleaning.

Learn how to operate a vacuum cleaner in eight clear steps, designed for homeowners and pet owners. This guide covers setup, selecting suction and attachments, cleaning routines for carpets and hard floors, plus tips to avoid clogs and damage. Follow the sequence to achieve consistent results and extend the life of your vacuum.
Why proper vacuum technique matters
Effective vacuuming is about more than just turning the machine on. Proper technique improves dirt pickup, reduces wear, and helps allergy-prone households breathe easier. According to Vacuum Cleaner Guide, a consistent routine minimizes missed spots and prolongs your vacuum’s life. The Vacuum Cleaner Guide team found that many homeowners rely on powerful suction alone and neglect filters, belts, and attachments. In this section, you’ll learn why a methodical approach matters for every home, whether you have pets, children, or delicate floors. Expect practical reasons for using the right brush, keeping a steady pace, and stopping to empty or clean components when needed.
What you’ll need before you start
Before you begin, gather a few essentials to keep the eight steps efficient and safe. Have the vacuum in good working order with clean filters, a functional belt, and all necessary attachments. A crevice tool helps reach tight corners while a motorized brush can tackle stubborn debris on carpets. Keep a microfiber cloth handy for quick surface wipe-downs, and have replacement bags or filters on hand for households with pets. Finally, ensure you have a dry, clear area to move around and a power source that suits your model’s cord length or battery life.
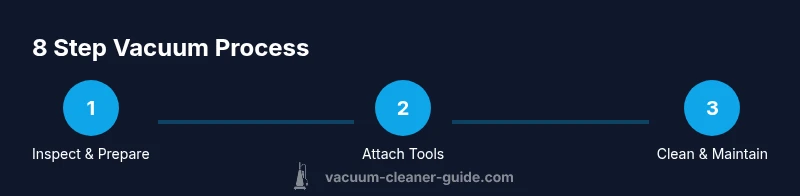
The eight-step routine at a glance
The eight steps are designed to be followed in order for maximum effectiveness. This section provides a concise overview so you know what to expect as you move through each stage. Step 1 focuses on inspection and safety; Step 2 covers selecting the correct setting and attachments; Step 3 through Step 6 emphasize technique and coverage; Step 7 highlights sensitive surfaces, and Step 8 wraps up with maintenance and post-cleaning checks. A well-planned sequence minimizes repeated passes and ensures consistent results across different room types.
Step-by-step overview (1–4): preparation and initial passes
In Steps 1 through 4 you prepare your machine and begin the cleaning process. Step 1 is inspection: unplug, check the bag or bin, confirm the belt’s condition, and verify attachments. Step 2 is preparation: attach the right tool for the surface and choose the appropriate suction setting. Step 3 is edge passes: start at the room’s perimeter to capture edge debris without overworking the center. Step 4 is systematic coverage: work in overlapping paths and maintain a steady pace to avoid missed areas. These initial actions set the foundation for efficient cleaning.
Step-by-step overview (5–8): finishing and maintenance
Steps 5 through 8 focus on deep cleaning, delicate surfaces, and closing routines. Step 5 emphasizes consistent overlap on each pass to thoroughly lift debris. Step 6 recommends slow, controlled strokes to maximize dirt removal without stirring dust back into the air. Step 7 reminds you to protect fragile surfaces like drapes or plush fabrics by using appropriate attachments. Step 8 concludes with maintenance: empty the canister or bag, clean filters, and wipe down attachments. This final stage helps prevent clogs and maintains suction power for longer.
Surfaces, attachments, and best practices
Different surfaces demand different approaches. For carpets, a motorized brush or turbo tool often yields the best results, while hard floors benefit from a hard surface setting and a soft brush. Upholstery and stairs commonly require a crevice or dusting tool. To maximize pet hair pickup, use a high-suction setting with a motorized brush on carpets, and switch to a crevice tool for tight corners. Always test a new attachment on an inconspicuous area first to avoid damage. Regular maintenance, including emptying the canister and cleaning filters, sustains suction and prolongs your vacuum’s life.
Authority sources
For additional context on indoor air quality and equipment safety, consider these authoritative sources:
- https://www.epa.gov/iaq (EPA — Indoor Air Quality)
- https://www.osha.gov (OSHA — Workplace Safety and Equipment)
- https://www.energy.gov (U.S. Department of Energy — Efficient home cleaning practices)
These references provide general guidance that supports best practices in vacuum use, maintenance, and safe operation.
Tools & Materials
- Vacuum cleaner(Ensure it’s in good working order with clean filters and a functional belt)
- Replacement bags/filters(Stock up especially for pet households or high-traffic cleaning)
- Crevice tool(Essential for corners, furniture legs, and tight gaps)
- Motorized brush or upholstery tool(Helpful for carpets and pet hair on furniture)
- Soft brush attachment(Use on delicate surfaces and for dusting)
- Microfiber cloth(Wipe surfaces after vacuuming to remove fine dust)
- Gloves(Protect hands when handling bags or filters)
Steps
Estimated time: 60-90 minutes
- 1
Inspect and prepare
Unplug the vacuum, inspect the cord for damage, open the bin or bag, and verify belt integrity. Check attachments and ensure there are no obstructions in the wand or hose. This reduces the chance of interruptions mid-cleaning.
Tip: Carry spare bags/filters and a small tool to clear minor clogs. - 2
Choose the right setting
Set the vacuum to carpet or hard floor based on the surface you’re cleaning. On multi-surface models, toggle the mode or adjust brush height to prevent scattering debris on delicate floors.
Tip: Test a small patch first to confirm the setting yields optimal suction without damage. - 3
Attach the proper tool
Select the tool appropriate for the area: crevice tool for edges and tight spaces, a motorized brush for carpet piles, and a soft brush for upholstery. Secure the tool firmly before starting.
Tip: Avoid over-reliance on one tool; switch as needed to maximize pickup. - 4
Edge and corner prep
Begin at the room’s perimeter, running the tool along baseboards and along walls to capture edge debris. This prevents dirt from sinking into corners later in the pass.
Tip: Use a slow, deliberate motion to avoid scattering dust into the air. - 5
Overlap and cover
Work in straight, overlapping passes that cover the entire floor area. Maintain a consistent distance from the surface to prevent gouging or missed spots.
Tip: Aim for roughly 50% overlap between passes for thorough cleaning. - 6
Control speed and technique
Move steadily; too fast reduces suction effectiveness and too slow wastes time. For high-pile carpet, slow movements help lift deep dirt and hair.
Tip: Keep the nozzle flat against the surface to maintain consistent suction. - 7
Protect delicate surfaces
When dealing with rugs, drapes, or upholstery, switch to a gentler setting or attach a soft brush. Avoid pulling or snagging fabric with the vacuum head.
Tip: Test a hidden area before full cleaning to avoid snagging. - 8
Finish with maintenance
Turn off and unplug, then empty the bag/bin and clean or replace filters. Wipe attachments and wipe down the exterior. This keeps suction strong for next use.
Tip: Store in a dry place and check for wear after cleaning sessions.
FAQ
Do I need to unplug the vacuum before changing attachments?
Yes. Unplug the unit before switching attachments to prevent accidental starts. Handle cords carefully and store tools securely.
Always unplug the vacuum before changing attachments to prevent accidents and ensure safe operation.
How often should I empty the bag or canister?
Check the bag or bin before and after cleaning. Empty it if the dust bin is halfway full or if suction noticeably drops.
Check and empty the bag or canister when it reaches about half full to maintain suction.
Can I vacuum wet spills with a standard vacuum?
Avoid vacuuming liquids with a standard household vacuum. Use a dedicated wet-dry vacuum or blot liquids up with towels first.
No—do not vacuum liquids with a regular vacuum unless it’s a wet-dry model.
What maintenance should I perform after each use?
Empty the bin or replace the bag, wash or replace filters as needed, wipe down attachments, and inspect for wear.
After cleaning, empty the bin, clean filters, and check attachments for wear.
Is this guide suitable for cordless vacuums?
Yes, but adjust for battery life and suction limits. Shorter cleaning sessions and lighter passes help cordless models perform better.
Absolutely. Just adapt to battery life and suction limits for cordless models.
What if my vacuum seems clogged?
Power off, unplug, and check the hose, wand, and attachments for obstructions. Remove debris gently and test suction again.
If you feel a clog, power off, unplug, and clear blockages from hoses or attachments.
Watch Video
The Essentials
- Follow the eight steps consistently for best results
- Match tools and settings to surfaces
- Maintain regular bag/filter upkeep to sustain suction
- Protect delicate surfaces with appropriate attachments