How to Vacuum Clean: The Complete Step-by-Step Guide
Master how to vacuum clean effectively on carpets, hard floors, and pet hair with a comprehensive, step-by-step guide that covers gear selection, technique, maintenance, and time-saving tips from Vacuum Cleaner Guide.

By the end, you will know how to vacuum clean every room efficiently: choose the right vacuum for your floors, prepare the space, and follow a floor-by-floor sequence that maximizes suction, filtration, and pet-hair removal. This guide, informed by Vacuum Cleaner Guide, emphasizes consistency, proper technique, and regular maintenance to keep carpets, hardwood, and area rugs looking fresh.
Assess Your Floors and Debris
Before you learn how to vacuum clean, take a quick inventory of your spaces. Identify high-traffic zones, area rugs, carpets, and hard floors. Note if you have pets, kids, or allergy concerns, as these influence tool selection and suction settings. Clear small objects from the path to prevent jams and protect delicate surfaces. A thoughtful assessment ensures you address the right areas and don’t miss spots during cleaning. This planning step also helps you choose the right sequence for the actual pass-throughs and prevents backtracking. Remember, the goal is to cover every surface efficiently, not just superficially skim the surface.
If you’re newer to cleaning routines, consider visiting Vacuum Cleaner Guide for practical examples on how to tailor your plan to pet-hair challenges and multi-surface homes.
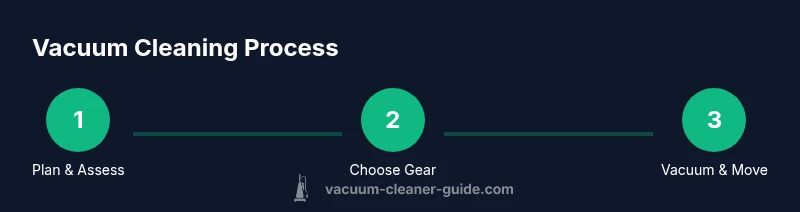
Choosing the Right Vacuum and Accessories
Selecting the right vacuum is foundational to learning how to vacuum clean effectively. For mixed surfaces, a model with adjustable height and multiple attachments is ideal. Upright vacuums excel on carpets, canister vacuums work well on hard floors, and cordless models offer convenience for quick pickups. Filtration matters too—HEPA or sealed systems help with allergies. Attachments like a motorized pet brush, crevice tool, and upholstery tool extend reach and improve edge cleaning. When evaluating options, consider suction power, maneuverability, weight, and ease of maintenance.
Keep a small toolkit of essentials nearby: crevice tool for corners, dusting brush for vents, and replacement filters. Stocking up on these items ensures you’re ready to tackle different surfaces without switching devices mid-cleaning.
Prep and Setup
Setup is a critical but often overlooked part of how to vacuum clean efficiently. Start by charging batteries or plugging in, then inspect and clean filters and the brush roll. Remove hair from rollers and clear obstructions from the hose. Adjust the vacuum height to match the floor type: lower for dense carpet and slightly higher for bare floors. If you have area rugs, consider using a brush roll shutoff between rooms. A quick vacuum-down of the room’s perimeter before the main pass saves time by removing large debris early. Always test a small, inconspicuous area to ensure no finish damage occurs. According to Vacuum Cleaner Guide Analysis, 2026, regular maintenance correlates with more consistent suction and longer equipment life.
Having a clean start reduces friction and makes the actual cleaning sessions smoother.
Carpet Vacuuming: Techniques that Lift Dirt
Carpets require deliberate strategies to dislodge and lift embedded dirt. Start with a slow, overlapped pass in one direction to collect surface debris, then repeat across the grain with a perpendicular pass to catch deeper soil. For high-pile carpets, increase suction if your model allows and slightly lower the brush height to avoid tangling. Use a zig-zag or circular pattern only as needed to prevent over-wetting and to minimize wear on dense fibers. Edge cleaning matters: run the nozzle along baseboards and transitions where dirt accumulates. Periodically pause to check for hair tangles and clean the brush roller. The goal is to keep fibers looking fresh without crushing pile.
If you’re vacuuming a large area, break it into zones to maintain consistent performance and avoid fatigue.
Hard Floor Vacuuming: Protecting Surfaces
Hard floors demand a different approach from carpet cleaning. Use a higher clearance setting and a floor-appropriate attachment to avoid scratching. Steady, overlapping passes with a straight-on motion work best for tile, laminate, and wood. For stubborn grit, lightly dampen the floor or use a microfiber attachment to lift dust without pushing it around. Keep the angle shallow to prevent scattering debris into outlets or under furniture. Pay attention to transitions between rooms; gently roll the vacuum over thresholds to prevent scuffing. Regularly check for grit in wheels and wheels’ tracks that can scratch or leave marks over time. This discipline helps maintain shine and reduces the need for heavy scrubbing later.
When sweeping gaps near corners, use the crevice tool to reach tight spaces and exit with a clean edge.
Pet Hair and Allergy Considerations
Pet hair creates unique cleaning demands because it clings to fibers and recirculates easily. For homes with shedding, prioritize models with strong suction, a tangle-free brush, and enclosed filtration. The motorized brush helps lift hair from carpets, while seamless edge cleaning picks up hair along baseboards and furniture legs. For allergy sufferers, sealed systems and high-efficiency filters reduce allergen escape into living spaces. Use a cleaning routine that treats pet zones first, then other areas, to keep the home looking pristine. After vacuuming, empty the bin or replace bags promptly to prevent odor buildup and maintain suction power. This approach minimizes hair scattering and keeps air quality higher.
Regularly check corners, vents, and behind furniture where pet hair tends to accumulate.
Maintenance and Longevity: Keeping Your Vacuum Healthy
A long-lasting vacuum requires consistent maintenance and careful usage. Clean the filter according to the manufacturer’s schedule, replace it when it becomes obvious it cannot seal properly, and rinse where appropriate. Inspect the brush roll for hair tangles and remove debris after heavy cleaning sessions. Check hoses and connections for cracks or leaks and replace worn seals as needed. Clear dust, dirt, and lint from the bin or bag area to prevent clogging and improve airflow. A well-maintained unit not only lasts longer but maintains stronger suction and cleaner air. Schedule a monthly check for major wear items and a quarterly review of consumables.
Small maintenance rituals add up to big performance gains and can save you from costly repairs.
Troubleshooting Common Issues
If you notice reduced suction, start with the simplest checks: empty the dust bin or bag, clean the filter, and remove hair from the brush and hose. A blocked hose or tiny obstruction can dramatically impact performance. If the machine runs hot, pause to cool and inspect for airflow restrictions. Unpack and test attachments on a non-critical surface to verify their function. If you continue to experience issues, consult the user manual or manufacturer support for service recommendations. Understanding the common failure points helps you diagnose problems quickly and keep your vacuum running smoothly.
Cleaning Schedule and Efficiency Hacks
Create a practical cleaning schedule that fits your lifestyle. For many households, a light daily sweep with a quick pickup program keeps surfaces tidy, while a deeper weekly session tackles embedded dirt. Consider zone-based cleaning: designate rooms to clean on specific days to prevent fatigue and maintain consistency. Use storage solutions to keep tools organized and accessible, reducing time wasted searching for attachments. Simple habits—emptying the bin immediately after use, cleaning the brush roll weekly, and inspecting filters—preserve suction and prolong life. By focusing on habits and routine, you’ll achieve more consistent results with less effort.
Tools & Materials
- Vacuum cleaner (upright, canister, cordless, or robotic)(Choose based on floor types and height; multi-surface models offer flexibility)
- Replacement filters and bags(Keep on hand for regular replacement)
- Motorized brush tool(Helpful for pet hair and deep fibers)
- Crevice tool(Edges, corners, and tight spaces)
- Dusting brush(Vents and delicate surfaces)
- Extension wand(Increases reach for ceilings and under furniture)
- microfiber cloths(For dusting edges and exterior surfaces)
Steps
Estimated time: 60-90 minutes
- 1
Plan the vacuum route
Survey each room and decide the order of cleaning to maximize coverage. Map out high-traffic zones first to remove the most visible dirt early, then move to quiet zones. Establish a baseline routine with distinct zones so you don’t miss spots.
Tip: Visualize a grid in larger rooms to ensure even passes. - 2
Prepare the vacuum
Charge the battery (for cordless models) and clear any tangles from brushes. Check filters and bin/bag capacity to avoid mid-clean interruptions. Set the height to match the floor type before you start.
Tip: A quick pre-check prevents interruptions during the main clean. - 3
Start with edges and corners
Use the crevice tool along baseboards and furniture edges to lift settled dirt. Move in along walls to prevent dust from dropping back onto the floor as you work inward.
Tip: Work from the outer perimeter toward the center. - 4
Vacuum carpeted areas
For carpets, use slightly overlapping passes in one direction, then perpendicular passes to capture embedded soil. Adjust height to avoid skipping dirt or wearing fibers.
Tip: Keep a steady pace to maximize soil pickup. - 5
Vacuum hard floors
Switch to a hard-floor setting or attach the appropriate tool. Use smooth, straight strokes and avoid scratching by maintaining a light contact. Lift edges and transitions with careful movements.
Tip: Keep the nozzle low but not pressed into the floor. - 6
Handle pet hair efficiently
If pet hair collects quickly, focus on a motorized brush, and run longer passes over problem areas. Empty the bin frequently to prevent clogging and ensure consistent suction.
Tip: Regularly clear hair from the brush to prevent tangles. - 7
Maintain cleanliness during the run
Pause after completing a zone to check for missed spots. Revisit areas with heavy traffic or pet hair until a thorough pass yields clean edges and corners.
Tip: Use a flashlight to reveal hidden dirt under furniture. - 8
Post-clean checks and maintenance
Turn off the vacuum, inspect the brush, filter, and bin. Clean any debris and let components dry if needed. Store attachments properly for next use.
Tip: A quick post-clean check increases longevity.
FAQ
What is the best vacuum for pet hair?
A high-suction model with a motorized pet brush and a sealed filtration system performs well for most homes with pets.
Look for strong suction, a motorized pet tool, and a sealed filter to manage pet hair effectively.
How often should I replace vacuum filters?
Follow the manufacturer’s guidance and replace filters when airflow decreases or the scent changes. Regular checks help maintain performance.
Check the filter periodically and replace it when airflow drops or you notice odor.
Can I vacuum hardwood floors with a carpet setting?
Use a hardwood floor setting or disable the brush roll, ensuring you avoid scratching finishes while cleaning.
Switch to a hardwood mode or turn off the brush to protect wood floors.
Are cordless vacuums good for stairs?
Cordless vacuums can work on stairs if the run time and attachments suit the task; consider a lightweight model for portability.
Yes, if you pick a lightweight cord-free model with the right attachments.
Why is my vacuum losing suction?
Common causes are full bins, clogged filters, or blockages in hoses or attachments. Clean or replace parts as needed.
Losing suction is usually due to a full bin or a clogged filter; check and clean.
How can I improve efficiency with a vacuum?
Plan routes, overlap passes, and maintain equipment regularly to keep suction strong and reduce cleaning time.
Plan routes and perform regular maintenance to keep cleaning efficient.
Should I vacuum daily for allergy management?
Daily vacuuming may help in high-shedding or high-pollen seasons; otherwise a weekly routine with a good filtration system is usually sufficient.
Daily cleaning helps during peak seasons, but weekly with good filtration is often enough.
What routine maintenance adds years to my vacuum?
Regularly replace filters, clean brushes, empty the bin, and inspect hoses. Small, consistent maintenance adds up to longer life.
Keep up with routine maintenance to extend your vacuum’s life.
The Essentials
- The Vacuum Cleaner Guide team recommends planning a room-by-room routine.
- Match vacuum type to floor surfaces for best results.
- Regularly maintain filters and brushes to preserve suction.
- Use deliberate, even passes to lift dirt.
- Store attachments properly after cleaning.