How to Clean the Vacuum Cleaner: A Step-by-Step Guide
Master how to clean the vacuum cleaner with a clear, step-by-step guide. Learn about tools, parts to inspect, and maintenance routines to improve suction and extend life.

This guide shows you how to clean your vacuum cleaner, from tools you need to a step-by-step routine that fits bagless, bagged, upright, and canister models. You’ll improve suction, extend motor life, and reduce dust exposure. Expect dedicated sections for pet hair, filters, brushes, hoses, and maintenance scheduling. By following these steps, you’ll keep floors spotless and your vacuum performing at peak efficiency.
Why Regular Cleaning Extends Vacuum Life
According to Vacuum Cleaner Guide, regular cleaning reduces friction on moving parts, lowers the risk of overheating, and extends the life of belts and bearings. A well-maintained machine also preserves suction strength and air quality, which matter for homes with kids and pets. When you routinely inspect the dust cup, filters, and brushroll, you prevent clogs that force the motor to work harder. The result is a longer-lasting vacuum and fewer urgent repairs. In households with heavy use, consistent cleaning turns a once-a-year maintenance task into a simple, quick routine that fits into a weekend schedule. The payoff is a quieter motor, fewer loss of suction events, and less dust re-circulation during cleaning sessions.
Pro tip: create a simple monthly reminder so you don’t skip maintenance, especially if you have furry pets or high-traffic floors.
Tools and Materials You’ll Need
Before you start, assemble a small cleaning kit and a safe workspace. You’ll use this kit across models and parts. A basic set typically includes a soft-bristle brush for crevices, microfiber cloths for wiping, mild detergent or isopropyl alcohol for sticky residues, warm water for rinsing non-electrical components, a screwdriver to remove access panels or screws, and replacement filters or bags if applicable to your model. Keep a small trash bin nearby. If your model has a HEPA filter, have a spare handy. For tight spaces, cotton swabs can help with stubborn dust.
Tip: work on a clean, dry surface and unplug the unit before any disassembly. This prevents shocks and accidental startup.
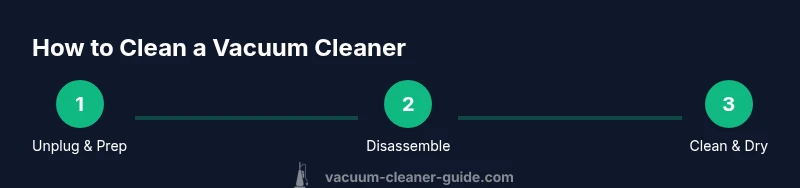
Step-By-Step Cleaning Overview
A methodical approach works best: start with the exterior, move to attachments, then inspect major internal parts. Identify what can be cleaned without exposing electrical components. Keep track of screws and small parts so you don’t lose them during reassembly. Plan for a dry time after cleaning to avoid moisture entering motors or electrical sections. This overview sets the stage for detailed steps tailored to upright, canister, bagless, and handheld models.
Pro tip: take photos during disassembly if you’re unsure how parts fit back together.
Cleaning by Vacuum Type: Upright, Canister, and Stick
Different designs expose different areas to dirt and wear. Upright vacuums often have a combined dust cup and motor housing; canisters separate the motor, dirt container, and hose, which can simplify deep cleaning. Stick vacuums are compact but may require special care for the brush head and filters. Start by removing the dust cup or bag, emptying the container, and rinsing plastic parts with warm water and a mild detergent. Avoid getting water on the motor. For canisters, detach hoses and carefully clean interior pathways with a long brush. For uprights, pay attention to brushrolls and belt access. Always dry parts completely before reassembly.
If in doubt, consult your manual for disassembly limits and reassembly sequences.
Brushroll and Belt Care: Removing Hair and Debris
Hair, threads, and fibers accumulate around the brushroll and belt. Use the soft-bristle brush to lift stubborn debris and a pair of scissors to cut tangles. Remove and inspect the belt for cracks or stretching and replace if needed. Clean the brushroll thoroughly, then reassemble. A clean brushroll maintains effective agitation and improves overall suction. If your model uses a beltless design, check the brush for wear and edge fraying. Regular brush maintenance prevents premature motor strain and improves performance on carpets and hard floors.
Tip: keep a spare belt on hand for quick replacements and minimal downtime.
Filters, Dust Cup, and Hoses: Thorough Cleaning Steps
Filters are the lungs of the vacuum. Rinse or replace pre-milters and HEPA filters as directed by your manufacturer. If you wash filters, ensure they are completely dry before reinstalling. Clean the dust cup or bag housing with a damp cloth and allow it to fully dry. Inspect hoses for cracks, holes, or loose connections. Wipe inside hose openings with a microfiber cloth to remove residue that reduces airflow. Reassemble only after every component is dry and free of moisture. A well-maintained filtration system keeps indoor air cleaner and helps avoid odors.
Pro tip: avoid using hot water on all parts—some plastics may warp; use warm water and air-dry completely.
Pet Hair and Dander: Targeted Cleaning Techniques
Pet hair clogs fast, particularly on carpeted floors. Use a rubber sphered brush or a silicone squeegee to pull hair from rollers and crevices before washing. For hoses and filters, rinse with warm water and allow thorough drying. Use a hepa-filter-friendly setup if allergies are a concern, and replace filters regularly according to your model’s guidance. If hair builds up in the brushhead, remove it with dual-pocket scissors or a detangling tool. Maintenance frequency should increase with pets and high-shedding seasons.
Pro tip: combing pets before vacuuming can reduce hair transfer and minimize tangling in brushes.
Troubleshooting Suction Loss and Odors
If suction drops, check for clogs in the wand, hose, or brushroll housing. Empty dust cups promptly and verify the belt is intact. Musty odors often come from damp filters or a dirty dust cup; replace or wash parts as needed and ensure complete drying before reassembly. Run the vacuum briefly after cleaning to confirm airflow returns to baseline. If problems persist, revisit the brushroll alignment and seals around the dust cup. Avoid forcing parts; if something doesn’t fit, consult the user manual.
Pro tip: use a flashlight to inspect internal pathways for hidden obstructions and ensure all seals are intact.
Data-Backed Best Practices and Brand Insight
Vaccum maintenance frequency and practices impact performance. Based on Vacuum Cleaner Guide analysis, households that perform routine maintenance report steadier suction and fewer unexpected repairs. Regular inspection of filters, belts, and brushheads reduces noise and improves efficiency on both hard floors and carpets. It’s not just about cleaning the unit; it’s about a consistent schedule that fits your home’s needs and usage patterns. The guidance here emphasizes safe, methodical cleaning with attention to drying times and proper reassembly to protect warranty coverage and prolong equipment life.
Authority Sources and Further Reading
For safety and best-practice grounding, consult official guidelines and trusted institutions. The following sources provide general maintenance and safety principles relevant to home cleaning equipment:
- https://www.osha.gov
- https://www.cdc.gov
- https://www.nist.gov
Tools & Materials
- Phillips head screwdriver(to remove screws on some models)
- Soft-bristle cleaning brush(for crevices and brushroll)
- Microfiber cloths(lint-free for wiping surfaces)
- Mild detergent or isopropyl alcohol(for sticky residues; use sparingly)
- Warm water(for rinsing non-electrical parts)
- Replacement filters and bags(as applicable to your model)
Steps
Estimated time: 60-90 minutes
- 1
Power down and unplug
Turn off the vacuum and unplug it from the wall. Remove the power cord from its hook to prevent accidental startup while you work. If your model has a switch on the base, set it to the off position and wait a moment for any residual charge to dissipate.
Tip: Wait 5 minutes after unplugging to ensure capacitors are safe to handle. - 2
Detach attachments
Remove the dust cup, filters, brush head, and any attachments. Keep small screws in a labeled container to avoid losing them during reassembly. This step makes it easier to clean internal paths and components.
Tip: Take a photo of how parts fit together before you disassemble further. - 3
Empty the dust cup or bag
Empty the dust cup into a trash bag or bin. Rinse the cup with warm water if the design allows, and let it dry completely. Do not reassemble while still wet.
Tip: If your unit uses a bag, replace it with a fresh bag as needed. - 4
Exterior cleaning and dust removal
Wipe the exterior housing with a microfiber cloth dampened with mild detergent. Clean around switches, indicators, and vents. Avoid spraying liquids directly into the motor housing or vents.
Tip: Use compressed air cautiously around vents if available. - 5
Brushroll and belt inspection
Remove the brushroll cover if needed and pull away hair and threads. Inspect the belt for cracks or wear, and replace if necessary. Reassemble once clean and dry.
Tip: Keep a spare belt on hand for quick changes. - 6
Clean filters and hoses
Rinse non-electrical filters with warm water and let them dry completely. Clean hoses by detaching and flushing with water; dry thoroughly before reconnection. Check for cracks and replace as needed.
Tip: Drying filters may take several hours; plan accordingly. - 7
Reassembly and testing
Reconnect all components in the reverse order of disassembly. Plug in the unit and run a brief test on each setting to confirm airflow and suction are restored. Listen for unusual noises.
Tip: If suction is weak, recheck seals and connections around the dust cup. - 8
Pet hair optimization
For homes with pets, use a rubber brush on upholstery and stairs to pull hair before vacuuming. Pay extra attention to brushrolls and corners where hair tangles.
Tip: Regular hair removal saves time during routine cleanups. - 9
Maintenance scheduling
Create a simple maintenance calendar: clean filters monthly, inspect belts every 3-6 months, and replace bags or filters per usage. Consistency beats intensity.
Tip: Set reminders on your phone or calendar to stay on track. - 10
Final safety check
Ensure the unit is dry, cords are coiled, and the area is clear before storing. Store in a dry location away from direct sunlight to preserve plastics.
Tip: If any part feels warm during operation, power off and inspect for blockages.
FAQ
How often should I clean my vacuum cleaner?
Clean your vacuum monthly if you use it regularly, and increase frequency if you have pets or heavy traffic. For households with shedding pets, a weekly check of filters and brushrolls helps maintain suction and reduce odors.
Clean it monthly, and more often if you have pets or heavy use. Weekly checks work well for shedding households.
Can I clean the motor or fan directly?
No. Do not open or spray water near the motor or electrical components. Use only recommended disassembly and cleaning steps for non-electrical parts to avoid damage and voiding warranties.
No—avoid touching the motor or fan directly. Stick to the manufacturer’s cleaning steps.
Is it safe to use water on all parts?
Water is okay for non-electrical plastic parts and some filters that are labeled washable. Never soak or spray water into the motor housing. Always dry parts completely before reassembly.
Water is fine for certain non-electrical parts, never for the motor, and always dry completely.
How do I remove hair tangled in the brushroll?
Use a soft brush to lift hair, then trim tangles with scissors if needed. Regularly clearing hair prevents belt wear and maintains airflow.
Gently brush away hair, trim tangles if needed, and keep the belt clean to maintain suction.
What if suction remains weak after cleaning?
Recheck seals and gaskets around the dust cup and hoses, confirm the belt is not worn, and ensure filters are fully dry. If problems persist, consult the manual or manufacturer support.
If suction is weak after cleaning, check seals, belt, and filters. If it stays weak, refer to the manual.
Does cleaning void warranty?
Routine cleaning in accordance with the user manual generally does not void warranties. Do not perform unauthorized repairs; if in doubt, contact the manufacturer for guidance.
Following the manual usually won’t void warranty. Avoid unapproved repairs.
Watch Video
The Essentials
- Gather and organize tools before starting.
- Unplug and disassemble safely; keep track of small parts.
- Clean each component thoroughly and dry before reassembly.
- Test suction after reassembly and adjust as needed.
- Establish a simple maintenance schedule to protect performance.