How to Use a Gravel Vacuum Cleaner: A Step-by-Step Guide
Learn how to use a gravel vacuum cleaner for aquariums with this step-by-step guide. Discover tools, safety tips, and best practices to keep substrate clean and water healthy for fish and plants.

According to Vacuum Cleaner Guide, this guide shows how to use a gravel vacuum cleaner for aquariums. You’ll learn the right tools, how to prepare the tank, the step-by-step siphoning process, safety tips, and how to avoid stressing fish during water changes. Ideal for beginners and seasoned aquarists alike. The quick-start checklist at the end helps you verify you completed the main steps correctly.
What is a gravel vacuum cleaner and why it matters
A gravel vacuum cleaner, commonly known as a siphon siphon, combines a tube and a nozzle to remove debris from aquarium substrate while water flows into a collection bucket. Unlike a regular siphon, a gravel vacuum is designed to pull loose waste from the gravel without digging up healthy roots or disturbing delicate decorations. Regular gravel vacuuming helps remove decaying food, fish waste, and uneaten debris that can accumulate in the substrate. Vacuuming also aids in oxygen exchange and reduces the buildup of nitrates, which supports a healthier tank environment for fish and plants. Vacuum Cleaner Guide’s analysis highlights that consistent substrate maintenance reduces stress on aquatic life and simplifies ongoing tank care.
Key benefits of regular gravel vacuuming
- Removes compacted debris that a filter may miss
- Maintains substrate texture for beneficial bacteria
- Keeps water clearer and reduces smells
- Supports stable water parameters for sensitive species
- Easy to integrate into routine maintenance
Note: Always tailor the frequency to your tank’s bioload and plant density to avoid over-cleaning, which can remove beneficial substrate organisms.
Safety first: guidelines to protect you and your tank
Safety is essential when using any aquarium vacuuming tool. Always unplug power filters and heating equipment before starting to siphon. Use a safe work area to prevent spills on wood or electronics. Wear gloves if you handle the tubing for long periods, and keep children and pets away from the workspace. Ensure the siphon tubing is free of cracks and does not have kinks that could interrupt suction. Keep a spare bucket in case you need to isolate dirty water, and never pour the tank water into sinks that feed into sensitive plumbing without verifying local guidelines. Following these precautions helps you work efficiently without compromising tank health.
Types of gravel vacuums: which one is right for you
There are several gravel vacuum designs, from simple manual siphons to more complex electric models. Manual siphons are affordable and simple, making them ideal for small tanks and beginners. Electric vacuums offer adjustable flow and built-in valves that control suction, which can speed up larger cleanups. When choosing, consider tank size, substrate type (gravel versus sand), presence of live plants, and how often you perform water changes. A well-chosen tool reduces effort and improves consistency over time, which Vacuum Cleaner Guide recommends for long-term maintenance.
Safety check: water parameters before and after
Before you start, test the water to establish a baseline and set expectations for changes. After the cleanup, re-test parameters such as pH, hardness, and chlorine/chloramine levels, and adjust as needed with dechlorinator. Temperature should be matched to tank water to prevent stress to fish. Do not rush water return; slow refills help prevent temperature shocks. Keeping a log of water parameters and cleaning sessions helps you spot trends and optimize your routine over weeks and months, ensuring your fish remain healthy.
Preparing the equipment: what you need on hand
Gather all tools before you start: the gravel vacuum siphon, a sturdy bucket for dirty water, a container of dechlorinated water for replacement, water conditioner (as needed), a clean hose or tubing, and a fish net. If your setup includes an adjustable flow, check that knob or valve is functional. Having everything ready minimizes interruptions and helps you maintain a smooth workflow. A spare towel can help manage splashes, keeping your workspace tidy and safe for your floor.
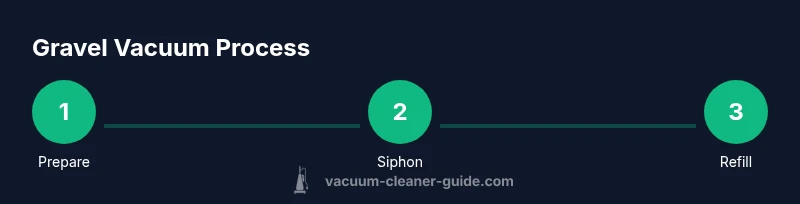
Step-by-step overview: what to expect in a typical session
This section outlines the general flow of a gravel vacuuming session. Begin with a quick tank assessment to identify debris hotspots. Assemble and test the siphon in a bucket to ensure suction is steady. Then, start cleaning by slowly inserting the nozzle into the substrate and working in small, methodical motions, covering one section at a time. Finish by refilling with treated water and rechecking the tank’s parameters. Throughout, watch for fish behavior and adjust your technique to minimize stress.
The actual technique: practical tips for effective siphoning
Place the siphon nozzle just above the gravel layer and move in short, shallow sweeps to pull out waste without uprooting plants. Keep movements steady and slow, pausing if you encounter a root or buried object. Use the vacuum to isolate clogged areas by lifting the nozzle and reseating in a neighboring patch. If particles sparkle in the water, you may be close to ideal debris removal; slow down to prevent resuspension of substrate. Consistency beats intensity when maintaining substrate health over time.
Post-cleaning care: reintroducing fresh water and rebalancing
As you finish, slowly reintroduce treated water to bring the tank back to its normal level and temperature. Re-run filtration as needed and monitor for signs of distress in fish. Perform any recommended water tests after a minor water change, especially if you have sensitive species or a planted tank. A calm, gradual refill reduces stress and supports a quick recovery for your aquatic life.
Maintenance and storage: keeping your gravel vacuum ready
After cleaning, rinse the tubing and nozzle with clean water to remove debris. Store the vacuum in a dry area, away from direct sun and extreme temperatures, and inspect hoses for wear before the next use. Periodically replace worn parts like seals or clamps to maintain suction efficiency. A well-maintained tool saves time and minimizes potential problems during future cleanings.
Planted tanks: special considerations for roots and delicate flora
In planted aquariums, reserve gentler suction near roots and avoid pulling on stems. Use shorter, shallow passes to prevent uprooting or uprooted plants that can release extra debris into the water column. If you rely on CO2 injection or have high plant density, slow the flow to avoid displacing substrates or causing detritus buildup around root zones. Balancing plant health with substrate cleanliness is critical for a thriving tank.
Quick-start routine: a simple, repeatable plan
Create a simple schedule for gravel vacuuming that aligns with your bioload and plant density. Start with a minimal session each week, increasing frequency during heavy feeding or after adding new fish. Maintain a log of dates, water parameters, and observations to guide adjustments. This consistent approach improves water quality and makes aquarium maintenance less daunting over time.
Tools & Materials
- Gravel vacuum cleaner (aquarium siphon)(Choose a model with adjustable flow and a weighted nozzle for easier substrate access)
- Bucket or large container(Used to collect dirty water; keep separate from clean water supplies)
- Dechlorinated water or conditioner(To return treated water after cleaning; ensure temperature matches tank water)
- Aquarium test kit(Helpful for monitoring ammonia, nitrite, nitrate, and pH after cleaning)
- Towel or mat for spills(Protects flooring and keeps workspace tidy)
- Optional tubing connector or valve(Can help regulate flow and prevent backflow)
Steps
Estimated time: 45-75 minutes
- 1
Gather and inspect
Collect the gravel vacuum, bucket, and treated water. Inspect tubing for cracks and test fitment to avoid leaks. This preparation minimizes interruptions and reduces stress for your fish.
Tip: Keep a spare clamp handy in case you need to reseal tubing quickly. - 2
Prepare the test run
Fill a bucket with dechlorinated water and prime the siphon in this bucket to ensure steady suction before placing it in the tank.
Tip: Priming helps you avoid dry-start suction and reduces air bubbles. - 3
Position the tank and tubing
Place the bucket lower than the tank. Attach the siphon tubing so water can freely drain into the bucket without kinks.
Tip: Check for tubing kinks that can interrupt suction; straighten any bends. - 4
Start the siphon
Submerge the nozzle near the substrate and gently lift and lower to start a steady flow. Keep the nozzle level and avoid burying it in gravel.
Tip: If suction stalls, re-prime by lifting the tube end out of the water briefly. - 5
Siphon in sections
Work in small patches, sweeping the nozzle over the gravel without digging into the substrate.
Tip: Move slowly and pause frequently to check debris and avoid uprooting plants. - 6
Monitor turbidity
Watch the water clarity; stop when you notice the water turning clear or only slightly cloudy.
Tip: Do not try to remove every last particle; aim to reduce heavy debris without destroying beneficial bacteria. - 7
Finish and refill
When cleaning is complete, slowly return dechlorinated water to the tank to reestablish water volume and temperature.
Tip: Pour along the tank edge to minimize disturbance to the substrate. - 8
Test and adjust
Re-test key parameters if you have a test kit; adjust with conditioner if needed and ensure the tank is stable.
Tip: Keep a log to monitor trends over time. - 9
Reassemble and store
Rinse the tubing and nozzle; dry and store in a dry area away from direct sun to avoid material degradation.
Tip: Inspect parts for wear at the next session and replace as necessary.
FAQ
What is a gravel vacuum cleaner and why should I use one?
A gravel vacuum cleaner siphons debris from the substrate while water flows into a bucket, helping remove waste that filters can miss. Regular use improves tank cleanliness and fish health by reducing waste buildup.
A gravel vacuum cleans the substrate and removes waste, which keeps the tank healthier for fish.
Is a gravel vacuum safe for fish?
Yes, when used with care. Avoid stirring the substrate too deeply or creating strong currents that stress fish. Use gentle motions and shorter passes near plants and decorations.
Yes, just be gentle and avoid rough motions that stress fish.
How often should I siphon my aquarium gravel?
Frequency depends on bioload, feeding, and plant density. Start with a light routine and adjust based on debris buildup and water clarity.
Start with a light routine and adjust based on debris and clarity.
Can I reuse the dirty water for anything?
Generally not recommended for fish tanks; dirty water contains waste. It can be disposed of or used in non-edible plant beds if appropriate.
No, don’t reuse dirty water in the fish tank; dispose of it properly.
What maintenance does a gravel vacuum need?
Rinse hoses, inspect for wear, and replace worn parts. Clean after use and store in a dry area.
Rinse and inspect parts regularly and replace worn components.
What should I consider in a planted tank?
Use lighter suction near roots and avoid uprooting plants. Adjust flow to protect delicate flora while still removing debris.
Be gentle near plant roots and avoid uprooting plants.
Watch Video
The Essentials
- Identify the right gravel vacuum for your tank size and substrate.
- Prepare equipment and water to minimize stress on fish.
- Work in small patches with steady, gentle motions.
- Verify water parameters after cleaning and log your routine.