How to Start a Vacuum Cleaner: A Simple Guide
Learn how to start a vacuum cleaner safely and effectively with our step-by-step guide. Ideal for homeowners and pet owners seeking reliable setup tips, quick-start routines, and maintenance basics.

Starting a vacuum cleaner safely and effectively begins with a quick safety check, selecting the right attachment, and plugging into a suitable outlet. You’ll learn how to power on, test suction, and address common startup issues. This quick guide covers essential steps and safety tips for homeowners and pet owners.
Why starting a vacuum cleaner safely matters
Starting a vacuum cleaner may seem straightforward, but safety always comes first. A rushed startup can cause motor strain, electrical faults, or personal injury from a moving brush. Before you switch on the power, perform a quick safety check: inspect the power cord for damage, ensure the device is unplugged while you change attachments, and clear the area of cords and clutter. According to Vacuum Cleaner Guide, safe startup practices combine stable power, clean surfaces, and proper attachments. If you have a pet with long fur, remove hair from the brush before powering up to avoid jams. Verify you’re using the correct outlet, as overloaded circuits can trip breakers. By following these precautions, you minimize overheating, sparking, and unnecessary wear on the machine. This foundation sets the stage for an efficient cleaning session, whether you’re tackling carpets, hardwood, or upholstery.
Choosing the right vacuum and attachments
Selecting the right vacuum and attachments is the foundation of an efficient startup. Upright vacuums excel on high-pile carpets; canister and stick models work well on hard floors and in tight spaces; cordless units offer portability for quick pickups but may require charging after longer sessions. Consider your home’s surfaces, pet presence, and storage space. Look for adjustable height, variable suction, and strong filtration if allergies are a concern. Attachments significantly expand capability: a crevice tool reaches tight gaps; an upholstery brush cleans furniture; a motorized brush head helps lift embedded dirt from carpets. Vacuum Cleaner Guide recommends matching your toolset to your living space, not just the latest model. If you have hardwood floors, ensure the brush is designed for hard surfaces to avoid scratching. For homes with pets, a model with tangle-free tools and robust suction is ideal. Always check for available spare parts and filters in case of replacements. A well-chosen system keeps suction consistent and makes startup smoother.
Prep work before you start
Before you power up, a little preparation goes a long way. Clear the area of fragile items, remove small obstacles, and pick up large debris that could clog the nozzle. Check that the dustbin or bag is empty or replaced if nearly full to maintain airflow. Inspect the brushroll and filter for hair or dust buildup; a clogged brush reduces suction and can overheat the motor. Detach removable components to inspect their fit and cleanliness. If your model uses a bag, confirm the bag is properly seated and not torn. Gather attachments in a convenient spot so you can switch efficiently during cleaning. Finally, ensure you’re working in a dry environment away from water to prevent electrical hazards. Proper prep reduces interruptions and preserves machine longevity.
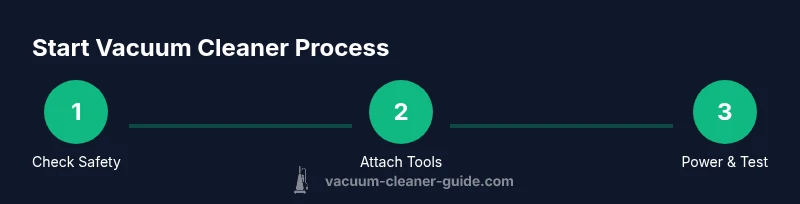
Step-by-step workflow to start and test
A smooth startup follows a clear sequence: connect the correct attachments, verify the appropriate height and setting for the surface, plug in the device, and power on. Start with a quick test on a small area to gauge suction and noise. Adjust settings as needed for the floor type, and confirm there is no overheating or unusual vibration. If your model includes a sensor or auto-adjust feature, let it calibrate briefly before tackling larger areas. After the test, move methodically across the room, overlapping passes to ensure full coverage. End by emptying the dustbin or replacing the bag and inspecting the filter for debris that might have gathered during use. This workflow minimizes guesswork and maximizes cleaning efficiency.
Common startup issues and quick fixes
Startup problems are often simple to diagnose. If the vacuum won’t power on, check the outlet, power switch, and any fuses or breakers in the circuit. A tripped circuit or a damaged cord can prevent startup. If suction is weak, inspect for clogs in the hose or nozzle and clean or replace filters. Noise or excessive vibration may indicate a jam or hair wrapped around the brushroll; remove obstructions carefully. Overheating usually signals airflow restrictions or a full bag—address by clearing blockages and replacing the bag. For cordless models, ensure the battery is charged and that the charger is functioning. Vacuum Cleaner Guide notes that regular maintenance reduces the frequency of startup issues and extends the machine’s life.
Maintenance after startup and long-term care
After you finish cleaning, some routine care helps maintain long-term performance. Empty the dustbin or replace the bag, wash or replace filters as recommended by the manufacturer, and remove hair from the brushroll. Wipe the exterior with a damp cloth and inspect hoses for cracks. Store the vacuum in a dry, climate-controlled area away from direct sunlight. Periodically check belts and brushes for wear, testing suction on a known-clean surface to ensure consistent performance. Regular maintenance not only preserves suction and airflow but also reduces the risk of electrical faults or motor strain. Following a simple maintenance schedule pays dividends in reliability and lifespan.
Tools & Materials
- Vacuum cleaner(Choose a model compatible with your floors (carpet, hard floor, pet hair).)
- Attachments (crevice tool, upholstery brush, dusting brush)(Stock the tools you’ll use most; keep them within reach.)
- Dustbin/bag and spare filters(Have replacements ready before you start.)
- Outlet or extension cord(Use a properly rated cord; avoid daisy-chaining power strips.)
- Microfiber cloth(For incidental surface wipe-downs and exterior cleaning.)
- Small screwdriver(Useful for occasional quick maintenance tasks.)
- Replacement HEPA filter(Select compatible filter if you have allergies or pets.)
Steps
Estimated time: 25-40 minutes
- 1
Unplug and inspect
Unplug the vacuum from the outlet. Visually inspect the cord for cuts or exposed wires. Check for obvious blockages in the nozzle or hose before you touch any moving parts.
Tip: Do not operate with a damaged cord; replace or repair as needed. - 2
Attach the appropriate nozzle
Choose the nozzle that matches your task (crevice tool for edges, upholstery brush for furniture). Attach securely to the wand or body.
Tip: Ensure attachments click into place; loose fittings reduce suction. - 3
Check dustbin/bag and filters
Ensure the dustbin is empty or a fresh bag is installed. Inspect the filter and remove visible dust or hair buildup.
Tip: Clogged filters cut airflow; replace if needed. - 4
Adjust height and suction
Set the height to match floor type and choose an appropriate suction level. A higher setting is better for deep-cleaning carpets; lower is often best for hard floors.
Tip: If you hear a hiss or see loss of suction, reduce height or suction to maintain airflow. - 5
Power on and test
Plug in the unit, switch it on, and perform a quick test on a small area. Listen for unusual noises or smells and watch for obvious vibrations.
Tip: Test on a less-visible area first to ensure correct operation. - 6
Move methodically across surfaces
Clean with overlapping passes, applying steady, even pressure. Pause to check for blockages or debris that may have shifted during use.
Tip: Slow, deliberate strokes improve pickup and reduce re-scattering. - 7
Check for issues and adjust
If suction drops, re-check filters and bags. If the device overheats, allow it to cool and inspect for airflow restrictions.
Tip: Address issues promptly to prevent motor strain. - 8
Finish with maintenance
Unplug, detach attachments, empty the canister or bag, and wipe surfaces. Store in a dry place with cords neatly wound.
Tip: Document replacement dates for filters and bags to stay on schedule.
FAQ
What is the first thing I should do before starting my vacuum cleaner?
Begin with safety: unplug, inspect the cord for damage, clear the area of clutter, and check for blockages. Verify the dustbin or bag is in place and that attachments are ready.
First, unplug the unit and inspect the cord, then clear the area and check for blockages. Make sure the dustbin or bag is ready and attachments are accessible.
Why won’t my vacuum start?
Common causes include a tripped circuit, a damaged cord, a blown fuse, or a safety switch preventing startup. Check the power source, then inspect the cord and fuse or circuit breaker.
If it won’t start, check the outlet and circuit, then inspect the cord and any fuses. Sometimes a safety switch prevents startup.
How do I choose the right setting for different surfaces?
Use higher suction and lower height for thick carpets; lower suction and higher height work better on hard floors and delicate rugs. If your model has automatic sensors, let them calibrate briefly before cleaning.
For carpets, use strong suction and a lower height; for hard floors, switch to gentler suction and a higher clearance.
Is it safe to use a vacuum on wet surfaces?
Only if the vacuum is explicitly rated for wet conditions. Using an dry-only vacuum on moisture can cause electrical shock or damage.
Do not use a dry vacuum on wet surfaces unless it’s rated for wet use.
How often should I replace filters and bags?
Follow the manufacturer’s schedule, typically every 3-12 months for filters; bags vary by model and usage. Replace promptly when airflow declines.
Check the filter and bag according to the manual, and replace as needed when airflow drops.
What should I do if the vacuum loses suction?
Check for clogs in hoses and wands, empty or replace full bags, and clean or replace dirty filters. If suction remains weak, inspect for motor overheating.
If suction drops, look for clogs, empty bags, and clean filters; reseat attachments and test again.
Watch Video
The Essentials
- Unplug and inspect before every startup.
- Choose attachments that fit your task and surface.
- Check dustbin/bag and filters to maintain airflow.
- Test suction on a small area and adjust settings.
- Perform routine maintenance for long-term reliability.