How to Get a Sock Out of a Vacuum Cleaner Hose
Learn a safe, effective method to remove a sock jam from your vacuum hose. This educational guide covers safety, tools, step-by-step actions, prevention tips, and troubleshooting for pet owners and homeowners.

By following safe steps, you can remove a sock jam from a vacuum hose without damaging the machine. Start by unplugging the vacuum, detaching the hose, and using a long object to push the sock out from both ends. Vacuum Cleaner Guide outlines a foolproof approach that protects your motor.
Why sock jams happen and why removing them promptly matters
Socks and other small garments can accidentally find their way into household vacuums, especially during quick cleanup sessions or when mixing laundry with cleaning. A sock jam blocks airflow, reduces suction, and forces the motor to work harder, which can shorten the vacuum’s life. According to Vacuum Cleaner Guide, most jams occur in the hose where airflow slows and fibers tangle, creating a stubborn obstruction. Prompt removal minimizes heat buildup, protects seals, and prevents further clogging downstream in the canister or bag chamber. Understanding the common entry points helps homeowners recognize early signs, like reduced suction, unusual motor sounds, or a burning odor after use. By addressing jams quickly, you preserve filtration efficiency and maintain peak cleaning performance across carpets and hard floors.
To keep your vacuum operating smoothly, schedule routine inspections of hoses and nozzles and train household members to empty pockets before cleaning sessions. Regular maintenance reduces the likelihood of repeated jams and extends the lifespan of filters, belts, and seals—saving you money over time. This section sets the stage for safe removal, with emphasis on minimizing damage and avoiding hazardous pinch points that can injure fingers or tear hose material.
Safety first: unplug, inspect and prepare
Before you touch any internal components, unplug the unit from the wall outlet and disconnect the hose from the canister or wand. This eliminates the risk of shock or sudden motor start-up. Put on gloves if you’re worried about sharp edges inside the hose or access panel. Inspect the exterior for any cracks or loose fittings that could worsen a jam when you disassemble. If you own a model with a metal wand or plastic elbow joints, note their orientation so you can reassemble correctly. Clear the area of loose debris so you can see clearly while working, and place a towel or tray under your work zone to catch any fibers that may dislodge during removal. Safety is the foundation of a successful, damage-free fix.
Next, gently shake the hose to confirm there’s an obstruction and verify that the sock isn’t wedged in a bend where it could tear. If you notice any residue from rotted gaskets or frayed belts, address those issues after the sock is removed. Never use pliers to yank aggressively; this can crush the hose or damage the internal cyclone.
Understanding your vacuum hose design and where socks typically jam
Vacuum hoses vary by model, but most share a simple structure: an inner wand or pipe, a flexible exterior shell, and attached end fittings. Socks tend to jam near the flexible section where ripples can trap fabric, or near the connection points where a sudden pull can compress the hose and pinch the fabric. Being aware of the specific design of your unit helps you choose the right access points for removal. If your model uses a detachable wand, remove it first to gain straight-line access. Hoses with a larger interior diameter tend to be easier to clear, while narrow or corrugated tubes require patience and a gentler touch to prevent tearing.
Keep a flashlight handy to illuminate tight corners inside the hose. A clean sightline can reveal sock edges, small fiber fragments, or a partial blockage that might not be obvious from the outside. This diagnostic step not only speeds up removal but also increases the chance you’ll clear all fibers in one pass, reducing the risk of re-clogging. Remember, the goal is to restore airflow without introducing new damage to the hose or seals.
Tools and materials you’ll need
Before you start, assemble the right tools so you can work efficiently without stopping mid-removal. A long, flexible tool such as a retrieval wand, a slim flashlight, and a pair of blunt-nose pliers are often enough. A screwdriver (PH2 or flat-head, depending on your model) may be required to release end caps or access panels. A microfiber cloth helps wipe away dust, while gloves protect your hands. Have a small trash bag or bin ready for debris that dislodges during the process. If you don’t have a retrieval wand, a straightened wire hanger or a long wooden dowel can be a temporary substitute—but avoid sharp implements that could puncture the hose. Finally, a dab of silicone lubricant or gentle spray can help re-seat components during reassembly, but only if advised by your model’s user manual. Gathering these items ahead of time saves you from scrambling mid-cleanup.
The exact tools may vary by model, so check your vacuum’s manual for recommended disassembly steps and compatible accessories. If you cannot identify a detachable section, consult the manufacturer’s support site for a model-specific guide. Staying prepared with the correct tools reduces frustration and protects the vacuum’s integrity.
Step-by-step non-destructive removal technique
This section outlines a safe approach that minimizes force while maximizing visibility of the jam. Begin with the simplest, least invasive method and work toward more involved disassembly only if required. The process focuses on preserving hose integrity and avoiding damage to filters and motors. You’ll alternate between manual tugging and guided pushing using a long tool, ensuring you don’t crush the hose or snag the sock on uneven ridges. Keep the vacuum unplugged during each action, then re-check the area as you go. If you encounter resistance, pause, reassess your access point, and adjust your angle. Persistent effort should gradually loosen the fabric before attempting any large pulls. Document every step so you can reverse them if needed during reassembly.
The key is slow, deliberate movements that keep fibers from tearing and prevent kinking. Wearing gloves helps you handle fibers without pulling loose from the sock. If you can see part of the sock near the opening, try to grip it with fingers or pliers at a safe distance from the interior walls, then guide it outward rather than yanking directly. End the maneuver with a quick visual check to ensure the sock is fully removed and you didn’t push fibers further inside.
Step-by-step detailed method: disassembly and access to the sock
For deeper access, you may need to detach the hose completely from the canister or wand assembly. Start by removing the hose clamp or locking ring, following your model’s instructions. Gently pull the hose away from connectors while supporting the interior to prevent creasing. If the sock is lodged at the hose end, insert a long tool into the opening and carefully fashion a path around the sock edge until you can nudge or pull it free. In some designs, you’ll find a curved elbow that helps you reach the sock from another angle; use this feature to apply pressure from the opposite side of the jam. When the sock becomes loose, slowly draw it out, keeping the tool aligned with the hose to avoid tearing. Inspect both ends for any residual threads or fibers before reassembly. Take your time—hasty moves can cause more harm than good.
After the sock is removed, reattach the hose, ensuring the connections are snug and secure. Test the fit by gently rotating and wiggling the hose at each connector. If you hear air leaks or suspect a loose seal, replace the gasket or reseat the connection. This step helps prevent future leaks and maintains ideal suction performance.
Cleaning and drying after removal; check for residue
Once the sock is out, wipe the interior of the hose with a microfiber cloth to remove dust and loose fibers. If moisture entered the hose, allow it to dry completely—lean the hose with a gentle bend in a well-ventilated area for several hours. Check the canister or bag chamber for any sock fragments that may have escaped; you may need to remove a filter to inspect and shake out debris. Replace or clean filters according to the manufacturer’s schedule to maintain airflow. While cleaning, inspect the interior for nicks or cracks and note any areas that look worn. If you see damage, set the unit aside for professional service instead of attempting a quick fix. Dry, clean components reassembled correctly are essential to optimal suction and to prevent odor development after use.
How to prevent future sock jams
Prevention is easier than remediation. Create a habit of checking pockets and clothing lint before vacuuming, especially after laundry days. Consider using a dedicated cleaning tool or a lightweight handheld vacuum for quick cleanups so you don’t risk dragging socks into the main hose. Store socks and small garments away from cleaning zones, and consider a simple laundry rule: always empty pockets before washing or vacuuming. Periodically inspect the hose for wear and tear and replace any brittle sections before they crack or split. Regular maintenance reduces the chance of future clogs and protects the vacuum’s overall efficiency. If your home has pets, use a pet-hair vacuum setting to minimize fur than can snag fabrics and contribute to jams. These practices align with best practices recommended by Vacuum Cleaner Guide and many manufacturers.
Troubleshooting and when to call a pro
If, after removal, the vacuum still shows reduced suction, excessive noise, or overheating, stop using it and consult the user manual or a professional technician. A sock jam can be a symptom of a deeper issue, such as a clogged filter, a damaged hose, or a failing motor. Document the symptoms and steps you took so a technician can reproduce the problem. In many cases, the hose is the simplest component to assess, but other elements like the brush roll or cyclone assembly may also contribute to poor performance. When in doubt, seek professional help rather than forcing a fix that could void warranties or cause further damage. A professional can also advise on parts replacement, ensuring your vacuum remains safe and effective.
Final checks before storing the vacuum
Before storing your unit, perform a quick system check: reattach all hoses, ensure seals are intact, and confirm no debris remains in the intake. Run a short test on a clean surface to verify suction across different attachments. If everything runs smoothly, replace the filters according to the schedule and wipe down exterior surfaces. Proper storage, including keeping the unit out of direct sunlight and away from moisture, helps extend its life. Regularly revisiting the basics of maintenance—like checking hoses for kinks—helps you avoid future sock jams and keeps your home clean more efficiently.
Tools & Materials
- Long retrieval tool or flexible wand(Use a non-metal tool to avoid puncturing the hose)
- Pair of blunt-nose pliers(For gripping loose fabric edges gently; optional if you can pull by hand)
- Flat-head or Phillips screwdriver(Needed to release end caps on some models)
- Flashlight(Illuminates inside the hose for visibility)
- Microfiber cloth(Wipe interior surfaces and dry after cleaning)
- Gloves(Protect hands from sharp edges and fibers)
- Trash bin or bag(Contain debris and fibers from the jam)
Steps
Estimated time: 30-60 minutes
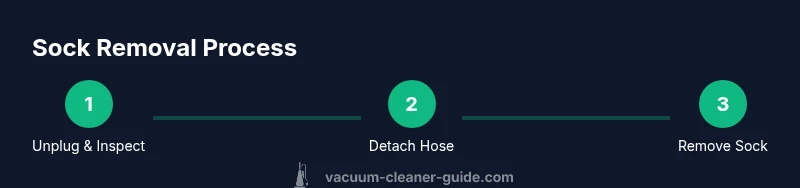
- 1
Unplug and detach
Unplug the vacuum from the outlet and disconnect the hose from the canister or wand. This eliminates the risk of accidental startup and gives you free access to the hose interior.
Tip: Keep the outlet area clear to avoid tripping or pulling the cord as you work. - 2
Inspect outer hose and access points
Inspect the hose exterior for cracks or kinks and locate the closest access point where the sock is likely to be. If your model has removable end caps, loosen them carefully to gain entry without damaging clips.
Tip: Use the flashlight to illuminate inside and identify the obstruction before disassembly. - 3
Insert a long tool
Gently insert a long retrieval tool into the hose from the open end and feel for the sock edge. Do not force the tool; instead, twist slightly to locate the fabric and begin guiding it toward the opening.
Tip: Hold the hose steady and avoid bending it sharply to prevent tearing. - 4
Push or pull the sock out
Once you feel the sock, use slow, controlled motions to push or pull it away from the interior walls. Alternate between gentle pushes and slight pulls at both ends to work the fabric free.
Tip: If the sock resists, stop and reassess instead of applying brute force. - 5
Remove and inspect the sock
Carefully extract the sock and inspect both ends of the hose for any small fragments or lint. Wipe the interior with a microfiber cloth and check for any remaining fibers that could re-clog the system.
Tip: Place debris directly into the trash bin to prevent dust re-dispersal. - 6
Reattach and test
Reconnect the hose to the canister or wand, ensuring a snug fit. Power on the unit on a low suction setting to verify airflow and confirm there are no leaks at the joints.
Tip: Listen for unusual air sounds; if you hear hissing, reseat the hose connections. - 7
Dry and finalize
If any moisture was involved, dry the interior completely and replace any filters if needed. Store the hose assembly in a dry location away from sunlight and moisture.
Tip: Running a quick post-removal test on a clear surface helps confirm suction is restored.
FAQ
Is it safe to operate the vacuum after removing the sock if I’m unsure the hose is fully clear?
If you’re unsure whether the hose is fully clear, do not run the vacuum. Recheck the hose ends for any residual fibers and test suction slowly. If resistance remains, disassemble again or consult a professional.
If you’re unsure the hose is clear, don’t run the vacuum. Recheck for fibers and test suction slowly; if resistance remains, reattempt removal or seek help.
What tools are recommended to remove a sock without damaging the hose?
Use a long, flexible tool that can reach into the hose without puncturing the walls. Blunt-nose pliers can help grip, but avoid sharp or metal objects that may tear. Always unplug the unit first.
Use a long, flexible tool to reach inside safely. Blunt pliers can help grab the sock, but avoid sharp metal objects. Unplug first.
Can a sock jam cause motor damage?
A sock jam can lead to reduced airflow and motor strain if left unresolved, which may damage the motor or seals over time. Prompt removal and inspection minimize risk.
Yes, if left unresolved a sock jam can strain the motor. Remove it promptly and inspect for damage.
What if the sock is stuck deeper inside the hose?
Detach the hose from the canister if necessary and use a longer tool from both ends. Follow manufacturer guidelines to avoid tearing or losing seals. Do not force a deep jam.
If it’s deeper, detach the hose and use a longer tool from both ends. Don’t force it.
How can I prevent socks from entering the vacuum hose in the future?
Empty pockets before vacuuming, avoid cleaning with laundry items nearby, and use a secondary handheld vacuum for quick cleanups. Regularly inspect hoses for wear and replace damaged parts promptly.
Empty pockets before vacuuming and consider a secondary handheld for quick jobs. Check hoses for wear regularly.
When should I call a professional?
If disassembly reveals damaged seals, cracks, or persistent loss of suction after reassembly, it’s time to involve a technician. A professional can diagnose motor issues and replace worn parts safely.
Call a pro if you see damage or suction doesn’t improve after reassembly.
Watch Video
The Essentials
- Unplug before any disassembly
- Identify the jam location with a flashlight
- Use a long, non-metal tool to guide the sock out
- Check for residual debris and hose integrity
- Prevent future jams with pockets-emptying habits