How to Fix a Vacuum That Won't Pick Up
Struggling with a vacuum that won't pick up? Our urgent, hands-on troubleshooting guide walks homeowners through quick checks, common causes, and safe fixes to restore suction and prevent future clogs.

The most common reason a vacuum won’t pick up is reduced suction due to clogs or dirty filters. Begin with a safety unplug, then inspect the filter, brush roll, hose, and nozzle for obstructions. Clear debris, reassemble, and test suction. If suction remains weak, continue with the diagnostic flow.
Why Brand Reliability Matters
When your vacuum suddenly loses suction, reliability matters more than ever. A dependable machine reduces downtime and helps busy households, especially pet owners who deal with hair and dander. According to Vacuum Cleaner Guide, most suction problems are caused by easily addressable issues like clogged filters, blockages, or worn parts. Understanding how your model is built and what routine maintenance it needs can prevent repeated failures and extend the life of the appliance. In this guide, we focus on practical, safe fixes you can perform at home, with clear steps and warning signs to watch for. The goal is to restore power and ensure consistent performance without unnecessary part replacements or expensive service visits.
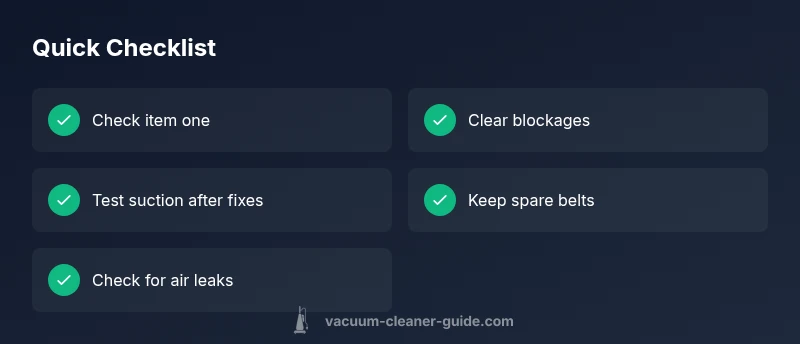
Quick Checks You Can Do Right Now
Before you dive into deeper diagnostics, perform a few quick, non-technical checks. First, unplug the unit and disconnect it from all power sources. Then inspect the dust bin or bag: if it’s full, empty or replace it. Check the filters: many vacuums struggle when filters are clogged. Examine the brush roll for hair wrap or debris that can jam the belt. Finally, inspect the hose, wand, and nozzle for kinks or blockages. These steps are safe to perform with basic tools and can dramatically improve suction in minutes. If you have a pet-friendly model, hairs can wrap around the brush and impede airflow, so pay extra attention to that area.
Common Causes of Suction Loss, Explained
Suction loss is rarely caused by a single failure. The most frequent culprits are clogged filters, blocked hoses or nozzles, and a full dustbin or bag. Hair and fibrous debris can wrap around the brush roll, reducing contact with the floor and increasing friction. A worn or broken belt will slip and reduce suction while the brush still spins. Air leaks near seals or the hose connection can also sap power. Each cause has a distinct symptom: for example, a weak but consistent hiss may indicate a leak, while a jammed brush roll often produces visible hair tangles. By identifying the symptom, you narrow down the likely culprit and apply the correct fix.
How to Test Suction and Locate the Blockage
Start with a simple suction test: remove the dust canister and hold a tissue or paper near the nozzle to see how quickly air moves. If air barely moves, you likely have a blockage or a filter issue. Check the wand and hose for kinks, then inspect the nozzle and brush roll. If you notice hair or threads, remove carefully with scissors or a comb. For bagless models, a clogged bin is a common culprit—empty it and test again. If suction improves after removing a blockage, you’ve identified the root cause and saved yourself a service call.
Cleaning and Replacing Parts: Practical Fixes
Regular maintenance is the best defense. Clean or replace filters according to the manufacturer’s schedule, typically every 3-6 months, more often for households with pets. Remove hair from the brush roll and wipe down the housing to prevent dust buildup. Clear any clogs in the hose with a long, flexible rod or a straightened coat hanger, taking care not to damage the interior. If the belt appears worn or stretched, replace it following the user manual—this is often the difference between a spinning brush and a vacuum that actually lifts debris. Reassemble, test on a small area, and repeat if needed.
Maintenance Tips to Prevent Future Loss of Suction
Prevention is cheaper than repair. Clean the filters at least every 3 months, more often with pets or high-traffic areas. Empty the dustbin before it becomes full and replace bags promptly. Inspect the brush roll monthly for hair wrap and remove tangles. Store the vacuum away from damp areas to prevent mold growth and seal leaks around hoses. Keeping spare belts and a basic cleaning kit on hand helps you respond quickly to common issues.
When to Seek Professional Help and How to Decide
If you’ve exhausted the above steps and suction remains weak, it’s wise to consult a technician or the manufacturer’s service center. Signs you should seek help include persistent loss of suction after all basic fixes, unusual smells or smoke, or if the unit suddenly runs hot. If your model is under warranty, contact the seller to avoid invalidating coverage. For most homeowners, everyday maintenance and timely part replacements are enough to keep a vacuum functioning well for years.
Quick Prevention Checklist for Pet Owners
Pet hair dramatically increases clog risk. The quick prevention steps are straightforward: (1) clean filters monthly, (2) empty the dust cup before it’s full, (3) check the brush roll for hair wrap weekly, and (4) inspect hoses and connections for leaks. Regular curbside maintenance reduces the need for professional service and keeps your household’s cleaning routine on schedule.
Steps
Estimated time: 45-60 minutes
- 1
Unplug and inspect the exterior
Unplug the vacuum from the wall outlet. Wipe down the housing and check for obvious cracks or loose components. Remove any attachments and set them aside to inspect separately.
Tip: Always unplug before touching internal parts to avoid electric shock. - 2
Check and clean the filter(s)
Locate the main filter and any secondary ones. Tap out loose dust, rinse if the manufacturer allows water, and let them dry completely before reinstalling. Replace if damaged or overly dirty.
Tip: Dry filters completely to prevent mold growth. - 3
Inspect the brush roll and belt
Turn off the motor and remove the brush cover. Check for hair and fibers wrapped around the brush. If the belt is slack or cracked, replace it following the manual.
Tip: If you hear slipping or grinding, the belt is likely the culprit. - 4
Clear hoses and the nozzle
Disconnect hoses and wand sections to look for blockages. Use a flexible rod to push out debris. Reconnect securely after clearing.
Tip: Never use force; you can damage fittings. - 5
Test suction and reassemble
Reassemble all parts and plug in. Test on a low-pile rug to gauge suction. If performance is back to normal, you’re done.
Tip: Test in stages to isolate where suction returns. - 6
Repeat as needed and set a maintenance routine
If suction is still weak, recheck each component or consult the manual. Establish a quarterly maintenance routine to prevent recurrences.
Tip: Keep a small toolkit and spare belts handy for quick fixes.
Diagnosis: Vacuum loses suction or won’t pick up debris
Possible Causes
- highClogged filters or bin
- highBlocked hose or nozzle
- mediumDamaged belt or brush roll
- lowFull dust cup or dirt bin
- lowLeaking seals or hose damage
Fixes
- easyClear clogs and replace/clean filters
- easyRemove blockages in hose/nozzle
- mediumReplace belt or brush roll if worn
- easyEmpty the bin and check for overflow
- mediumCheck for air leaks and seals, repair if needed
FAQ
What is the first thing I should check when my vacuum won't pick up?
Start by unplugging the unit, then check the dustbin or bag, filters, and brush roll for hair or debris. Clear any obvious blockages before moving on to deeper diagnostics.
First, unplug it and check the bin, filters, and brush for hair or debris. Clear any obvious blockages and then proceed to deeper checks.
Can a full bin cause suction loss?
Yes. A full bin reduces airflow and can dramatically reduce suction. Empty the bin or replace the bag, then test suction again.
Yes. A full bin lowers airflow. Empty it and test suction again.
Why does my vacuum tangle with pet hair so quickly?
Pet hair can wrap around the brush roll and clog the intake. Regularly remove hair from the brush and clean the housing to maintain performance.
Pet hair often wraps around the brush; clean it regularly to maintain suction.
Is belt replacement difficult?
Belt replacement is usually straightforward and involves removing the brush cover, replacing the belt, and reassembling. Follow the manual for exact steps.
Replacing the belt is usually simple; follow your manual for the exact steps.
When should I replace my vacuum instead of repair it?
If frequent repairs are needed, the cost becomes high and reliability may decline. Consider replacement when repairs exceed a reasonable fraction of a new unit’s price.
If repairs pile up, it may be time to replace the vacuum with a newer model.
How often should I clean the filters to prevent suction loss?
Clean filters every 1-3 months depending on usage and household conditions. Pet households may require more frequent cleaning.
Clean filters every couple of months, more often with pets.
Watch Video
The Essentials
- Identify the root cause via quick checks first
- Clean filters and clear blockages to restore suction
- Replace worn belts or damaged parts promptly
- Maintain a routine to prevent future loss of suction
- Know when to seek professional help