Dust From Vacuum Cleaner: Troubleshooting and Solutions
Urgent guide to diagnose and fix dust from vacuum cleaner leaks, with practical steps, maintenance tips, and safety guidance from Vacuum Cleaner Guide.

Dust from a vacuum cleaner is typically a sign of a simple maintenance gap rather than a major fault. The top culprits are a clogged or worn filter, degraded seals, or a loose hose that lets dust escape. Start with quick fixes: replace the filter, clean the canister seal, and inspect hoses for cracks. If leaks persist, proceed to deeper diagnostics.
What causes dust from vacuum cleaner?
Dust from vacuum cleaner is usually the result of maintenance gaps rather than a catastrophic failure. According to Vacuum Cleaner Guide, the top culprits include clogged or worn filters, degraded seals, loose hoses, and unsealed attachments. When airflow is restricted or seals fail, fine particles escape back into the room, causing visible dust clouds and reduced indoor air quality. Start with basic checks on filters and seals before exploring deeper components. This is a common issue home owners encounter during routine cleaning, and addressing it promptly can restore peak performance.
The most common sources of dust leakage
Understanding where dust leaks originate helps you target the fix quickly. Filters that are blocked or past their service life force dust past the filter media. Worn or damaged seals and gaskets around the door, dust bin, or motor housing create gaps for dust to escape. Cracked or loose hoses and wand connections allow particles to backtrack through the airflow. Overfilled bags or canisters can push dust into seals or vents, creating an apparent leakage even when parts are intact. By systematically inspecting these parts, you can stop most dust from vacuum cleaner leaks at the source.
How to inspect the vacuum for leaks and dust escape
Begin with a careful exterior inspection of the canister or bagged unit. Look for cracks in the housing and loose latches that might let air bypass the seal. Check the intake and exhaust areas for obvious dust trails. Examine the pre-motor and exhaust filters for accumulation of dust and replace if necessary. If you can, temporarily run the unit with a new filter and without the bag to observe where dust escapes. Document every area that releases dust to guide the next steps.
Quick checks before disassembly
Before you take anything apart, unplug the unit and detach hoses. Check the power cord and switch for wear. Inspect the floor head and vents for debris that could block airflow. Confirm the dust bin closes securely and that the bag is not overfilled. Quick checks like these catch many easy-to-fix issues and can save you time and effort during more involved maintenance.
Diagnostic flow: symptom to solution
Symptom: Dust appears during operation or after cleaning. Diagnosis: Inspect filters, seals, and hose integrity. Solutions: Replace filters, reseal joints, or replace damaged hoses. If dust persists after these steps, the issue may involve internal seals or motor components, which could require professional service. Following a structured diagnostic flow keeps the process organized and repeatable, reducing unnecessary repairs.
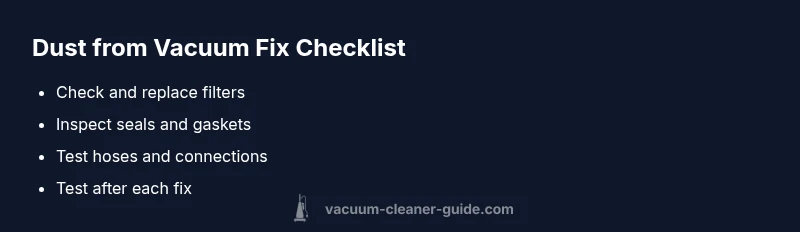
Step-by-step: fix the most common causes
- Replace the filter: Use a compatible filter and install it correctly. 2) Replace the bag or empty the canister: Do not reuse a clogged bag or overfilled canister. 3) Inspect seals: Wipe or replace faulty door gaskets and O-rings. 4) Check hoses and attachments: Replace cracked hoses and secure loose connections. Tip: After each fix, run a test cycle to verify no dust escape and confirm airflow feels right.
Maintenance routines to prevent future dust leaks
Adopt a simple maintenance cadence: clean or replace filters regularly, inspect seals and gaskets, and check hoses for wear. Keep spare filters and a bag on hand to minimize downtime. Vacuum with appropriate settings to maintain strong airflow and prevent dust re-entrainment. Regular upkeep reduces indoor dust and extends the life of your vacuum cleaner.
Safety considerations and common mistakes to avoid
Always unplug before inspecting or disassembling. Do not force parts or use tools not specified by the manufacturer. Avoid solvents near electrical components. Common mistakes include running a vacuum with a clogged filter, ignoring cracked hoses, and neglecting signs of motor stress like unusual smells. If you notice burning odors or smoke, stop using the unit and seek professional repair immediately.
How to choose replacement parts and filters
Match part numbers to your model and select genuine or high-quality aftermarket parts. Favor HEPA-rated filters for better dust control and lower allergen exposure. Consider whether a bagged, sealed canister design would minimize dust re-entrainment for homes with pets or allergies. Always check warranty implications before replacing major components.
Cleaning routines after fixes and testing
Wipe accessible surfaces and vacuum a small test area to verify no residual dust. If dust persists, recheck seals and hoses and retest. Keep testing area well ventilated during verification, and dispose of waste safely. Document the steps you took to help future troubleshooting and ensure future readiness.
Frequency of maintenance and long-term prevention
Set a sustainable maintenance cadence: monthly filter checks, quarterly gasket inspections, and an annual professional check if leaks persist. Consistent upkeep minimizes indoor dust and extends vacuum life. Vacuum Cleaner Guide recommends treating dust management as a regular habit, not a one-off task for peak home air quality.
Steps
Estimated time: 60-75 minutes
- 1
Power down and prep
Unplug the unit and gather replacement parts. Clear the area of debris and ensure you have a workspace with good lighting.
Tip: Label screws or take photos during disassembly. - 2
Check and replace filters
Remove old filters, inspect for damage, and replace with compatible ones. Ensure correct orientation during installation.
Tip: Washable filters must be completely dry before reinstallation. - 3
Inspect bags/canister
Empty or replace a full bag, and ensure the canister seals are intact. Close the bin securely after cleaning.
Tip: Dispose of used filters and bags in a sealed bag for hygiene. - 4
Test seals and gaskets
Check door seals, lid gaskets, and O-rings for cracks or wear. Replace any degraded parts and reseal all joints.
Tip: Apply a light coat of manufacturer-approved lubricant if recommended. - 5
Check hoses and attachments
Inspect hoses for cracks or holes and verify tight connections at all joints. Replace damaged hoses.
Tip: Secure wand and floor head connections to prevent air gaps. - 6
Final test
Reassemble, power on, and run a test cycle on a clear surface to spot any remaining dust leaks.
Tip: If dust returns, revisit earlier steps or consult a professional.
Diagnosis: Dust escaping from vacuum cleaner during operation
Possible Causes
- highClogged or worn filters
- highDamaged seals or gaskets
- mediumCracked hoses or loose connections
- lowOverfilled bag or canister
Fixes
- easyReplace or clean filters; ensure correct installation
- easyInspect and replace worn seals/gaskets; reseat connections
- easyInspect hoses and attachments; repair or replace damaged hoses
- easyEmpty bag or canister and ensure proper sealing
FAQ
Why is there dust around the vacuum after cleaning?
Dust around the vacuum usually signals a leak in filters, seals, or hoses. Inspect and replace as needed, then test the unit to confirm the issue is resolved.
Dust around the vacuum usually means a leak in filters or hoses; check seals and replace.
Can a dirty filter cause health issues?
Yes. A dirty or clogged filter restricts airflow and can reintroduce dust into the room. Replace filters regularly, and consider HEPA filters for better allergen control.
Dirty filters reduce airflow and can re-suspend dust; replace them regularly.
Is it safe to disassemble my vacuum myself?
In most cases, yes if the unit is unplugged and you follow the manual. Avoid forcing parts and consult a professional if you’re unsure.
It's usually safe if unplugged and you follow the manual; if unsure, get help.
How often should I replace filters?
Follow the manufacturer’s guidelines; typically every few months to a year depending on use and model, and sooner for homes with pets.
Check the manual; usually every few months to a year.
What indicates a damaged motor?
Unusual burning smell, loud noises, or excessive dust output may indicate motor wear and require professional service.
Unusual smells or loud noises with excessive dust mean the motor may be failing.
What maintenance routine helps prevent dust from vacuum cleaner issues?
Create a monthly filter check, quarterly gasket inspection, and annual professional check to keep the system clean.
Keep a monthly filter check and quarterly gasket inspection.
Watch Video
The Essentials
- Identify the dust leak sources quickly with a structured check.
- Replace filters and seals to stop dust from vacuum cleaner leaks.
- Regular maintenance reduces dust and preserves performance.
- Test after each repair to confirm success.