Safely Cleaning a Computer with a Vacuum Cleaner: Tips
Learn safe, non-intrusive methods to reduce dust around a computer using a vacuum cleaner, plus safer alternatives and essential tools for exterior cleaning. Protect electronics with proper precautions and routine maintenance.

You're going to learn how to safely reduce dust around a computer using a vacuum without risking internal damage. We'll cover what not to vacuum, safer external cleaning methods, and the right tools. According to Vacuum Cleaner Guide, many vacuums can help remove surface dust when used on non-electronic parts and with proper attachments. Follow the steps below.
Why cleaning a computer matters
Dust intrusion in a computer can impede airflow, raise internal temperatures, and stress cooling fans. Over time, excessive dust near vents and on exterior panels can contribute to overheating and reduced performance. Regular, careful cleaning helps maintain effective cooling and prolongs hardware life. The Vacuum Cleaner Guide team emphasizes that non-invasive, exterior cleaning is often enough to manage surface dust on most home computers. Remember: cleaning is a maintenance task, not a substitute for proper servicing when components show signs of failure. Always prioritize safety and follow manufacturer guidelines.
What not to do with a vacuum around electronics
Do not attempt to vacuum inside a powered computer or laptop. Vacuuming can generate static charge, dislodge delicate components, and draw dust into areas you cannot see. Avoid using a standard household vacuum directly on fans, circuit boards, cables, or connectors. Do not vacuum while the device is plugged in or powered on, and never insert the nozzle into ports or vents. If you need deeper cleaning, consider non-destructive methods first, such as a gentle brush, microfiber wipe, and compressed air used correctly from the outside.
Safer dust-removal methods
Safer approaches start with non-contact methods. Use a soft, anti-static microfiber cloth to wipe exterior surfaces and keyboard tops. A gentle, non-conductive brush can loosen dust from vents or around the case seams. For stubborn dust, use short bursts of compressed air held upright and directed at exterior vents from a safe distance, preferably outdoors. Regular routine cleaning, performed with care, minimizes dust buildup without risking internal damage. Vacuuming should be limited to exterior surfaces and never directed toward openings that lead into the chassis.
Using a vacuum correctly around a computer (external surfaces)
If you must use a vacuum around the outside of a computer, keep the nozzle several inches away from the surface and use a brush attachment to reduce suction on sensitive edges. Move slowly and methodically to pull dust from crevices without pulling on cables. Focus on the computer chassis, keyboard, monitor stand, and external ports area—never insert the nozzle into vents, fan housings, or gaps that reveal circuitry. After vacuuming, wipe surfaces with a microfiber cloth to remove fine particles that suction may miss.
Desktop vs laptop: tailored approach
Desktops allow more access to exterior areas like side panels and front fans, but should still be cleaned from the outside in. For laptops, remove the power supply and, if comfortable and permitted by warranty, open the bottom panel only as guided by the manufacturer. Never disassemble a device solely for dust removal unless you are trained or following official repair instructions. The primary goal is to decrease surface dust and avoid static risk while preserving internal components.
Maintenance routines to minimize dust buildup
Establish a simple dust-management routine: keep the workspace clean, use a dedicated surge protector, and perform exterior cleaning every few weeks in dry environments. Place devices away from dusty areas (like near windows or vents) and use a desk mat that’s easy to wipe down. Periodically replace or clean dust filters on any peripherals (like printers or external cooling units) and consider air-quality improvements if dust is persistent. Small preventive steps reduce the frequency of intensive cleaning sessions.
Troubleshooting common issues after cleaning
If you notice unexpected startup issues or abnormal fan noise after cleaning, recheck exterior surfaces and ensure cables are reconnected properly. If temperatures still rise abnormally, there may be dust accumulation inside the chassis that requires professional service. In most cases, exterior dust removal should not affect internal components, but if you see dust near vent openings or loose parts, stop and consult a technician.
Choosing the right tools and accessories
Select tools designed for electronics-safe cleaning: anti-static microfiber cloths, soft brushes, and non-conductive air sources. Attachments like a narrow crevice tool or brush head help reach tight areas without applying excessive suction. Avoid high-powered vacuums or attachments that can slip and cause damage. For ongoing dust control, consider a dedicated air duster and a minimal, purpose-built electronics-cleaning kit to complement regular exterior care.
Tools & Materials
- anti-static microfiber cloth(Lint-free; use for exterior surfaces and keyboard tops)
- soft brush or paintbrush(Loosen dust from vents and seams without scratching)
- compressed air can (optional)(Short bursts; hold upright and use from the outside; avoid internal use)
- non-conductive brush attachment for vacuum(Use with extreme caution and only on exterior surfaces)
- small portable vacuum with brush tool (external use only)(Only around exterior panels; never insert into openings)
Steps
Estimated time: 20-40 minutes
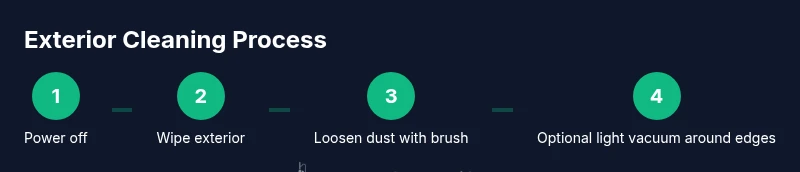
- 1
Power down and unplug
Shut down the computer and disconnect all cables from power sources. If you’re cleaning a laptop, unplug the adapter and remove the battery if it’s user-serviceable. This eliminates the risk of short circuits and protects you from electric shock during cleaning.
Tip: Double-check that the device is fully powered off before touching any surfaces. - 2
Ground yourself and prep the workspace
Work on a flat, clean surface. Ground yourself to avoid static buildup; touch a metal object or use an anti-static wrist strap. Have all tools within reach and a microfiber cloth ready to capture fine dust.
Tip: Static can damage electronics; keep away from carpets during cleaning. - 3
Wipe exterior surfaces with microfiber
Gently wipe the outer panels, keyboard deck, and monitor stand using an anti-static microfiber cloth. Apply only light pressure to avoid stressing finishes or dislodging components. Rotate cloth to a clean area as dust collects.
Tip: Microfiber picks up dust without scratching; avoid sprays on electronic surfaces. - 4
Loosen dust with a soft brush
Use a soft brush to loosen dust from vents, seams, and ports around the exterior. Do not scrape or pry; work in short, soft strokes to minimize particle disruption. This prepares dust for removal without using aggressive suction.
Tip: Brushing first reduces the amount of dust that suction would need to handle. - 5
Short bursts of external compressed air (optional)
If you use compressed air, spray in short bursts from a safe distance away from openings. Do not tilt the can, as liquid propellant can spray out. Focus on external vent grilles and surrounding surfaces rather than internal areas.
Tip: Always operate air from the outside of the case; never spray into ports. - 6
Light vacuum around exterior edges (optional)
With a vacuum and brush attachment, lightly hover around the edges of the case to pull away loose dust from crevices. Keep the nozzle a few inches away and never direct suction toward fans, ports, or openings.
Tip: Do not use aggressive suction on any area near the airflow path. - 7
Final wipe and re-check
Wipe again with the microfiber cloth to remove remaining fine dust. Inspect vents and keyboard areas for any missed particles. Reconnect cables only after you are confident the exterior is clean and dry.
Tip: Dry surfaces completely before powering the device back on. - 8
Power on and monitor temperatures
Reconnect power and run a brief system check. Observe fan noise and temperatures to ensure there were no adverse effects from cleaning. If temperatures rise or fans spin loudly, power down and inspect for any loosened components.
Tip: If in doubt, consult a technician rather than forcing a restart.
FAQ
Is it safe to vacuum a computer?
Vacuuming the interior of a computer is not recommended due to static risk and potential component damage. Exterior cleaning with non-conductive tools is generally safe when done carefully.
Vacuuming the inside of a computer is risky; stick to exterior cleaning with safe tools.
Can I vacuum around the keyboard or laptop exterior?
Yes, you can gently vacuum around the keyboard exterior using a brush attachment and low suction, but avoid direct contact with the keys and any openings. Always power down first.
You can gently vacuum around the keyboard exterior, but don't use strong suction on the keys.
Should I use compressed air instead of a vacuum for dust?
Compressed air is often a safer option for exterior vent areas when used correctly, but avoid blowing dust toward openings that could re-enter the device. Use short bursts and hold the can upright.
Compressed air can help exterior vents if used in short bursts and upright.
How often should I clean exterior dust off my computer?
Clean exterior surfaces every few weeks in dusty environments, with a deeper exterior wipe monthly or as needed. Environment and usage influence frequency.
Clean exterior dust every few weeks in dusty environments and adjust based on use.
What if I see overheating after cleaning?
If overheating occurs after cleaning, power down and inspect for loose cables or dust near vents. If the problem persists, seek professional service.
If overheating happens after cleaning, power down and check for loose cables or vent blockages, and contact a tech if needed.
Can cleaning extend my computer’s life?
Regular, safe exterior cleaning can help maintain cooling performance and reduce dust-related wear, contributing to longer-term reliability when combined with good room conditions.
Regular exterior cleaning can help cooling and reliability when paired with good room conditions.
Watch Video
The Essentials
- Unplug devices before cleaning exterior surfaces
- Use anti-static tools and avoid internal access
- Prefer non-invasive methods like microfiber cloth and brushes
- Reserve vacuuming for exterior surfaces only